Install NextCloud on Ubuntu 20.04 with Apache (LAMP Stack)
This tutorial will be showing you how to install NextCloud on Ubuntu 20.04 LTS with Apache web server.
What’s NextCloud?
NextCloud is a free open-source self-hosted cloud storage solution. It’s functionally similar to Dropbox. Proprietary cloud storage solutions (Dropbox, Google Drive, etc) are convenient, but at a price: they can be used to collect personal data because your files are stored on their computers. If you worry about privacy, you can switch to NextCloud, which you can install on your private home server or on a virtual private server (VPS). You can upload your files to your server via NextCloud and then sync those files to your desktop computer, laptop or smartphone. This way you have full control of your data.
NextCloud Features
- Free and open-source
- End-to-end encryption, meaning files can be encrypted on client devices before uploaded to the server, so even if someone steals your server, they can not read your files.
- Can be integrated with an online office suite (Collobora Online, OnlyOffice) so you can create and edit your doc, ppt, xls files directly from NextCloud.
- The app store contains hundreds of apps to extend functionality (like calendar app, contacts app, note-taking app, video conferencing app, etc).
- The sync client is available on Linux, macOS, Windows, iOS and android.
Prerequisites
NextCloud is written in PHP programing language. To follow this tutorial, you first need to install LAMP stack on Ubuntu 20.04. If you haven’t already done so, please check out the following tutorial.
You can install NextCloud on your home server or a VPS (virtual private server). You also need a domain name, so later on your will be able to enable HTTPS to encrypt the HTTP traffic. I registered my domain name from NameCheap because the price is low and they give whois privacy protection free for life. Nextcloud can be installed without a domain name, but it really doesn’t make sense if you don’t encrypt the HTTP connection to prevent snooping. I recommend buying a domain name, if you really want to tinker with server software and use them to the fullest potential.
Now let’s install NextCloud.
Step 1: Download NextCloud on Ubuntu 20.04
Log into your Ubuntu 20.04 server. Then download the NextCloud zip archive onto your server. The latest stable version is 21.0.1 at time of this writing. You may need to change the version number. Go to https://nextcloud.com/install and click the download for server button to see the latest version.

You can run the following command to download it on your server.
wget https://download.nextcloud.com/server/releases/nextcloud-21.0.1.zip
You can always use the above URL format to download NextCloud. If a new version comes out, simply replace 21.0.1 with the new version number.
Once downloaded, extract the archive with unzip.
sudo apt install unzip

sudo unzip nextcloud-21.0.1.zip -d /var/www/
The -d option specifies the target directory. NextCloud web files will be extracted to /var/www/nextcloud/. Then we need to change the owner of this directory to www-data so that the web server (Apache) can write to this directory.
sudo chown www-data:www-data /var/www/nextcloud/ -R
Step 2: Create a Database and User for Nextcloud in MariaDB Database Server
Log into MariaDB database server with the following command. Since MariaDB is now using unix_socket plugin to authentication user login, there’s no need to enter MariaDB root password. We just need to prefix the mysql command with sudo.
sudo mysql
Then create a database for Nextcloud. This tutorial name the database nextcloud. You can use whatever name you like.
create database nextcloud;
Create the database user. Again, you can use your preferred name for this user. Replace your-password with your preferred password.
create user nextclouduser@localhost identified by 'your-password';
Grant this user all privileges on the nextcloud database.
grant all privileges on nextcloud.* to nextclouduser@localhost identified by 'your-password';
Flush privileges and exit.
flush privileges;

exit;

Step 3: Create an Apache Virtual Host for Nextcloud
Create a nextcloud.conf file in /etc/apache2/sites-available/ directory, with a command-line text editor like Nano.
sudo nano /etc/apache2/sites-available/nextcloud.conf
Copy and paste the following text into the file. Replace nextcloud.example.com with your own preferred sub-domain. Don’t forget to create DNS A record for this sub-domain in your DNS zone editor. If you don’t have a real domain name, I recommend going to NameCheap to buy one. The price is low and they give whois privacy protection free for life.
<VirtualHost *:80>
        DocumentRoot "/var/www/nextcloud"
        ServerName nextcloud.example.com

        ErrorLog ${APACHE_LOG_DIR}/nextcloud.error
        CustomLog ${APACHE_LOG_DIR}/nextcloud.access combined

        <Directory /var/www/nextcloud/>
            Require all granted
            Options FollowSymlinks MultiViews
            AllowOverride All

           <IfModule mod_dav.c>
               Dav off
           </IfModule>

        SetEnv HOME /var/www/nextcloud
        SetEnv HTTP_HOME /var/www/nextcloud
        Satisfy Any

       </Directory>

</VirtualHost>
Save and close the file. (To save a file in Nano text editor, press Ctrl+O, then press Enter to confirm. To exit, press Ctrl+X.)
Then enable this virtual host.
sudo a2ensite nextcloud.conf
Run the following command to enable required Apache modules.
sudo a2enmod rewrite headers env dir mime setenvif ssl
Then test Apache configuration.
sudo apache2ctl -t
If the syntax is OK, reload Apache for the changes to take effect.
sudo systemctl restart apache2
Step 4: Install and Enable PHP Modules
Run the following commands to install PHP modules required or recommended by NextCloud.
sudo apt install imagemagick php-imagick libapache2-mod-php7.4 php7.4-common php7.4-mysql php7.4-fpm php7.4-gd php7.4-json php7.4-curl php7.4-zip php7.4-xml php7.4-mbstring php7.4-bz2 php7.4-intl php7.4-bcmath php7.4-gmp
Reload Apache to use these modules.
sudo systemctl reload apache2
Step 5: Enable HTTPS
Now you can access the Nextcloud web install wizard in your web browser by entering the domain name for your Nextcloud installation.
nextcloud.example.com

If the web page can’t load, you probably need to open port 80 in firewall.
sudo iptables -I INPUT -p tcp --dport 80 -j ACCEPT
And port 443 as well.
sudo iptables -I INPUT -p tcp --dport 443 -j ACCEPT
Before entering any sensitive information, we should enable secure HTTPS connection on Nextcloud. We can obtain a free TLS certificate from Let’s Encrypt. Install Let’s Encrypt client (certbot) from Ubuntu 20.04 repository.
sudo apt install certbot python3-certbot-apache
Python3-certbot-apache is the Apache plugin. Next, run the following command to obtain a free TLS certificate using the Apache plugin.
sudo certbot --apache --agree-tos --redirect --staple-ocsp --email [email protected] -d nextcloud.example.com
Where:
- –apache2: Use the Apache authenticator and installer
- –agree-tos: Agree to Let’s Encrypt terms of service
- –redirect: Enforce HTTPS by adding 301 redirect.
- –staple-ocsp: Enable OCSP Stapling.
- –email: Email used for registration and recovery contact.
- -d flag is followed by a list of domain names, separated by comma. You can add up to 100 domain names.
You will be asked if you want to receive emails from EFF(Electronic Frontier Foundation). After choosing Y or N, your TLS certificate will be automatically obtained and configured for you, which is indicated by the message below.

I found that Certbot can’t automatically add HSTS header in the Apache config file for Nextcloud. If you would like to enable HSTS (HTTP Strict Transport Security), then edit the file.
sudo nano /etc/apache2/sites-enabled/nextcloud-le-ssl.conf
We can then add the following line in the SSL server block to enable HSTS header.
Header always set Strict-Transport-Security "max-age=31536000"
Like below.

Save and close the file. Then text Apache configurations.
sudo apache2ctl -t
If the test is successful, reload Apache for the change to take effect.
sudo systemctl reload apache2
The above configuration will get A+ score on SSL test.

Step 6: Finish the Installation in your Web Browser
Now you can access the Nextcloud web install wizard using HTTPS connection.
https://nextcloud.example.com
To complete the installation, you need to create an admin account, enter the path of Nextcloud data folder, enter database details you created in step 2. You can use the default localhost as host address, or you can enter localhost:3306, as MariaDB listens on port 3306.
The data folder is where users’ files are stored. For security, it’s best to place the data directory outside of Nextcloud webroot directory. So instead of storing users’ files under /var/www/nextcloud/data/, we can change it to /var/www/nextcloud-data. which can be created with the following command:
sudo mkdir /var/www/nextcloud-data
Then make sure Apache user (www-data) has write permission to the data directory.
sudo chown www-data:www-data /var/www/nextcloud-data -R

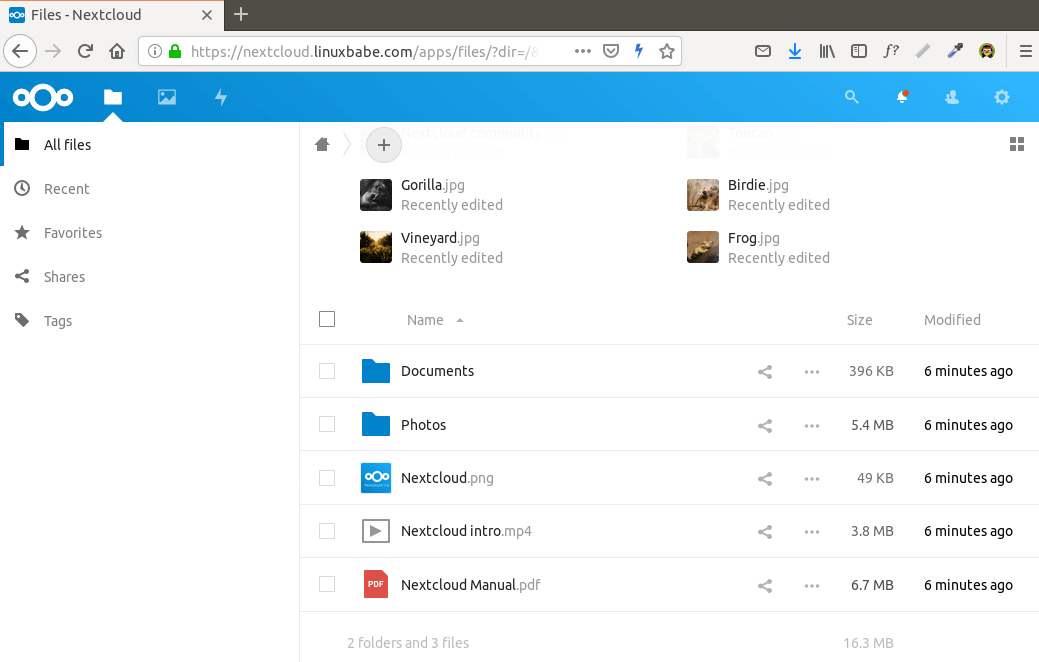
Click the Finish Setup button, you will see the Web interface of Nextcloud. Congrats! You can start using it as your private cloud storage.

How to Set up NextCloud Email Notification
If your NextCloud instance will be used by more than one person, it’s important that your NextCloud server can send transactional emails, such as password-resetting email. First, you should set an email address for your own account. Go to Settings -> Personal Info and set an email address for your account.

Then go to Settings -> Basic settings. You will find the email server settings. There are two send modes: sendmail and smtp. You can choose the sendmail mode if your NextCloud host has an SMTP server running.

If you would like to use an SMTP server running on another host, then choose smtp mode and enter the SMTP server address and login credentials like below. Choose STARTTLS for encryption.

For how to set up an email server, please check out the following tutorial. Note that I highly recommend running iRedMail mail server on a fresh clean OS. Installing iRedMail on an OS that has other web applications can fail, and likely break existing applications.
How to Reset Nextcloud User Password From Command Line
If you lost your admin account password, and you didn’t set up email delivery in Nextcloud, then you need to reset the password by running the following command on your server. Replace nextcloud_username with your real username.
sudo -u www-data php /var/www/nextcloud/occ user:resetpassword nextcloud_username
There are also other commands you might find useful. List available commands with:
sudo -u www-data php /var/www/nextcloud/occ
or
sudo -u www-data php /var/www/nextcloud/console.php
How to Move the Data Directory
In case you need to move the NextCloud data directory, there are 4 steps to accomplish this. First, you need to use the cp command to copy the data directory to the new directory. For example, the mount point of my external hard drive is /media/linuxbabe/b43e4eea-9796-4ac6-9c48-2bcaa46353731. I create the new data directory on the external hard drive.
sudo mkdir /media/linuxbabe/b43e4eea-9796-4ac6-9c48-2bcaa46353731/nextcloud-data/
Then I copy the original data directory to the new data directory. -R flag means the copy operation is recursive.
sudo cp /var/www/nextcloud-data/* /media/linuxbabe/b43e4eea-9796-4ac6-9c48-2bcaa46353731/nextcloud-data/ -R
You also need to copy the .ocdata file.
sudo cp /var/www/nextcloud-data/.ocdata /media/linuxbabe/b43e4eea-9796-4ac6-9c48-2bcaa46353731/nextcloud-data/
Next, you need to set www-data (Apache user) as the owner.
sudo chown www-data:www-data /media/linuxbabe/b43e4eea-9796-4ac6-9c48-2bcaa46353731/nextcloud-data/ -R
Lastly, you need to edit the config.php file.
sudo nano /var/www/nextcloud/config/config.php
Find the following line and change the value of datadirectory.
'datadirectory' => '/var/www/nextcloud-data',
Save and close the file. Reload NextCloud web page and you are done.
Step 7: Increase PHP Memory Limit
The default PHP memory limit is 128MB. NextCloud recommends 512MB for better performance. To change PHP memory limit, edit the php.ini file.
sudo nano /etc/php/7.4/apache2/php.ini
Find the following line. (line 409)
memory_limit = 128M
Change the value.
memory_limit = 512M
Save and close the file. Alternatively, you can run the following command to change the value without manually opening the file.
sudo sed -i 's/memory_limit = 128M/memory_limit = 512M/g' /etc/php/7.4/apache2/php.ini
Then reload Apache for the changes to take effect.
sudo systemctl reload apache2
If your server has the /etc/php7.4/fpm/php.ini file, that means your server also runs PHP-FPM. I recommend changing the memory_limit in PHP-FPM as well.
sudo nano /etc/php/7.4/fpm/php.ini
Find the memory_limit parameter and change the value. After saving the file, reload PHP-FPM for the change to take effect.
sudo systemctl reload php7.4-fpm
Step 8: Configure Redis Cache for NextCloud
If you go to your NextCloud settings -> overview page, you might see the following warning:
No memory cache has been configured. To enhance your performance please configure a memcache if available.
We will enable memory caching for nextCloud by using Redis. Run the following command to install Redis server from Ubuntu repository.
sudo apt install redis-server
You can check the version with:
redis-server -v
Sample output:
Redis server v=5.0.7 sha=00000000:0 malloc=jemalloc-5.2.1 bits=64 build=636cde3b5c7a3923
Now we can check if redis server is running.
systemctl status redis

Hint: If the above command didn’t quit immediately, you can press the Q key to gain back control of the terminal.
From the above screenshot, we can see that it’s running and auto-start is enabled. If for any reason it’s not running, execute the following command:
sudo systemctl start redis-server
And if auto-start at boot time is not enabled, you can use the following command to enable it:
sudo systemctl enable redis-server
In order to configure Redis as a cache for nextCloud, we need to install the PHP extension for interfacing with Redis.
sudo apt install php-redis
Check if the extension is enabled.
php --ri redis

We can see that Redis extension is enabled. If it’s not enabled, run the following command:
sudo phpenmod redis
You may also need to reload Apache if the redis extension is still not enabled.
sudo systemctl reload apache2
Next, edit nextCloud configuration file.
sudo nano /var/www/nextcloud/config/config.php
Add the following lines above the ending ); line.
'memcache.distributed' => '\OC\Memcache\Redis',
'memcache.local' => '\OC\Memcache\Redis',
'memcache.locking' => '\OC\Memcache\Redis',
'redis' => array(
     'host' => 'localhost',
     'port' => 6379,
     ),

Save and close the file. Then restart Apache and PHP-FPM.
sudo systemctl restart apache2 php7.4-fpm
Now go to NextCloud settings -> overview page again and refresh the web page, the warning about memory caching should be gone.
Adding Missing Indexes
If you see the following message in the NextCloud Settings -> Overview page,
The database is missing some indexes. Due to the fact that adding indexes on big tables could take some time they were not added automatically.
Then you need to manually add those indexes. Change to the Nextcloud webroot directory.
cd /var/www/nextcloud/
Run the following command to add indexes to the Nextcloud database.
sudo -u www-data php occ db:add-missing-indices

Now if you refresh the NextCloud Settings -> Overview page, the warning about missing indexes should be gone.
Conversion to Big Int
If you see the following message in the NextCloud Settings -> Overview page,
Some columns in the database are missing a conversion to big int. Due to the fact that changing column types on big tables could take some time they were not changed automatically.
Then you need to manually change the column type. Change to the Nextcloud webroot directory.
cd /var/www/nextcloud/
Change your Nextcloud into maintenance mode to prevent users from logging in and making changes.
sudo -u www-data php occ maintenance:mode --on
Then run the following command to change the column type.
sudo -u www-data php occ db:convert-filecache-bigint
Once it’s done, switch off the maintenance mode.
sudo -u www-data php occ maintenance:mode --off

Now if you refresh the NextCloud Settings -> Overview page, the warning about big int should be gone.
How to Install NextCloud Client on Ubuntu 20.04 Desktop
Run the following commands on Ubuntu 20.04 desktop to install the client from the default repository.
sudo apt install nextcloud-client
NextCloud Client on Ubuntu 20.04

Client software for macOS, Windows, Android and iOS can be found on the Nextcloud download page.
How to Enable OnlyOffice/Collabora Online
By default, Nextcloud ships with support for OnlyOffice, which an online office suite that allows you to edit your doc, ppt, xls files directly from NextCloud. We only need to install an app to use this feature. Go to Nextcloud Apps -> Office & Text. Find and enable the community document server app.

Now when you click the add button (+) in Nextcloud, you will be able to create Word, spreadsheet and presentation documents right from your Nextcloud server.


However, I found this app isn’t very reliable. And the community edition allows only 20 users at most. You need to purchase an enterprise edition if you have more than 20 users. There’s another open-source LibreOffice-based online office suite called Collabora Online that has the same functionality, but without the limitation on the number of users. You can read the following article to integrate it with Nextcloud.
Increase Upload File Size Limit
If you use the Apache PHP module to run PHP script, then there’s no upload file size limit. If you use PHP-FPM to run PHP script, you need to change the file size limit. The default maximum file size for uploading in PHP-FPM is 2MB. To increase the upload size limit, edit the PHP configuration file.
sudo nano /etc/php/7.4/fpm/php.ini
Find the following line (line 846).
upload_max_filesize = 2M
Change the value like below:
upload_max_filesize = 1024M
Save and close the file. Alternatively, you can run the following command to change the value without manually opening the file.
sudo sed -i 's/upload_max_filesize = 2M/upload_max_filesize = 1024M/g' /etc/php/7.4/fpm/php.ini
Then restart PHP-FPM.
sudo systemctl restart php7.4-fpm
Enabling HTTP/2 Protocol
HTTP/2 protocol can greatly improve page loading speed. You can read the following guide to enable HTTP/2 protocol on Apache.
Adding Local DNS Entry
It’s recommended to edit the /etc/hosts file on your Nextcloud server and add the following entry, so that Nextcloud itself won’t have to query the public DNS, which can improve the overall stability. If your Nextcloud server can’t resolve the nextcloud.example.com hostname, then you may encounter a 504 gateway time out error.
127.0.0.1 localhost nextcloud.example.com
An IP address in the /etc/hosts file can have multiple hostnames, so if you have other applications installed on the same box, you can also add other hostnames or sub-domains on the same line like this:
127.0.0.1 localhost focal ubuntu nextcloud.example.com collabora.example.com
Using Cron to Run Background Jobs
By default, Nextcloud uses AJAX to execute one task with each page load. You can use the more efficient system cron service to run background jobs. Go to Nextcloud Settings -> Basic Settings and select Cron.

Next, edit the www-data user’s crontab file.
sudo -u www-data crontab -e
Add the following line in this file, so the cron job will run every 5 minutes.
*/5 * * * * php7.4 -f /var/www/nextcloud/cron.php
Save and close the file.
Troubleshooting Tips
If you encounter errors, you can check one of the following log files to find out what’s wrong.
- Apache error log:
/var/log/apache2/error.log - Apache error log for the Nextcloud virtual host:
/var/log/apache2/nextcloud.error - Nextcloud application log:
/var/www/nextcloud/data/nextcloud.log
For example, I once had an “Internal Server Error” on my Nextcloud instance and the /var/log/nginx/nextcloud.error file told me that
FastCGI sent in stderr: "PHP message: PHP Fatal error: Uncaught OC\HintException: [0]: Memcache \OC\Memcache\Redis not available for local cache (Is the matching PHP module installed and enabled?)
It turned out that because I used the ppa:ondrej/php PPA on my Ubuntu server, I also need to install php7.4-redis in addition to the php-redis package.
If you see the following error message in the nextcloud.log file, you can ignore it.
Could not detect any host in https:///data/htaccesstest.txt
Upgrading Nextcloud
It’s important to keep your Nextcloud server up to date with the latest security and bug fixes. Read the tutorial below to learn how to upgrade Nextcloud.
Wrapping Up
I hope this tutorial helped you install NextCloud on Ubuntu 20.04 server with Apache. As always, if you found this post useful, then subscribe to our free newsletter to get more tips and tricks. Take care 🙂


Hello Xiao
I love your Post! you are Invaluable as a source for learning. I run Ubuntu 20.04 and 19.10 in Hyper-V with a Pfsense router.
I am having 3 issues and have tried multiple times following this tutorial
1) I a syntax error after entering sudo nano /etc/apache2/sites-available/nextcloud.conf
Require all granted
Options +FollowSymlinks MultiViews ( If I remove the + the error goes away?)
AllowOverride All
2) I noticed that the nextcloud.example.com there is always Nextcloud in front of the Domain name, should it be Nextcloud.my Domain.com or just my domain.com? also in the config, I don’t see localhost used to access Nextcloud for setup purposes and I cannot access my nextcloud instance I have checked with port check port 80 is open. So at that point, I get stuck. can you please help me with this config file.
3) Before finding your website I signed up with No Ip and have my Domains there for this project and also a Subsonic/Ubuntu project I gave up on for now (Also Didn’t work) I am still relentless after 17 years of Trying Linux to finally learn. I cannot get Letsencrypt to work on any domain I have. all the Ip addresses are current and tied to the Domains
I know you are a busy guy so I will support you and greatly appreciate your input.
I am experiencing the issue you describe in number 2 as well but I found the solution for the first one. Bother of the options have to match, so if FollowSymlinks has a + in front of it, the Multiviews needs one as well. And there is no space between tehe + and the option. I found that one out the hard way.
Hi Donald
Thank you for that information, I will give it a try. how did the rest of the Tutorial go for you? how far did you get?
Thank you for asking, Robert. I have been having trouble with getting the site to open. I realize there are some differences I need to use for getting this to work on a server on my internal network that is not using any external DNS resolution, but I am also not able to open the web installation portion using the IP address of the server from my workstation on the same network. I will be trying the /etc/hosts file edit next! I found this tutorial to be way more in-depth than I was looking to go and very useful!
1.) Yes. There’s a typo in the Apache config. There’s no need to add the + character. It’s now corrected.
2.) If your domain name is used for Nextcloud server only, then you can use yourdomain.com. If you have other projects, it’s common to use a sub-domain like nextcloud.yourdomain.com for each project.
I don’t recommend using localhost to access Nextcloud. If you have set up other projects on the same server, using localhost will mess them up, because there’s only one localhost, right? You can add a local DNS entry in
/etc/hostsfile to resolve the domain name or sub-domains locally like below, assuming Nextcloud is installed on your local computer.Then you can type
nextcloud.yourdomain.comin the web browser address bar to access Nextcloud locally without traversing the Internet.3.) I don’t have and can’t use no-ip in my network environment. If you use Dynamic DNS service, generally you need to open TCP port 80 and 443 in your router and set up port forwarding.
Hi Xiao
you are so right about the localhost, I need to fix that. I was able to get an SSL Cert and received an A+ rating. Everything is going a positive direction I can access the Domain on the internet, much more work to do.
Thank you Again.
Can I intigrate postfixadmin users into nextcloud?
Hello Xiao, first and foremost thank you for one of the most comprehensible tutorials on Nextcloud 18 available. I followed your tutorial and managed to get it up and running on Ubuntu Server 18.04 (i have to stick to that version due to other projects.
Unfortunately I had to skip step8 completely: Whatever I try to do redis-server won’t work.
I did apt update && aot upgrade but instead of your version 5 i only receive version 4.x – although system tells me it is the latest version. Is this an isdue because I’m still on 18.04? Furthermore the service won’t start. It just does…nothing. Althoug installation (as sudo user) finishes without error thete is no content in redis.conf, so I guess it is broken. I tried it several times (apt remove => apt upgrade => autoremove => fresh install) every time the same result. I also recreated the redis.conf anew by using the official template from the vendor but no luck.
Do you have any idea what to do or whete to look for the issue in my system?
Yes, Ubuntu 18.04 has Redis 4.x.
Purge your redis server.
Reinstall it again.
If it won’t start, you may want to check the redis log.
Or read the log file (/var/log/redis/redis-server.log).
Thanks for your help. I completely forgot about purge-command. Finally I was able to reset the installation completely and received a better error log.
Unfortunately the service is still not running due to this issue:
I am using the original, unmodified config now that comes with the installation. However at line 301 it states
which is obviously different from the log. I also tried to manually change it to the argument from the log message but to no luck. The installation remains in an unfinished state.
In case anyone runs into the same issue:
I fixed it by manually downloading the lates and tversion of redis from redis.io, run the make command and then the make install and this version did the trick. After having enabled redis on my VPN I could follow the tutorial again and now my Nextcloud 18 has no more warnings and an A+ rating.
Hi Xiao
I’m Stuck! after logging into Nextcloud the User and password worked fine, things went sideways when I tried to create another user to backup my login just in case I forgot the password. When creating the second user verification of the admin. it did not accept my password and now I’m locked out with no Email just stuck.
Run the following command on your server to reset the password for Nextcloud user.
Hi Xiao
I have tried Different variants of ways to reset the password.
sudo -u www-data php /var/www/nextcloud/occ user:resetpassword nextcloud_username
root@joe-Virtual-Machine:~# sudo -u www-data php /var/www/nextcloud/occ user:resetpassword Robdroid
Nextcloud is not installed – only a limited number of commands are available
There are no commands defined in the “user” namespace.
I also tried playing around with the command
root@joe-Virtual-Machine:~# sudo -u www-data php /usr/share/apache2/nextcloud/occ user:resetpassword Robdroid
Could not open input file: /usr/share/apache2/nextcloud/occ
root@joe-Virtual-Machine:~# sudo -u www-data php /usr/share/nextcloud/occ user:resetpassword Robdroid
Could not open input file: /usr/share/nextcloud/occ
root@joe-Virtual-Machine:~# sudo -u www-data php /usr/share/nginx/nextcloud/occ user:resetpassword Robdroid
Could not open input file: /usr/share/nginx/nextcloud/occ
root@joe-Virtual-Machine:~#
What folder am I looking for?
“Nextcloud is not installed.” You cannot reset password if Nextcloud is not installed yet.
Great at all!
Hi, love your work.
Would it be possible to add another “NextCloud Settings -> Overview page” type post that will be adjusted on your guide (Ubuntu 20, lamp, etc) for:
I was not able to solve it from my end with their guide from https://docs.nextcloud.com/server/18/admin_manual/issues/general_troubleshooting.html#service-discovery
Thanks for what you are doing.
Also, my LOGs are filling up with:
“Trying to access array offset on value of type null at /var/www/nextcloud/3rdparty/leafo/scssphp/src/Compiler.php#5230”
But is see that this is a known bug, and a fix should come from nextcloud at some point. What is your thought on this?
Your
/var/www/nextcloud/.htaccessfile should have the following lines.<IfModule mod_rewrite.c> RewriteEngine on RewriteCond %{HTTP_USER_AGENT} DavClnt RewriteRule ^$ /remote.php/webdav/ [L,R=302] RewriteRule .* - [env=HTTP_AUTHORIZATION:%{HTTP:Authorization}] RewriteRule ^\.well-known/host-meta /public.php?service=host-meta [QSA,L] RewriteRule ^\.well-known/host-meta\.json /public.php?service=host-meta-json [QSA,L] RewriteRule ^\.well-known/webfinger /public.php?service=webfinger [QSA,L] RewriteRule ^\.well-known/nodeinfo /public.php?service=nodeinfo [QSA,L] RewriteRule ^\.well-known/carddav /remote.php/dav/ [R=301,L] RewriteRule ^\.well-known/caldav /remote.php/dav/ [R=301,L] RewriteRule ^remote/(.*) remote.php [QSA,L] RewriteRule ^(?:build|tests|config|lib|3rdparty|templates)/.* - [R=404,L] RewriteCond %{REQUEST_URI} !^/\.well-known/(acme-challenge|pki-validation)/.* RewriteRule ^(?:\.|autotest|occ|issue|indie|db_|console).* - [R=404,L] </IfModule>And make sure you have enabled the required modules in Apache for Nextcloud.
Then restart Apache.
Thank you for this guide!
I was wondering if you have any insight on what might be my problem. When I go to load up the website (for the first time) I just get the Apache2 IT WORKS site without any errors. If you have any idea what might cause this please let me know!
Thanks
Nevermind! After waiting a few minuets it appears to be up and running! Thanks again for the guide.
I believe “sudo chown www-data:www-data /var/www/nextcloud-data -R” should be “sudo chown www-data:www-data /var/www/nextcloud -R”
Never mind I made a mistake
i only have a “B” rating god damn it 🙂
https://www.ssllabs.com/ssltest/analyze.html?d=nextcloud.go-hangar49.com
Edit the /etc/letsencrypt/options-ssl-apache.conf file and find the following line,
Change it to
This will disable TLSv1.0 and TLSv1.1. Save and close the file. Then restart Apache.
Hi Guys
I have put my domain name as ServerName in /etc/apache2/sites-available/nextcloud.conf but when I run the command: sudo apache2ctl -t I get the following message:
AH00558: apache2: Could not reliably determine the server’s fully qualified domain name, using 127.0.1.1. Set the ‘ServerName’ directive globally to suppress this message
Syntax OK
I can confirm that ports 80 and 443 are forwarded and allowed on the firewall…
Any Suggestions?
Apache is complaining about the global
ServerName, not the virtual hostServerName.By default, Apache uses the system hostname as its global
ServerName. If the system hostname can’t be resolved in DNS, then you will probably see the following error after runningsudo apache2ctl -tcommand.To solve this problem, we can set a global ServerName in Apache. Use the Nano command-line text editor to create a new configuration file.
Add the following line in this file.
Save and close the file. To save a file in Nano text editor, press Ctrl+O, then press Enter to confirm. To exit, press Ctrl+X. Then enable this config file.
Reload Apache for the change to take effect.
Now if you run the
sudo apache2ctl -tcommand again, you won’t see the above error message.So, I have a VM running ubuntu and hosting my site via apache..its a simple static site, and i have another site for a friend thats word press(ignore that site)….I decided to spool up another VM for my nextcloud stuff to keep backups of it separately..my webserver is forward out on 80 and 443…my router wont let me do two internal IPs forwarding on ports already in use. I want people to go to cloud.mysite.com and get nextcloud stuff…and www.mysite.com for the static site…my registrar has an a record for my subdomain…when i try to install the certificate for cert bot it fails…what am i doing wrong???
“My router won’t let me do two internal IPs forwarding on ports already in use.”
That’s the problem. Your router can forward requests on port 80/443 to only one internal IP address. The Internet can reach only one VM in your network.
Also…when i go to localhost in the VM’s browser, i get the default apache page, same result when i go to the IP address form another device on the LAN
localhost will bring you the default apache page. That’s not an error.
If you create a local DNS entry in /etc/localhost file, then enter your Nextcloud domain name in the browser, you will get the Nextcloud page.
Very nice tutorial.
Thank You for article.
When i go to “nextcloud.example.com” in another PC on the LAN page not opened. How to open nextcloudpage on another PC in browser?
Thank you for nice tutorial. A few quick comments:
– Stable version 19.0.0 is available (and maybe the remaining comments below are specific to ver 19).
– There seem to be some required database settings: https://docs.nextcloud.com/server/19/admin_manual/configuration_database/linux_database_configuration.html#db-transaction-label
Thank you for this information. I have paused my installation at Step 6 before I click finish install because I would like to point the NextCloud Database to a second drive vs the OS drive. I’m assuming I can point it to a new location but would the LAMP Stack still be configured correctly. Any advise on how to do this would be greatly appreciated. Thank you.
So maybe I should give you a little more information. One I’m new to Linux, maybe a few months. Two I have this Ubuntu LAMP stack running on my a VM on ESXI 6.7. I use a 1TB SSD for the VMs and then the server has 2 1TB HHDs. One of which I want to point the NextCloud Database to… It has already been set as the second HDD in the VM. This is why I asked the previous question if I point the NextCloud location to a different location will the rest of the stack still work. My guess would be no… But obviously I’m looking forward to your expertise. How many beers would this require? 🙂
By “Nextcloud Database” you mean the Nextcloud data directory? The data directory/data folder is not the same as the MariaDB database.
You can point the data directory to any location, as long as the
www-datauser has read and write permissions.Any amount of beer is appreciated 🙂
Ah, understood. I guess I read this statement wrong on their site. I was thinking it meant the data directory is part of the database and both could be set at the time of install.
“Background. As seen ‘/path/to/nextcloud/data’ is default value/location, if it is not changed during Nextcloud installation process. Nextcloud stores the data directory location and all it’s files locations inside it’s database, that can be chosen during installation as well.”
Looks like I can finish the install and send you a few beers…
SUPER!!!
Thank you very much.
Hello Xiao,
I am stuck at enabling HTTPS.
I have bought a domain name from Namecheap.com and created “A+ Dynamic DNS Record” with @ for host name and IP address of my local machine for value. I am able to access NextCloud via mydomainname.com but when I try to obtain free TLS cert. I get “too many redirect” error message. How do I fix this issue? Currently only host record that I have in Advanced DNS section is “A+ Dynamic DNS Record” that I just created above. If you need more information let me know.
Thank you.
Sincerely,
Terry
Thank you very much for this tutorial. It was spot on start to finish.
Thank you for the tutorial, it was great. Can’t seem to fix the following in backround jobs using cron.
Last background job execution ran yesterday. Something seems wrong. Check the background job settings
Thanks,
Al
Everything worked perfect, THANK YOU! One issue…. The mobile client doesnt seem to be showing my files on the web interface or the desktop client. Any ideas?
Hi, thanks for the helpful tutorial. But I have an issue when I use the following commands:
– a2enmod ssl
– a2ensite default-ssl
– service apache2 start
I’ve got the error message:
root@raspi:~# a2enmod ssl
Considering dependency setenvif for ssl:
Module setenvif already enabled
Considering dependency mime for ssl:
Module mime already enabled
Considering dependency socache_shmcb for ssl:
Module socache_shmcb already enabled
Module ssl already enabled
root@raspi:~# a2ensite default-ssl
Site default-ssl already enabled
root@raspi:~# service apache2 reload
apache2.service is not active, cannot reload.
root@raspi:~# service apache2 start
Job for apache2.service failed because the control process exited with error code.
See “systemctl status apache2.service” and “journalctl -xe” for details.
root@raspi:~# systemctl status apache2.service
● apache2.service – The Apache HTTP Server
Loaded: loaded (/lib/systemd/system/apache2.service; enabled; vendor preset: enabled)
Active: failed (Result: exit-code) since Tue 2020-11-03 14:40:03 CET; 42s ago
Docs: https://httpd.apache.org/docs/2.4/
Process: 4764 ExecStart=/usr/sbin/apachectl start (code=exited, status=1/FAILURE)
Nov 03 14:40:03 raspi systemd[1]: Starting The Apache HTTP Server…
Nov 03 14:40:03 raspi apachectl[4767]: AH00526: Syntax error on line 32 of /etc/apache2/sites-enabled/default-ssl.conf:
Nov 03 14:40:03 raspi apachectl[4767]: SSLCertificateFile: file ‘/etc/ssl/certs/ssl-cert-snakeoil.pem’ does not exist or is empty
Nov 03 14:40:03 raspi apachectl[4764]: Action ‘start’ failed.
Nov 03 14:40:03 raspi apachectl[4764]: The Apache error log may have more information.
Nov 03 14:40:03 raspi systemd[1]: apache2.service: Control process exited, code=exited, status=1/FAILURE
Nov 03 14:40:03 raspi systemd[1]: apache2.service: Failed with result ‘exit-code’.
Nov 03 14:40:03 raspi systemd[1]: Failed to start The Apache HTTP Server.
Do you know where the problem is? Thanks in advance.
You don’t need the default-ssl virtual host. Remove it.
Restart Apache.
Hey – I followed the guide to the letter, but I have configured a RAID 1 with mdamd – and that is where I want to store all my data.
I renamed the volume. Made sure it has write permission.
Now moving the data folder following your steps results in the following error: Your data directory is invalid Ensure there is a file called “.ocdata” in the root of the data directory.
Now this is a very common topic on the nextcloud forums for some reason. Think you can give me a hand?
Simply create an empty .ocdata file in the data directory.
Did everything but when browsing the webpage I get the apache “it works” instead of the nextcloud install wizard, literally did everything exactly as it’s explained here. help
You should use a domain name with Nextcloud, instead of typing an IP address or using localhost in the address bar.
i did use my own subdomain which is also the server hostname
Delete the default virtual host file and restart apache.
Also run the following command to check the current virtual host configurations. It might give you some clues.
Sorry, didn’t have the time to troubleshoot I just used a script I found in google and after some tinkering everything works now, I’ll give this another try when it’s not urgent, thanks!
what kind of script you used? i am having the same issue 🙁
i used a script made by daniel hanson ill look it up later and post ut here in case you cant find it
This is a quick manual I wrote the source of all of this as well as the script is:
https://docs.hanssonit.se/s/W6fMouPiqQz3_Mog/virtual-machines-vm/d/bj0vl4ahv0jgrmfm0950/build-your-own-nextcloud-vm
Quick deployment
1) Install Ubuntu 20.04
2) Set server hostname properly (DNS A RECORD FOR SUBDOMAIN NAME, IT SHOULD RESOLVE)
3) Open ports:
sudo ufw allow 80
sudo ufw allow 443
4) Update and upgrade:
sudo apt-get update
sudo apt-get upgrade
5) Remove built in MySQL:
sudo apt-get remove mysql-common
6) Reboot System.
7) Before doing anything else, create a VM snapshot so you can roll back to this exact point in case something goes wrong during the install.
8) Download and Run NextCloud Install Script:
sudo bash -c “$(wget -q -O – https://raw.githubusercontent.com/nextcloud/vm/master/nextcloud_install_production.sh)”
9) Login with user ncadmin and execute the following sh file:
/var/scripts/nextcloud-startup-script.sh
10) You can run the config script again if you need to change configs later:
var/scripts/menu.sh
TLS
You can run the config script in order to modify TLS configuration or automatically renewing the certs:
var/scripts/menu.sh
Security and integration
1) On step 8, make sure you properly set up GeoLocation and block all the continents/Countries you don’t want the service being accessed from.
2) After NextCloud is deployed and accessible from the WebGUI you will need Collabora Online – Built-in CODE Server AND Collabora Online for being able to work with Office documents from the cloud, you can install these from the NextCloud App Store.
Update
Update script location (Run it for forcing an update or modify if you need to):
/var/scripts/update.sh
Disable updates:
sudo crontab -e -u root
Troubleshooting:
IF THE IP ADDRES CHANGES DURING REMOTE SSH THE CONNECTION WILL BREAK AND WILL RESET TO DHCP.
TLS is REQUIRED in order for the WebGUI to load properly, apparently, if you can’t do it on the first run of the install script, you can always try it again later by running menu.sh again.
After formatting the SDB drive, it looks as if the script stops responding, just press TAB until the button is highlighted and then press enter to continue.
this is an absolute incredible great tutorial, thank you very much. Every single tasks works like a charm. Now I can trash Dropbox and GoogleDrive and host my own, sorry, nextcloud 🙂 Again, thanks!
During the certbot part, i get:
“Connection reset by peer
To fix these errors, please make sure that your domain name was
entered correctly and the DNS A/AAAA record(s) for that domain
contain(s) the right IP address. Additionally, please check that
your computer has a publicly routable IP address and that no
firewalls are preventing the server from communicating with the
client. If you’re using the webroot plugin, you should also verify
that you are serving files from the webroot path you provided.”
Any solution to this?
You can also not use collabora I ended up using OnlyOffice and then removing the 20 user limitation (replace with another number) by hand:
Additional method is to install OnlyOffice Community server and tune the connections limit:
I changed the following in nextcloud/apps/documentserver_community/:
lib/Controller/StaticController.php (line 92):
} else if ($this->sessionManager->getSessionCount() >= 20) {
lib/XHRCommand/AuthCommand.php (line 37):
const MAX_CONNECTIONS = 20
If you also want to change the message:
js/sessionlimit.js:
OC.Notification.show(t(“documentserver”, “The community document server only supports up to 20 concurrent sessions”), {
I have a problem with my download and upload speed. Speed between nextcloud server and local machine is something about 3Mb/s and over WAN only like 500kb/s. Can anyone to tell me what I can do?
You can try enabling TCP BBR algorithm.
Hi!
I tryed BBR but it didn’t help. Is there some hairpinnig in linux systemd-resolved? I have three days trying to find a solution but I came up with that, but why this is not working. I have Ubuntu desktop, apache2 and php-fpm.
The WAN speed is limited to the uplink speed your ISP gave you.
Hi
speedtest.net gives to me 40/40 Mbps speed. Maybe nextcloud 20.0.3 and 20.0.4 have some errors or I don’t handle this thing :D. I also tested my mobile phone speed and test give me 25/10Mbs speed.
is it possible to remove your https certificate
hey, thanks for this great tutorial. I followed all the instructions a couple of days back and everything was perfectly setup. Today i had to restart by Ubuntu server. I now see a 404 error on my webpage. Tried restarting db and apache2. Still doesn’t load anything. Any help will be appreciated. Thanks.
update: Solved. Was scrolling across the comments on this page and someone spoke about UFW status. had to re-allow some ports.
For Nextcloud 21 on Ubuntu 20.04
===============================
You need to add the following steps for NC 21:
## imagick warning
sudo apt-get install imagemagick php-imagick
## default_phone_region:
sudo nano /var/www/nextcloud/config/config.php
#just before the closing bracket at the last line
‘default_phone_region’ => ‘US’,
# save and close
#Restart
sudo systemctl restart apache2 php7.4-fpm
# find your region: https://en.wikipedia.org/wiki/ISO_3166-1_alpha-2#Officially_assigned_code_elements
Hi Xiao
I had upgrade manual from ver 20.0.4 to ver 21.0.0 from tutorial below this link
https://docs.nextcloud.com/server/21/admin_manual/maintenance/manual_upgrade.html
After that it’s have a problem
You have any suggestion for me ?
Many Thanks
You can manually run all pending background jobs with
By the way, you can use web-based updater app to upgrade to Nextcloud 21. You need to change the update channel to beta, then it will allow you to upgrade to 21.
2 Ways to Upgrade Nextcloud [Command-Line & GUI]
Thanks for this Support.
Your meaning is Nextcloud 21.0.0 still Beta ?
I download and upgrade ver 20.0.4 to ver 21 from link
https://download.nextcloud.com/server/releases/nextcloud-21.0.0.zip
Nextcloud 21 is now the latest stable version, but a major stable release can take some time to be included in the stable update channel, because there might be some apps that don’t have updates for the the major stable release.
In this case, you need to change the update channel from stable to beta. After the upgrade is complete, you can change back to the stable update channel.
Thank you for the great tutorial. I am having trouble getting nextcloud to come up when I reboot. I keep getting the generic Apache2 Ubuntu default page. I’m thinking the apache config file but I’m still new to linux. Sorry for the simple question. Thanks
Thank You for this tutorial.
When I am done, and create new spreadsheet file. I got the error message like this:
<pre
Unable to create new file from template
Great tutorial. I followed this and it works. However, on the “Overview” tab, I’m getting following warnings:
1. The “Strict-Transport-Security” HTTP header is not set to at least “15552000” seconds.
2. Your web server is not properly set up to resolve “/.well-known/caldav”.
Any tips to fix these? Thanks so much.
Very nice tutorial.
Thanx a lot !
Thank you, it works on my private Dell R730 server, but I live in China, and my ISP has disabled ports 80 and 443. Now I use Http access. Maybe I have to learn how to DDNS… But there are ways to use non-80 and 443 Does the port access nextcloud?
Change
<VirtualHost *:80>to another port like<VirtualHost *:8080>in/etc/apache2/sites-available/nextcloud.conffile.And change
<VirtualHost *:443>to another port like<VirtualHost *:8443>in/etc/apache2/sites-enabled/nextcloud-le-ssl.conffile.I’m having this same issue although changing to another port in /etc/apache2/sites-available/nextcloud.conf file didn’t work. I also sudo ufw allow 9001. I am using this url to access site: http://192.168.10.50:9001/
Says can’t reach this page
Hi,
I have an issue after having change my domain from mydomain.com to nextcloud.mydomain.com
I change the name of mydomain.com to the subdomain name (nextcloud.mydomain.com) everywhere execpt for the command below that I did with the new subdomain name.
I have an error: Failed to start Certbot. (Concerning mydomain.com which I don’t need anymore as I use nextcloud.mydomain.com)
There is a way to delete certbot for mydomain?
Thanks in advance
I solve it with the following commnad
Then choose the certificat number you want to delete
hi can you tell me where you changed the domain name? i have a new domain for my nextcloud but can’t seem to be able to get it to direct to my server. thanks in advance
Hi
I need help please.
I followed the instructions. I have a nginx reverse proxy on the network, so I had to bounce back a bit.
Everything seems to be working great for me. However, I have one problem. If I scan nextcloud on https://scan.nextcloud.com/ I get the result gree A only.
First I asked a question on the nextcloud forum, but they didn’t help me there. So that I don’t have to copy configuration files here, here is a link where I describe the problem.
https://help.nextcloud.com/t/i-want-to-achieve-an-a-result/117260
best regards
On Nextcloud 22 having all the CAL/CARDDAV issues someone mentions above. It appears I have the lines already where you mention them.
What am I missing here or what other places can I check? 🙁
hi can you tell me where you changed the domain name? i have a new domain for my nextcloud but can’t seem to be able to get it to direct to my server. thanks in advance
So I followed this tutorial and everything works fine but when i do the SSL Configuration, apache service stops working and it cannot be started again until I disabled the SSL mod in apache and reverting back to Virtual Host configuration to step 5 before enabling HTTPS.
I am using my own company certificate and not let’s encrypt.
Regards
How did you disable the SSL configuration after running certbot to create the ssl cert?
How did you disable the SSL configuration after running certbot?
I am trying to move my nextcloud data to another drive, but when I execute the sudo cp command, I get “No such file or directory for /var/www/nextcloud-data/*
Do I need to put Nextclooud in maintenance-mode?
Now I am getting the following error when opening Nextcloud on the web: “Your data directory is invalid Ensure there is a file called “.ocdata” in the root of the data directory”
I have .ocdata file in the root of the data directory of Nextcloud
I was able to get it to work by setting www-data ownership on one directory above, in my case it was “/mnt/storage”
no luck on my side
This the directory path I have:
/media/myusername/d2121e80-dfb9-40ee-8feb-66453c9628e8/Data/nextcloud-data
Thank you the great tutorial. I just have one question. I have now setup HAproxy and want HAproxy to handle the ssl cert. How do i disable it in nextcloud?
Since the last update 23.0.2, when I copy big files inside my NC or download files it stops at 512MB. If I try to delete it, it doesn’t work and sometime I have a pop up which says that the file is locked.
I can upload bigger files, this is not a problem.
Someone has the same issue?
I don’t have this problem on my Nextcloud instance (version 23.0.2).
It seems to be only linked to smb share. A possible solution is to install php7.4-smbclient but this package is not available on Ubuntu.
Another funny thing which is also only on my smb folders, the time is not in-line with the server. When I copy a file it is stamped “modified in an hour”.
I checked and ubuntu and NC have the same time.
I was missing the python apache module so the SSL nextcloud-le-ssl.conf file wasn’t created for me. I have the certificates , so I’m looking for an example nextcloud-le-ssl.conf file that I can copy and modify for my nextcloud install.
is there a template that I can look at?
You can install the Python module.
And run the following command again to obtain a free TLS certificate. If you already have the TLS certificate, it will give you an option to reinstall the TLS certificate, so you don’t have to manually configure Apache to use the cert.
I figured out the issue. I’m using DNS verification, so I can only use the “certonly” certbot method. That method doesn’t create or modify conf files.
Eventually, I found an example web server config file that I could use as a template.
Thx for the reply
Hello, I followed this guide quite a while ago and got set up nicely. Thank you for the excellent guide. I was wondering what the most painless method to upgrade my server version to Ubuntu 22.04 would be. Any suggestions?
Anything!
————
https://servers.expert/hoster/datacheapru
https://www.short4cams.com/