Easily Boost Ubuntu Network Performance by Enabling TCP BBR
This tutorial shows you how to enable TCP BBR on Ubuntu. TCP BBR is a TCP congestion control algorithm developed by Google. It tackles the shortcomings of traditional TCP congestion control algorithms (Reno or CUBIC). According to Google, it can achieve orders of magnitude higher bandwidth and lower latency. TCP BBR is already being used on Google.com and YouTube servers, and the Internet Engineering Task Force (IETF) has been standardizing this algorithm Since July, 2017. BBR stands for Bottleneck Bandwidth and RTT.
BBR requires only changes on the sender side. You can enable TCP BBR on your Linux desktop to improve the overall web surfing experience. If you have a Linux web server, TCP BBR can achieve faster web page downloads for your website visitors.
Step 1: Check TCP Congestion Control Algorithms on Linux
By default, Linux uses the Reno and CUBIC congestion control algorithm. To check available congestion control algorithms, run the following command.
sysctl net.ipv4.tcp_available_congestion_control
Output:
net.ipv4.tcp_available_congestion_control = cubic reno
To check the current congestion control algorithm in use, run
sysctl net.ipv4.tcp_congestion_control
Output:
net.ipv4.tcp_congestion_control = cubic
Step 2: Make Sure You Have Linux Kernel 4.9 or Above
TCP BBR is supported by Linux since kernel version 4.9. Use the following command to check your Linux kernel version.
uname -r
Ubuntu 18.04 has kernel 4.13.
4.13.0-16-generic
Ubuntu 20.04 uses kernel 5.4.
5.4.0-96-generic
Ubuntu 22.04 uses kernel 5.15.
5.15.0-25-generic
Step 3: Enable TCP BBR in Ubuntu
Once you have kernel 4.9 or above, edit sysctl.conf file.
sudo nano /etc/sysctl.conf
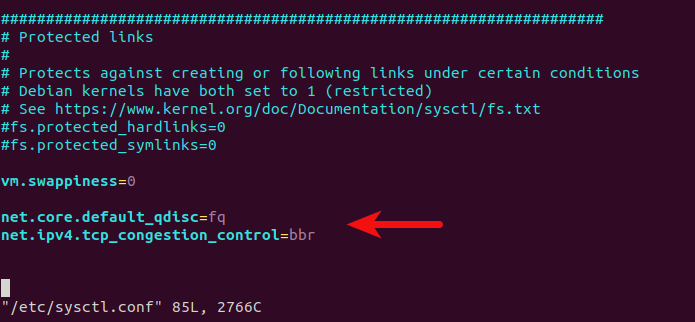
Add the following two lines at the end of the file.
net.core.default_qdisc=fq
net.ipv4.tcp_congestion_control=bbr
Save and close the file. Then reload sysctl configurations.
sudo sysctl -p
If you have correctly added the above two lines in the file, then they will be included in the output like below.
linuxbabe@ubuntu:~$ sudo sysctl -p
net.core.default_qdisc = fq
net.ipv4.tcp_congestion_control = bbr
Now check the congestion control algorithm in use.
sysctl net.ipv4.tcp_congestion_control
Output:
net.ipv4.tcp_congestion_control = bbr
Congrats! You have successfully enabled TCP BBR on Ubuntu.
Speed Improvements
I used Shadowsocks proxy on a low-end VPS to test TCP BBR. The speed improvement is huge. The following screenshot shows YouTube connection speed before enabling TCP BBR on my proxy server. As you can see, the speed is only around 400Kb/s (50KB/s).

This is YouTube connection speed after enabling TCP BBR on my proxy server. 9878 Kb/s is about 1234 KB/s. My proxy server just got 24 times faster!

On a second Shadowsocks proxy server, the speed went from around 10Mbit/s to around 62Mbit/s (64172Kbit/s) after enabling TCP BBR.

Don’t disable TCP Window Scaling
You might need to disable TCP window scaling in order to fix a problem, but doing so can greatly reduce the network performance. Add the following line in /etc/sysctl.conf file to enable TCP window scaling.
net.ipv4.tcp_window_scaling = 1
Then apply the changes.
sudo sysctl -p
That’s it! I hope this tutorial helped you enable TCP BBR on Ubuntu. As always, if you found this post useful, then subscribe to our free newsletter to get more useful tips and tricks.


You should write a little notice on Linuxtoday so more people get to know about your blog. I think what you’re doing is great and contributes to the Linux community. It’s free to write a post there too and many Linux users reads it!
https://www.linuxtoday.com/
How do I undo this?
Best Blog website ever
thanks for being born :*
Thank you for this little gem! So easy to do too 🙂
Hi
I have tried to enable it but my output is different from yours. Below is the output from my system
jieru@MS-7B51:~$ sysctl net.ipv4.tcp_available_congestion_control
net.ipv4.tcp_available_congestion_control = reno cubic
jieru@MS-7B51:~$ sysctl net.ipv4.tcp_congestion_control
net.ipv4.tcp_congestion_control = cubic
jieru@MS-7B51:~$ sudo nano /etc/sysctl.conf
[sudo] password for jieru:
jieru@MS-7B51:~$ sudo sysctl -p
jieru@MS-7B51:~$ sysctl net.ipv4.tcp_congestion_control
net.ipv4.tcp_congestion_control = cubic
/etc/sysctl.conf

If you have correctly added the above two lines in the file, then they will be included in the output like below when you run
sudo sysctl -p.Hi
Here is the updated outputs
Is everything correct?
Thanks
Yes. it’s correct.
Hi
Thanks for the help.
i did not understand what net.ipv4.tcp_window_scaling = 1 means
If you don’t understand this, then ignore it. It’s on by default. Learn the TCP/IP protocol and you will understand TCP window scaling.
Is it necessary to install hwe kernel? Because Ubuntu 18.04 already has kernel > 4.9 (4.15, as today). HWE kernel would be 5.4
If you have Linux kernel 4.9 or above, then you don’t need to install a new kernel.
Hi Xiao, there is any booster for UDP like TCP as well??
Hi
Tried installing softether on linux once more (currently running on a windows very old machine yet it runs) and i m having the same speed problem again ….. connected one client and results
client speed results:
54 Mbit Down / 7.2 Mbit Up 61ms softether on windows machine
1.6 Mbit Down / 7.7 Mbit Up 76ms softether on linux machine
Since linux is on a VM, added
net.core.default_qdisc = fq
net.ipv4.tcp_congestion_control = bbr
and
vm.swappiness=0.
What else to do? Is it because ens18 (internal naming for ethernet) is based on a vmbr which is based on 2 port bonding in LACP mode?
During configuration I had a message about Promiscuous mode (I ll upload it). Can I do something with that?