How to Easily Set up a Full-Fledged Mail Server on Ubuntu 24.04 with iRedMail
Setting up your own email server on Linux from scratch is a long and tedious process, a pain in the butt if you are not an advanced user. This tutorial will be showing you how to use iRedMail to quickly set up a full-featured mail server on Ubuntu 24.04, saving you lots of time and headaches.
What is iRedMail?
iRedMail is a shell script that automatically installs and configures all necessary mail server components on your Linux/BSD server, thus eliminating manual installation and configuration. With iRedMail, you can easily create unlimited mailboxes and unlimited mail domains in a web-based admin panel. Mailboxes can be stored in MariaDB/MySQL, PostgreSQL database, or OpenLDAP. The following is a list of open-source software that will be automatically installed and configured by iRedMail.
- Postfix SMTP server
- Dovecot IMAP server
- Nginx web server to serve the admin panel and webmail
- OpenLDAP, MySQL/MariaDB, or PostgreSQL for storing user information
- Amavised-new for DKIM signing and verification
- SpamAssassin for anti-spam
- ClamAV for anti-virus
- Roundcube webmail
- SOGo groupware, providing webmail, calendar (CalDAV), contacts (CardDAV), tasks and ActiveSync services.
- Fail2ban for protecting SSH
- mlmmj mailing list manager
- Netdata server monitoring
- iRedAPD Postfix policy server for greylisting
Step 1: Choose the Right Hosting Provider and Buy a Domain Name
To set up a full-featured email server with iRedMail, you need a server with at least 3GB RAM, because after the installation, your server will use more than 2GB of RAM.
It is highly recommended that you install iRedMail on a clean fresh Ubuntu 24.04 server.
This tutorial is done on a $9/month Kamatera VPS (virtual private server) with 1 CPU and 3GB RAM. They offer a 30-day free trial.
Kamatera is a very good option to run a mail server because
- They don’t block port 25, so you can send unlimited emails (transactional email and newsletters) without spending money on SMTP relay service. Kamatera doesn’t have any SMTP limits. You can send a million emails per day.
- The IP address isn’t on any email blacklist. (At least this is true in my case. I chose the Dallas data center.) You definitely don’t want to be listed on the dreaded Microsoft Outlook IP blacklist or the spamrats blacklist. Some blacklists block an entire IP range and you have no way to delist your IP address from this kind of blacklist.
- You can edit PTR record to improve email deliverability.
- They allow you to send newsletters to your email subscribers with no hourly limits or daily limits, whatsoever.
- You can order multiple IP addresses for a single server. This is very useful for folks who need to send a large volume of emails. You can spread email traffic on multiple IP addresses to achieve better email deliverability.
Other VPS providers like DigitalOcean blocks port 25. DigitalOcean would not unblock port 25, so you will need to set up SMTP relay to bypass blocking, which can cost you additional money. If you use Vultr VPS, then port 25 is blocked by default. They can unblock it if you open a support ticket, but they may block it again at any time if they decide your email sending activity is not allowed. Vultr actually may re-block it if you use their servers to send newsletters.
Go to Kamatera website to create an account, then create your server in your account dashboard.

I recommend following the tutorial linked below to properly set up your Linux VPS server on Kamatera.
Once you created a server, Kamatera will send you an email with the server SSH login details. To log into your server, you use an SSH client. If you are using Linux or macOS on your computer, then simply open up a terminal window and run the following command to log into your server. Replace 12.34.56.78 with your server’s IP address.
ssh [email protected]
You will be asked to enter the password.
You also need a domain name. I registered my domain name from NameCheap because the price is low and they give whois privacy protection free for life.
Step 2: Creating DNS MX Record
The MX record specifies which host or hosts handle emails for a particular domain name. For example, the host that handles emails for linuxbabe.com is mail.linuxbabe.com. If someone with a Gmail account sends an email to [email protected], then Gmail server will query the MX record of linuxbabe.com. When it finds out that mail.linuxbabe.com is responsible for accepting email, it then queries the A record of mail.linuxbabe.com to get the IP address, thus the email can be delivered.
You need to go to your DNS hosting service (usually your domain registrar) to create DNS records. In your DNS manager, create a MX record for your domain name. Enter @ in the Name field to represent the main domain name, then enter mail.your-domain.com in the Value field.

Note: The hostname for MX record can not be an alias to another name. Also, It’s highly recommended that you use hostnames, rather than bare IP addresses for MX record.
Your DNS manager may require you to enter a preference value (aka priority value). It can be any number between 0 and 65,356. A small number has higher priority than a big number. It’s recommended that you set the value to 0, so this mail server will have the highest priority for receiving emails. After creating MX record, you also need to create an A record for mail.your-domain.com , so that it can be resolved to an IP address. If your server uses IPv6 address, be sure to add AAAA record.
Hint: If you use Cloudflare DNS service, you should not enable the CDN feature when creating A record for mail.your-domain.com. Cloudflare does not support SMTP proxy.
Step 3: Configuring Hostname
Log into your server via SSH, then run the following command to update existing software packages.
sudo apt update

sudo apt upgrade -y
During the upgrade process, it may ask you the following question. If you want to keep using port 6543 for SSH, then select keep the local version currently installed. If you want to use port 22 for SSH, then select install the package maintainer's version.

I strongly recommend creating a sudo user for managing your server rather than using the default root user. Run the following command to create a user. Replace username with your preferred username.
adduser username

Then add the user to the sudo group.
adduser username sudo
Switch to the new user.
su - username
Next, set a fully qualified domain name (FQDN) for your server with the following command.
sudo hostnamectl set-hostname mail.your-domain.com
We also need to update /etc/hosts file with a command-line text editor like Nano.
sudo nano /etc/hosts
Edit it like below. (Use arrow keys to move the cursor in the file.)
127.0.0.1 mail.your-domain.com localhost
Save and close the file. (To save a file in Nano text editor, press Ctrl+O, then press Enter to confirm. To close the file, press Ctrl+X.)
To see the changes, re-login and then run the following command to see your hostname.
hostname -f
Step 4: Setting up Mail Server on Ubuntu 24.04 with iRedMail
Run the following commands to download the latest version of iRedMail script installer from its Github repository.
wget https://github.com/iredmail/iRedMail/archive/1.7.1.tar.gz
Extract the archived file.
tar xvf 1.7.1.tar.gz
Then cd into the newly-created directory.
cd iRedMail-1.7.1/
Add executable permission to the iRedMail.sh script.
chmod +x iRedMail.sh
Next, run the Bash script with sudo privilege.
sudo bash iRedMail.sh
The mail server setup wizard will appear. Use the Tab key to select Yes and press Enter.

The next screen will ask you to select the mail storage path. You can use the default path: /var/vmail, so simply press Enter.

Then choose whether you want to run a web server. It’s highly recommended that you choose to run a web server because you need the web-based admin panel to add email accounts. Also, it allows you to access the Roundcube webmail. By default, Nginx web server is selected, so you can simply press Enter. (An asterisk indicates the item is selected.)

Then select the storage backend for email accounts. Choose one that you are familiar with. This tutorial chose MariaDB. Press up and down arrow key and press the space bar to select.

If you selected MariaDB or MySQL, then you will need to set the MySQL root password.

Next, enter your first mail domain. You can add additional mail domains later in the web-based admin panel. This tutorial assumes that you want an email account like [email protected]. In that case, you need to enter your-domain.com here, without sub-domain. Do not press the space bar after your domain name. I think iRedMail will copy the space character along with your domain name, which can result in installation failure.

Next, set a password for the mail domain administrator.

Choose optional components. By default, 4 items are selected. If you like to use the SOGo groupware (webmail, calendar, address book, ActiveSync), then press the down arrow key and space bar to select. Press Enter to the next screen.

Now you can review your configurations. Type Y to begin the installation of all mail server components.

At the end of installation, choose y to use firewall rules provided by iRedMail and restart firewall.

Now iRedMail installation is complete. You will be notified the URL of webmail, web admin panel and the login credentials. The iRedMail.tips file contains important information about your iRedMail server.

Reboot your Ubuntu 24.04 server.
sudo shutdown -r now
Once your server is back online, you can visit the web admin panel.
https://mail.your-domain.com/iredadmin/
Note that in the above URL, the sub-directory for accessing the admin panel is /iredadmin/, not /iredmail/. And because it’s using a self-signed TLS certificate, you need to add security exception in your web browser.
Step 5: Installing Let’s Encrypt TLS Certificate
Since the mail server is using a self-signed TLS certificate, both desktop mail client users and webmail client users will see a warning. To fix this, we can obtain and install a free Let’s Encrypt TLS certificate.
Obtaining the Certificate
First, log in to your server again via SSH and run the following command to install Let’s Encrypt (certbot) client on Ubuntu 24.04.
sudo apt install certbot
iRedMail has already configured TLS settings in the default Nginx virtual host, so here I recommend using the webroot plugin, instead of nginx plugin, to obtain a certificate. Run the following command. Replace the red text with your actual data.
sudo certbot certonly --webroot --agree-tos --email [email protected] -d mail.your-domain.com -w /var/www/html/
When it asks you if you want to receive communications from EFF, you can choose No.

If everything went well, you will see the following text indicating that you have successfully obtained a TLS certificate. Your certificate and chain have been saved at /etc/letsencrypt/live/mail.your-domain.com/ directory.

Failure to Obtain TLS Certificate
If certbot failed to obtain TLS certificate, maybe it’s because your DNS records are not propagated to the Internet. Depending on the domain registrar you use, your DNS record might be propagated instantly, or it might take up to 24 hours to propagate. You can go to https://dnsmap.io, enter your mail server’s hostname (mail.your-domain.com) to check DNS propagation.
If certbot failed to obtain a certificate and you saw the following message,
Failed authorization procedure. mail.linuxbabe.com (http-01): urn:ietf:params:acme:error:connection :: The server could not connect to the client to verify the domain :: Fetching https://mail.linuxbabe.com/.well-known/acme-challenge/IZ7hMmRE4ZlGW7cXYoq2Lc_VrFzVFyfW6E0pzNlhiOA: Timeout during connect (likely firewall problem)
It might be that you have set AAAA record for mail.your-domain.com, but Nginx web server doesn’t listen on IPv6 address. To fix this error, edit the /etc/nginx/sites-enabled/00-default.conf file
sudo nano /etc/nginx/sites-enabled/00-default.conf
Find the following line.
#listen [::]:80;
Remove the # character to enable IPv6 for this Nginx virtual host.
listen [::]:80;
Save and close the file. Then edit the SSL virtual host /etc/nginx/sites-enabled/00-default-ssl.conf.
sudo nano /etc/nginx/sites-enabled/00-default-ssl.conf
Add the following line.
listen [::]:443 ssl http2;

Save and close the file. Then test Nginx configuration.
sudo nginx -t
If the test is successful, reload Nginx for the change to take effect.
sudo systemctl reload nginx
Run the following command again to obtain TLS certificate. Replace red text with your actual data.
sudo certbot certonly --webroot --agree-tos --email [email protected] -d mail.your-domain.com -w /var/www/html/
Now you should be able to successfully obtain TLS certificate.
Installing the Certificate in Nginx
After obtaining a TLS certificate, let’s configure Nginx web server to use it. Edit the SSL template file.
sudo nano /etc/nginx/templates/ssl.tmpl
Find the following 2 lines.
ssl_certificate /etc/ssl/certs/iRedMail.crt;
ssl_certificate_key /etc/ssl/private/iRedMail.key;
Replace them with:
ssl_certificate /etc/letsencrypt/live/mail.your-domain.com/fullchain.pem;
ssl_certificate_key /etc/letsencrypt/live/mail.your-domain.com/privkey.pem;
Save and close the file. Then test nginx configuration and reload.
sudo nginx -t

sudo systemctl reload nginx
Visit iRedMail admin panel again, your web browser won’t warn you any more because Nginx is now using a valid TLS certificate.

Installing TLS Certificate in Postfix and Dovecot
We also need to configure Postfix SMTP server and Dovecot IMAP server to use the Let’s Encrypt issued certificate so that desktop mail client won’t display security warning. Edit the main configuration file of Postfix.
sudo nano /etc/postfix/main.cf
Find the following 3 lines. (line 95, 96, 97).
smtpd_tls_key_file = /etc/ssl/private/iRedMail.key
smtpd_tls_cert_file = /etc/ssl/certs/iRedMail.crt
smtpd_tls_CAfile = /etc/ssl/certs/iRedMail.crt
Replace them with:
smtpd_tls_key_file = /etc/letsencrypt/live/mail.your-domain.com/privkey.pem
smtpd_tls_cert_file = /etc/letsencrypt/live/mail.your-domain.com/cert.pem
smtpd_tls_CAfile = /etc/letsencrypt/live/mail.your-domain.com/chain.pem
Save and close the file. Then reload Postfix.
sudo systemctl reload postfix
Next, edit the main configuration file of Dovecot.
sudo nano /etc/dovecot/dovecot.conf
Fine the following 2 lines. (line 47, 48)
ssl_cert = </etc/ssl/certs/iRedMail.crt
ssl_key = </etc/ssl/private/iRedMail.key
Replace them with:
ssl_cert = </etc/letsencrypt/live/mail.your-domain.com/fullchain.pem
ssl_key = </etc/letsencrypt/live/mail.your-domain.com/privkey.pem
Save and close the file. Then reload dovecot.
sudo systemctl reload dovecot
From now on, desktop mail users won’t see security warnings.
Step 6: Sending Test Email
Log into iredadmin panel with the postmaster mail account ([email protected]). In the Add tab, you can add additional domains or email addresses.

After you create a user, you can visit the Roundcube webmail address and login with the new mail user account.
https://mail.your-domain.com/mail/

Now you can test email sending and receiving. Please note that you may need to wait a few minutes to receive emails because iRedMail by default enables greylisting, which is a way to tell other sending SMTP servers to try again in a few minutes. The following line in mail log file /var/log/mail.log indicates greylisting is enabled.
Recipient address rejected: Intentional policy rejection, please try again later;
Adding Swap Space
ClamAV is used to scan viruses in email messages. ClamAV can use a fair amount of RAM. If there’s not enough RAM on your server, ClamAV won’t work properly, which will prevent your mail server from sending emails. You can add a swap file to your server to increase the total RAM on your server. (Note that using swap space on the server will degrade server performance. If you want better performance, you should upgrade the physical RAM instead of using swap space.)
To add swap space on the server, first, use the fallocate command to create a file. For example, create a file named swapfile with 1G capacity in root file system:
sudo fallocate -l 1G /swapfile
Then make sure only root can read and write to it.
sudo chmod 600 /swapfile
Format it to swap:
sudo mkswap /swapfile
Output:
Setting up swapspace version 1, size = 1024 MiB (1073737728 bytes)
no label, UUID=0aab5886-4dfb-40d4-920d-fb1115c67433
Enable the swap file
sudo swapon /swapfile
To mount the swap space at system boot time, edit the /etc/fstab file.
sudo nano /etc/fstab
Add the following line at the bottom of this file.
/swapfile swap swap defaults 0 0
Save and close the file. Then reload systemd and restart ClamAV.
sudo systemctl daemon-reload

sudo systemctl restart clamav-daemon
Step 7: Checking If Port 25 (outbound) is blocked
Your ISP or hosting provider won’t block incoming connections to port 25 of your server, which means you can receive emails from other mail servers. However, many ISP/hosting providers block outgoing connections to port 25 of other mail servers, which means you can’t send emails.
If your email didn’t arrive at your other email address such as Gmail, then run the following command on your mail server to check if port 25 (outbound) is blocked.
telnet gmail-smtp-in.l.google.com 25
If it’s not blocked, you would see messages like below, which indicates a connection is successfully established. (Hint: Type in quit and press Enter to close the connection.)
Trying 74.125.68.26...
Connected to gmail-smtp-in.l.google.com.
Escape character is '^]'.
220 mx.google.com ESMTP y22si1641751pll.208 - gsmtp
If port 25 (outbound) is blocked, you would see something like:
Trying 2607:f8b0:400e:c06::1a...
Trying 74.125.195.27...
telnet: Unable to connect to remote host: Connection timed out
In this case, your Postfix can’t send emails to other SMTP servers. Ask your ISP/hosting provider to open it for you. If they refuse your request, you need to set up SMTP relay to bypass port 25 blocking.
Still Can’t Send Email?
If port 25 (outbound) is not blocked, but you still can’t send emails from your own mail server to your other email address like Gmail, then you should check the mail log (/var/log/mail.log).
sudo nano /var/log/mail.log
For example, some folks might see the following lines in the file.
host gmail-smtp-in.l.google.com[2404:6800:4003:c03::1b] said: 550-5.7.1 [2a0d:7c40:3000:b8b::2] Our system has detected that 550-5.7.1 this message does not meet IPv6 sending guidelines regarding PTR 550-5.7.1 records and authentication. Please review 550-5.7.1 https://support.google.com/mail/?p=IPv6AuthError for more information
This means your mail server is using IPv6 to send the email, but you didn’t set up IPv6 records. You should go to your DNS manager, set AAAA record for mail.your-domain.com, then you should set PTR record for your IPv6 address, which is discussed in step 9.
Step 8: Using Mail Clients on Your Computer or Mobile Device
Fire up your desktop email client such as Mozilla Thunderbird and add a mail account.
- In the incoming server section, select IMAP protocol, enter
mail.your-domain.comas the server name, choose port 143 and STARTTLS. Choosenormal passwordas the authentication method. - In the outgoing section, select SMTP protocol, enter
mail.your-domain.comas the server name, choose port 587 and STARTTLS. Choosenormal passwordas the authentication method.

Fail2ban Blocking Your Own IP Address
If you made a mistake and failed to log in to mail server multiple times, then the Fail2ban service on the mail server might block your IP address. You can add your IP address to whitelist by editing the jail.local file.
sudo nano /etc/fail2ban/jail.local
Add your own IP address to the ignore list like below. Replace 12.34.56.78 with your real IP address.
ignoreip = 12.34.56.78 127.0.0.1 127.0.0.0/8 10.0.0.0/8 172.16.0.0/12 192.168.0.0/16
Save and close the file. Then restart Fail2ban.
sudo systemctl restart fail2ban
Step 9: Improving Email Deliverablity
To prevent your emails from being flagged as spam, you should set PTR, SPF, DKIM and DMARC records.
PTR record
A pointer record, or PTR record, maps an IP address to a FQDN (fully qualified domain name). It’s the counterpart to the A record and is used for reverse DNS lookup, which can help with blocking spammers. Many SMTP servers reject emails if no PTR record is found for the sending server.
To check the PTR record for an IP address, run this command:
dig -x IP-address +short
or
host IP-address
PTR record isn’t managed by your domain registrar. It’s managed by the organization that gives you an IP address. Because you get IP address from your hosting provider or ISP, not from your domain registrar, so you must set PTR record for your IP in the control panel of your hosting provider, or ask your ISP. Its value should be your mail server’s hostname: mail.your-domain.com. If your server uses IPv6 address, be sure to add a PTR record for your IPv6 address as well.
To edit the reverse DNS record for your Kamatera VPS, log into the Kamatera client area, then open a support ticket and tell them to add PTR record for your server IP addresss to point the IP address to mail.your-domain.com. It’s not convenient, you might think, but this is to keep spammers away from the platform, so legitimate email senders like us will have a great IP reputation.
SPF Record
SPF (Sender Policy Framework) record specifies which hosts or IP address are allowed to send emails on behalf of a domain. You should allow only your own email server or your ISP’s server to send emails for your domain. In your DNS management interface, create a new TXT record like below.

Explanation:
- TXT indicates this is a TXT record.
- Enter @ in the name field to represent the main domain name.
- v=spf1 indicates this is a SPF record and the version is SPF1.
- mx means all hosts listed in the MX records are allowed to send emails for your domain and all other hosts are disallowed.
- ~all indicates that emails from your domain should only come from hosts specified in the SPF record. Emails that are from other hosts will be flagged as forged.
To check if your SPF record is propagated to the public Internet, you can use the dig utility on your Linux machine like below:
dig your-domain.com txt
The txt option tells dig that we only want to query TXT records.
DKIM Record
DKIM (DomainKeys Identified Mail) uses a private key to digitally sign emails sent from your domain. Receiving SMTP servers verify the signature by using the public key, which is published in the DNS DKIM record.
The iRedMail script automatically configured DKIM for your server. The only thing left to do is creating DKIM record in DNS manager. Run the following command to show the DKIM public key.
sudo amavisd-new showkeys
The DKIM public key is in the parentheses.

Then in your DNS manager, create a TXT record, enter dkim._domainkey in the name field. Copy everything in the parentheses and paste into the value field. Delete all double quotes and line breaks.

After saving your changes, run the following command to test if your DKIM record is correct.
sudo amavisd-new testkeys
If the DKIM record is correct, the test will pass.
TESTING#1 linuxbabe.com: dkim._domainkey.linuxbabe.com => pass
Note that your DKIM record may need sometime to propagate to the Internet. Depending on the domain registrar you use, your DNS record might be propagated instantly, or it might take up to 24 hours to propagate. You can go to https://www.dmarcanalyzer.com/dkim/dkim-check/, enter dkim as the selector and enter your domain name to check DKIM record propagation.
DMARC Record
DMARC stands for Domain-based Message Authentication, Reporting and Conformance. DMARC can help receiving email servers to identify legitimate emails and prevent your domain name from being used by email spoofing.
To create a DMARC record, go to your DNS manager and add a TXT record. In the name field, enter _dmarc. In the value field, enter the following. (You should create the [email protected] email address.)
v=DMARC1; p=none; pct=100; rua=mailto:[email protected]

The above DMARC record is a safe starting point. If you want to read the full explanation of DMARC, please check the following article. Note that this is optional.
Step 10: Testing Email Score and Placement
After creating PTR, SPF, DKIM record, go to https://www.mail-tester.com. You will see a unique email address. Send an email from your domain to this address and then check your score. As you can see, I got a perfect score. In the test result, you should check if your PTR record, SPF and DKIM record is valid.


Email is Rejected by Microsoft Mailbox?
Microsoft uses an internal blacklist that blocks many legitimate IP addresses. If your emails are rejected by Outlook or Hotmail, you need to follow the tutorial linked below to bypass Microsoft Outlook blacklist.
What if Your Emails Are Still Being Marked as Spam?
I have more tips for you in this article: How to stop your emails being marked as spam. Although it will take some time and effort, your emails will eventually be placed in inbox after applying these tips.
Adding Multiple Mail Domains
I wrote this article to show you how to add multiple mail domains in iRedMail.
How to Disable Greylisting
By default, iRedMail has enabled greylisting, which tells other sending SMTP servers to try again in a few minutes. This is mainly useful to block spam, but it also degrades user experience. If you prefer to disable greylisting, follow the instructions below.
Add write permission to the /opt/iredapd/settings.py file.
sudo chmod 600 /opt/iredapd/settings.py
Then edit the configuration file.
sudo nano /opt/iredapd/settings.py
Find the following line.
plugins = ["reject_null_sender", "wblist_rdns", "reject_sender_login_mismatch", "greylisting", "throttle", "amavisd_wblist", "sql_alias_access_policy"]
Remove "greylisting" from the list. Save and close the file. Then restart iredapd.
sudo systemctl restart iredapd
Change the configuration file back to read only mode.
sudo chmod 400 /opt/iredapd/settings.py
Enabling SMTPS Port 465
If you are going to use Microsoft Outlook client, then you need to enable SMTPS port 465 in Postfix SMTP server.
Troubleshooting
First, please use a VPS with at least 4GB RAM. Running iRedMail on a 1GB RAM VPS will cause the database, SpamAssassin, or ClamAV to be killed because of out-of-memory problem. If you really want to use a 1GB RAM VPS, you are going to lose incoming emails and have other undesirable outcomes.
If the iRedMail web interface isn’t accessible, like a 502 gateway error, you should check the Nginx logs in /var/log/nginx/ directory to find clues. You may also want to check the mail log /var/log/mail.log.
Check if the various services are running.
systemctl status postfix

systemctl status dovecot

systemctl status nginx

systemctl status mariadb

systemctl status clamav-daemon

systemctl status amavis
If you enabled the firewall, you should open the following ports in the firewall.
HTTP port:  80
HTTPS port: 443
SMTP port:  25
Submission port: 587 (and 465 if you are going to use Microsoft Outlook mail client)
IMAP port:  143 and 993
If you would like to use the UFW firewall, check my guide here: Getting started with UFW firewall on Debian and Ubuntu.
How to Renew TLS Certificate
Let’s Encrypt issued TLS certificate is valid for 90 days only and it’s important that you set up a Cron job to automatically renew the certificate. You can run the following command to renew certificate.
sudo certbot renew -w /var/www/html/
You can use the --dry-run option to test the renewal process, instead of doing a real renewal.
sudo certbot renew -w /var/www/html/ --dry-run
If you see the following error when renewing TLS certificate.
The client lacks sufficient authorization :: Invalid response
Then you need to create the hidden directory.
sudo mkdir -p /var/www/html/.well-known/acme-challenge
And set www-data as the owner of the webroot.
sudo chown www-data:www-data /var/www/html/ -R
Also, edit the SSL virtual host /etc/nginx/sites-enabled/00-default-ssl.conf. Add the following lines.
location ~ /.well-known/acme-challenge {
     root /var/www/html/;
     allow all;
}

Save and close the file. Test Nginx configuration and reload.
sudo nginx -t
sudo systemctl reload nginx
Create Cron Job
If now the dry run is successful, you can create Cron job to automatically renew certificate. Simply open root user’s crontab file.
sudo crontab -e
Then add the following line at the bottom of the file.
@daily certbot renew -w /var/www/html/ --quiet && systemctl reload postfix dovecot nginx
Reloading Postfix, Dovecot and Nginx is necessary to make these programs pick up the new certificate and private key.
Setting Up Backup Mail Server
Your primary mail server could be down sometimes. If you host your mail server in a data center, then the downtime is very minimal, so you shouldn’t be worried about losing inbound emails. If you host your mail server at home, the downtime can’t be predicted so it’s a good practice for you to run a backup mail server in a data center to prevent losing inbound emails. The backup mail server needs just 512MB RAM to run. Please check the full detail in the following article.
For Advanced Users
iRedMail doesn’t include a DMARC verification service, you can check out the following tutorial to set up OpenDMARC to block email spoofing.
You may want to customize the SpamAssassin content filter to better detect spam.
If your website and mail server are running on two different VPS (virtual private server), you can set up SMTP relay between your website and mail server, so that your website can send emails through your mail server. See the following article.
Wrapping Up
That’s it! I hope this tutorial helped you set up a mail server on Ubuntu 24.04 with iRedMail. As always, if you found this post useful, then subscribe to our free newsletter to get more tips and tricks. Take care 🙂


I mentioned this in the article, but I want to say it again: The best practice to run iRedMail is using a clean fresh OS.
Generally speaking, if there’s a script that will install lots of software, it’s a good practice to install it on a clean freash OS. Otherwise, the install script might mess up the existing configurations of your software, making it unusable. Or maybe a component of the softwar stack needs to bind to a port, but it’s already been taken by an existing process on the server, resulting in installation failure.
Unless you are very knowledgeable about every piece of software on the server and can spead lots of time debugging, it’s not recommended to install iRedMail on a server that has other applications running.
I have seen many folks who didn’t follow this advice bork the applications on their servers.
Xiao, thank you so much for your process here. I got the mail server running. Wonderful write-up, plenty of great information.
One of the best intructions I have ever seen. Thank you so much for you time and patience.
Can this be done on an 18.04 installation as well?
Yes, Ubuntu 18.04 is supported by iRedMail.
Hi Xiao,
From your configuration, is there a way to change outgoing email port from 25 to 587 ? Actually i have installed the iredmail on the digital ocean droplet. My email server can accept inbound email but deferred all outgoing emails because DO is blocked port 25. I have asked them to open, but they cannot do it due to their policy. So, i’m searching if there is a solution for this problem and how to apply it to the iredmail configuration.
Thanks
Aris
Hi Aris,
You can set up SMTP relay to bypass port 25. Here’s a detailed tutorial: https://www.linuxbabe.com/mail-server/postfix-smtp-relay-ubuntu-sendinblue
Thanks for the answer xiao !
Thank you very much for this tutorial! I have successfully setup my self-hosted mail server using your instructions. They were clear and the screen shots were very helpful.
Thank you for the Spam Tester website, it helped me troubleshoot that i needed another TXT entry for DKIM.
Again thank you!
Hi, I’m curious. The guide was fantastic! But since you have a lot of experience doing this, how much would you charge to set it up? It would be a Kamatera VPS and have domain name already. Very curious but extremely serious and will pay.
Hi, it will be a fixed price of 35 USD. If interested, email [email protected]
Awesome post! Thanks Xiao Guoan!
A setup like this has been long overdue – I’m planning to switch over.
Would I be able to set this up before I switch the domain over? (So I can configure everything and make sure it is running smoothly by testing against the ip address and then finally doing the switch for minimal downtime.)
I think you can use a sub-domain to test. Instead of creating [email protected], create an email address like [email protected]
Hello,
Thank you very much Xiao Guoan!
Hi, I’m wondering why I have to set my hostname to `mail.my-domain.com` instead of `my-domain.com` as it was previously. I’m not an expert, but since this is the same server I host a HTTP server on, won’t setting the hostname to `mail.my-domain.com` make it so people have to access my website using `mail.my-domain.com`?
This hostname will be used by your mail server. It has nothing to do with website address. Please note that iRedMail will change the web server configuration directory. Your website may stop working. You can bring it up with a little work, but I recommend that you back up web server configurations.
Ah okay, thanks. What I don’t get is: isn’t the hostname system-wide? It’s also a bit annoying when I ssh in and the prompt says zac@mail instead of zac@zacgarby (my previous hostname was zacgarby.co.uk)
Yes, it’s system-wide, but almost always your Apache virtual host or Nginx server block is configured to use a different value. The Bash shell by default only shows the leftmost part of your hostname.
Right, that makes sense! Thank you
This broke my other ssl enabled sites. Don’t recommend using this on a server with existing website running.
I think maybe you overlooked the bold here:
“It is highly recommended that you follow the instructions below on a CLEAN INSTALL of Ubuntu 20.04 system that has at least 2GB of RAM”
You should read prerequisites before trying to discredit someone’s work.
You don’t need to be so defensive, he’s just trying to be helpful :/
Hello,
I tried to install iRedMail 0.9.8 on Amazon EC2 with OpsWorks Stack on Ubuntu 16.04.
During the installation it shows the message that the user “iredadmin” isn’t available.
After restarting server iRedAdmin page shows a 502 Bad Gateway
Checking locks an running services shows that uwsgi service isn’t running.
Starting this service shows following error:
● uwsgi.service - LSB: Start/stop uWSGI server instance(s)
   Loaded: loaded (/etc/init.d/uwsgi; bad; vendor preset: enabled)
   Active: failed (Result: exit-code) since Fri 2018-09-14 11:32:16 UTC; 3s ago
     Docs: man:systemd-sysv-generator(8)
  Process: 4194 ExecStart=/etc/init.d/uwsgi start (code=exited, status=1/FAILURE)
I tried to add the default ubuntu source.list but it does not solve this problem.
Did anyone have an idea?
Thanks a lot.
Chris
here the detail message during installation message:
Check
/etc/passwdfile to see ifiredadminis there.If the
iredadminuser and group wasn’t created. You can manually create it with:sometimes it is so easy…
thanks a lot, I added the user before installation.
After that it works.
What is the best method to encrypt emails at rest on your server. Has anybody tried this, for example?
https://wiki2.dovecot.org/Plugins/MailCrypt
Hi Xiao,
Really apprecite you taking time to set this tutorial up. I’m getting this error when I’m trying to set up the certbort any idea on what I can do?
IMPORTANT NOTES:
– The following errors were reported by the server:
Domain: mail.boltcorp.com
Type: unauthorized
Detail: Invalid response from
http://mail.boltcorp.com/.well-known/acme-challenge/iZYPFWRimn9ocHXyFTI0hCbw1 VpSu-naxjRYhG6pmlM:
“<html lang=\"en\"
data-adblockkey=MFwwDQYJKoZIhvcNAQEBBQADSwAwSAJBANnylWw2vLY4hUn9w06zQKbhKBfvj FUCsdFlb6TdQhxb9RXWX"
To fix these errors, please make sure that your domain name was
entered correctly and the DNS A/AAAA record(s) for that domain
contain(s) the right IP address.
I've set up the MX and A record to point to the correct FQDN and IP address.
Thanks.
Looking at the mail.boltcorp.com webpage, It seems iRedMail isn’t installed yet.
Xiao,
One more thing what email address do I put here?
sudo certbot certonly –webroot –agree-tos –email your-email-address -d mail.your-domain.com -w /var/www/html/
the postmaster one?
You can use any email address you have.
Xiao – This guide is excellent. I followed your steps and everything is working perfectly.
Is there a simple way to backup the config for all the apps or even a snapshot of the entire OS? I’d like to be able to restore the settings in case i make a mistake and break this smooth running config. Thank you
Before editing a file, copy it to a new file. If you make a mistake, then restore the original file.
If you are using a server hosting service, they should provide a snapshot function.
Thanks for the guide i installed it perfectly. got 10/10 out of mailtester. Next step is connection with ldap / ms ad or samba4. I tried to follow https://docs.iredmail.org/active.directory.html but got stuck at dovecot. and finding config files for rouncube (ngnix other place ?) and missing guide for sogo. do you have any plans to make a guide for that ?
The danger of following a tutorial like this that you are installing a whole bunch of packages (do you understand what they all do?) which need to be configured accurately and kept up to date for ever. It is true that it is supposed to be done on a clean install, and it will PROBABLY work, but if it doesn’t you will have to do another clean install. There is no “uninstall/unconfigure”.
It worked OK for me on my first go, but in setting up a standby server, it failed and couldn’t be unscrambled. Beware.
Is a fresh OS install on the standby server out of the question? Why not just try it again?
Could you let me know the error when setting up a standby server?
Richard, no, re-installing the OS is not out of the question, but its a whole heap more work if its doesn’t install and configure properly first time.
Xiao, I don’t remember the error exactly – some server was unreachable at the time, I think.
My point was, it’s great when it works, and a lot of extra work when it doesn’t.
Testing with mail-tester.com is essential to get all the things right.
Citadel-suite has a mail server, chat server and other features and is generally easier.
Your mail server WILL be attacked on the first day and every day.
I am not using any hosting service. The mail server is created in the lab. My os is ubuntu 20.04.
How to achieve PTR stuff.
Harshil, the PTR record should be done by your ISP. For example ISP gave u an IP 123.123.123.123 and you bought a domain name gupta.com, but your host name is mail.gupta.com, you pass mail.gupta.com to your isp technician they should be able to configure for you
I got the point.
Thank you 🙂
It is not sending emails to godaddy mails also not receiving.
Please check the mail log
/var/log/mail.log.i am getting
Godaddy’s mail server (secureserver.net) can’t find the PTR record of your IP address. Create A PTR record for 45.64.11.2.
Hi,
Can i change the smtp port from 25 to some other?
currently i am getting
And is it possible to send mail through php code using SMTP
Hi Ashutosh,
You can set up SMTP relay to bypass port 25. Here’s a detailed tutorial: https://www.linuxbabe.com/mail-server/postfix-smtp-relay-ubuntu-sendinblue
I’m afraid you can’t change what port Postfix uses to send outgoing email. Port 25 is required by the SMTP protocol.
Yes, you can write PHP code to send email through your email server, although I’m not familiar with PHP programming.
Actually I am using Azure VM, and azure doesn’t allow for port 25. they are recommending some other port like port 587 or 443. So if it is possible to change port for postfix smtp, please guide.
I don’t understand why it needs to install a web server? I just want email.
Is this for configuration purposes? Why can’t I just do that via SSH and text configuration files?
The web server is needed to set up a webmail client, so you can access email in your web browser. If you don’t need that, you can disable the web server from running on your machine.
This article did not say you can’t use SSH to install iRedMail on another machine.
I was looking at the screenshot of the install questions. It gave you a choice of which web server you want (nginx or Apache) but did not appear to offer the option of skipping the webserver all together.
iRedMail also comes with a web-based control panel that allows you to easily add email accounts, that also requires a web server. You may need this if you are not familiar with adding email accounts from the command line.
You can disable or remove the web server after your email server is up and running, if you really don’t like having a web server on your machine.
I notice there is a step where you set a static IP address of the mail server.
This is problematic. I was planning on running my server with a dynamic DNS service and not using IP addresses at all. Is this not possible?
With a dynamic IP address, you can’t set the PTR record, in which case your emails are more likely to land in spam folder or be rejected outright.
If you plan to set up an email server in your home, ask your ISP if they can give you a static IP and if PTR record can be configured for your IP address, Or you can set up SMTP relay.
I can recieve emails but no sending, log shows:
Your hosting provider or ISP is blocking port 25. Ask them to open it for you.
Thanks
When i test my DKIM key on Putty of example, it shows success, but when i try to test it on a tool like mxtoolbox it shows it says:
No DKIM found with the selector mail.
How can i change that? I mean, my selector is dkim._domainkey
Am i missing somehing?
Thank you
You can send an email to me ([email protected]), so that I can examine your situation.
Please run the following command on your email server to see what selector is being used for your domain.
Paste the output here.
Output:
The default DKIM selector is dkim, and your DKIM record is correct, but for some reason your email server is using mail as selector. Open the Amavis configuration file.
Find the following line.
dkim_key('your-domain.com', 'dkim', '/var/lib/dkim/your-domain.com.pem');The second parameter in the parentheses is the selector used by Amavis. If it’s set to
mailin your file, change it todkim.Save and close the file. Then restart Amavis.
This indicates that your server has enabled greylisting. The sending server will try again in a few minutes and it will be accepted.
Hello,
When i try to type the command to install the TLS certificate i reviecve this message:
What am i doing wrong
You left the
--emailoption out. The correct command isYou have saved my day thank you!
HI, I’ve done everything with success but I can’t instatll certbot. I’m using debian 9.
I follow the steps from certbot page but it wants to certificate my domain, I only have access to mail server. How can I do that?
Make sure you have set A record for the hostname of your mail server (mail.your-domain.com), follow the certbot instructions and you would fine.
Xiao thanks for the answer.
I have another question.
For dkim, I generate the public and private key and configure my dns server. Where I should copy my private key. I must install something in my email server? My dns server is another server.
Best Regards.
Carina
You need to copy the public key to your DNS, not the private key. You can find the public key in the
iRedmail.tipsfileUnder
DNS record for DKIM supportBasically it looks like this:
iRedmail already installed necessary software for you, so no need to install other software.
Thank you for your guide. its the best i have come acrossed. Please i need your help, my mails are delivered to spam folders.
Your email server configuration looks good. For more tips to getting out spam folder, read this article: How to stop your email being marked as spam.
Just wanted to write a quick “thank you” for the iRedmail write-up and website in general. Your walkthroughs are, by far, the best I’ve found on the net and you are my favorite linux educator. Thank you!
You are welcome 🙂
Hello
i followed these steps now i can send the emails but when i am sending mails from gmail to this server mails are not coming in inbox. i created a @ mx record pointing to mail.mydomain.tld . Please help.
Hi, greylisting will delay incoming email for a few minutes. You can check your mail log with
sudo nano /var/log/mail.log. If you see a mail address is greylisted, the emails will be delayed.Also make sure you create an A record for mail.yourdomain.tld.
Is it possible to create mx record without creating a record?? Obviously i created a A record mail.domain.tld. And delay after 6 hours i have not received any mail. How long??
If you created MX and A record correctly, then Gmail can find your mail server. Greylisting will delay emails no more than 15 minutes. Can you paste your mail log in the comments? Also can you tell me your domain just to make sure I can verify your MX and A records?
You can find the log here:-
https://pastebin.com/7318Bb7v
and my domain is mail.devopshit.xyz
thanks!
Hi, looks like you are using AWS. Please go to AWS web-based console and set firewall to allow incoming traffic to the following ports:
TCP port 25 (smtp),
TCP port 587 (submission)
TCP port 993 (imaps)
TCP port 995 (pop3s).
I forgotten to take care of these.. now working thanks.. your tutorial was awesome…
if we wish to use with phpmailer library is it possible?
if yes so,how use it?
please tell me.
PHPMailer is used by a web application to connect to SMTP server. You can use PHPMailer with any SMTP server. It has nothing to do with iRedMail. You should ask a web developer.
Hi,
I want my mail server to process a PHP script everytime it receives an incoming email (to any receipient).
Is this possible with iRedMail? Any tips on where I can learn more on how to it?
Many thanks.
iRedmail uses Postfix SMTP server, so you should Google how to execute PHP scripts with Postfix SMTP server.
Great guide. Happy Server life 🙂
I followed the instructiuons. I faced my first error when it came to configure MariDB, that kept on failing so I used Postgres. But now I am getting an internal server error.
And all the other server blocks that I had for my sub domains have also disappeared. Should that have happned?
Yes, that’s expected. I did say “it’s highly recommended to follow the instructions on a clean install of Ubuntu 20.04 system”.
t is possible to add other subdomains to nginx such as nextcloud.domain.com or wordpress.domain.com I searched the internet for some tutorials but none of them helped
Hi, I have the same question and also is it possible to use subdomain with iRedMail ? Is it possible to use webmail.domain.com instead of mail.domain.com/mail ? Same for netdata and admin ? Thank you !
I to would like to add additional web pages for the nginx to serve. i have tried some of the stuff i have found online but is now working for what ever reason… i used your AWSOME tutorial (thank you, thank you, thank you)… system is ubuntu server 20.04 and 1.3.1 version of IRedMail, NginX and Sogo… i hope this helps to let you know what i am setup with to help guide me how to add an additional web page to serve.
Is this tutorial missing the step of installing apt-get install build-essential python3-dev before starting iredmail install?
Simone
No. iRedMail will automatically install them for you.
You might want to add that if your using Bind9, the _domainkey line will look like:
you will have to break up the domain key to 255 characters or less with an end double quote
a space and then start another section with another double quote. Each section will have to be less than 255 characters. The only other way that might work is with an include file. I didn’t test
the include file. That kept me entertained for days.
If you use the BIND9 authoritative DNS server, you just need to copy the entire DKIM key, including the parentheses, don’t delete any double quotes or line breaks, and paste it to the value field in your BIND zone file, as explained in the following tutorial.
Set Up BIND Authoritative DNS Server on Ubuntu
How can I add additional domain to the nginx service after installing the iredmail ?
Please read this tutorial: How to Host Multiple Mail Domains in iRedMail with Nginx
Hi Xiao,
My sincerest thanks for taking the time and effort to develop this tutorial. It’s been very valuable in helping me gain a better understanding of Linux and the complexity of establishing email capability.
I’m having a bit of difficulty in accessing the iRedMail panel via https://mail.your-domain.com/iredadmin/ (mine is https://mail.motophoto.net/iredadmin/), however, using https://motophoto.net/iredadmin/ isn’t an issue.
1) Should it matter, and if it does..
2) Per my Google Domains DNS records, does anything look out of whack? (file attached)
Update: I added a CNAME record (mail.motophoto.net) and was able to access the iRedAdmin with the format you provided.
Installation did not work for me:
Ubuntu 20
Why does an mail server need to access grub?
Your system is trying to upgrade the
grub-efi-amd64-signedpackage withsudo apt-get upgrade, but failed. This is not iRedMail’s problem. It’s the system problem. You can go to askubuntu.com to ask for help.Thank you, you are right. This was a freshly installed server with the standard image they use for installing. After a fresh install, the error is still there. I will have to check with them, since I cannot physically access the server if something goes wrong with grub.
Thank you so much Xiao. Everything went smooth !
Would be great if you could add per-user email encryption into iredmail package. I tried to configure Dovecot mail-crypt plugin with per user encryption (keys generated based on a user’s password) using this tutorial: https://workaround.org/ispmail/buster/o … ent-125882 but it involves changes to mysql databases. I wasn’t able to locate the db containing virtual users of iredmail. Perhaps you could add this functionality to the next release? Merry xmas!
Hi Xiao,
I am hoping you can help. I am following your guide and I got to the point of issuing the certificate and I am getting the error:
It does not have a / after the domain mydomain.tech like yours does Yours looks like mydomain.tech/.well-known/), but my configuration files look like yours so the steps used to troubleshoot do not work.
I have my mail server behind a firewall, but I have the ports forwarded for IMAP and SMTP, though I can’t forward port 80 because I have another server that is running web pages. But I am not really worried about webmail access to this mail server, just clients like thunderbird or outlook.
The certbot
HTTP-01challenge needs port 80 and 443 opened in order to work. You can try using the DNS-01 challenge, which doesn’t require port 80 or 443.Gotcha. I was starting to think it required one or both of those and that it was pulling the invalid info from the web server on the other server. I will look at the DNS challenge and see if I can get that to work. Thanks!
Love your guides they helped me setup a lot of things that I never thought possible
Thanks a lot for the tutorial.
Note: I didn’t receive emails, but i could send. Editing the MX record helped from “mail.example.com” to the “mail”.
Hi Xiao,
Great tutorial, everything is working great on my new mail server. My question is, if LetsEncrypt gives us 90 days… why are we renewing with them on the cron job with a @daily ? Would it be feesable to set a @weekly or a @monthly cron? Thanks
certbot will only renew your certificate if the certificate expires in 30 days. So, using @daily in Cron job will check daily when your certificate will expire and if the certificate will expire in 30 days, it will be renewed.
An amazingly detailed tutorial! Thanks a lot!
Is it possible to create a docker container out of it for trying things out? I’m pondering setting up a full-fledged mail server, but before I do that I was thinking of spinning up a docker container inside Linux to see how it works without the domain registration and other networking stuff. Is it at all possible? Thanks.
Hi Xiao.
Your recommendation is to have a server with 2 GB of RAM in order not to lose emails. If my server has 1 GB of RAM and 4 GB of swap space on the SSD – will this prevent the loss of letters?
Yes. It can prevent losing emails, but your SSD will die more quickly if swap space is heavily used.
Can I use the exiting apache2 to be the web server?
No. It will break your Apache hosted websites. Use a fresh clean server.
stats: Error: conn stats-reader (127.0.0.1:45230): didn’t reply with a valid VERSION line: EXPORT global
I set everything up according to the instructions, but as soon as people start logging into their logins (web, outlook), the system immediately refuses. Already what day I can not understand why Dovecot crashes.
Active (running)indicates Dovecot didn’t crash. Simply restart Dovecot. The error should be gone.dovecot.service – Dovecot IMAP/POP3 email server
Loaded: loaded (/lib/systemd/system/dovecot.service; enabled; vendor preset: enabled)
Active: active (running) since Wed 2021-05-05 06:54:35 UTC; 7min ago
Docs: man:dovecot(1)
http://wiki2.dovecot.org/
Main PID: 783 (dovecot)
Tasks: 10 (limit: 7030)
Memory: 13.9M
CGroup: /system.slice/dovecot.service
├─783 /usr/sbin/dovecot -F
├─934 dovecot/lmtp -L
├─936 dovecot/anvil
├─937 dovecot/log
├─941 dovecot/lmtp -L
├─942 dovecot/lmtp -L
├─943 dovecot/lmtp -L
├─944 dovecot/lmtp -L
├─954 dovecot/config
└─973 dovecot/stats
May 05 06:54:35 mail.qgeo.kz systemd[1]: Started Dovecot IMAP/POP3 email server.
May 05 06:54:36 mail.qgeo.kz dovecot[783]: master: Dovecot v2.3.7.2 (3c910f64b) starting up for pop3, imap, sieve, lmtp (core dumps disabled)
May 05 06:54:43 mail.qgeo.kz dovecot[937]: stats: Error: conn stats-reader (127.0.0.1:36650): didn’t reply with a valid VERSION line: EXPORT global
May 05 06:54:43 mail.qgeo.kz dovecot[937]: stats: Error: conn stats-reader (127.0.0.1:36652): didn’t reply with a valid VERSION line: EXPORT global
Hi! Thanks for responding to the previous post. I tried reinstalling Ubuntu 20.04 and installing iRedMail 1.4.0 back, but I still could not overcome this error. It occurs half an hour after the mail has been stable.
This error doesn’t affect the overall operation of your mail server. You can ignore it. If you really want to make it disappear, edit the
/etc/dovecot/dovecot.conffile, find the following lines, add a#character at the beginning of each line to comment them out.fifo_listener stats-mail { user = vmail mode = 0644 }Save and close the file. Then restart Dovecot.
Thank you very much for this tutorial!
Works fine for me expect adding the email account to a mail client like Thunderbird or outlook
I really dont know why it does not work adding the account.
It seems like they cant find the email account
The Roundcube webmail works fine i can recieve and sent email 10/10
I already checked if there is any port still not open also deactivated the firewall to check but nothing helped
So maybe you can help me again thanks in advance
ERROR: “General authentication error. None of the authentication methods supported by the IMAP server are supported by this computer.”, hr=0x800CCCDF
Maybe you are using a really old operating system/mail client?
Hi, Xiao Guoan, thanks for doing these tutorials. Fantastic resource!
I have a couple of questions. I have a VPS, but it only has 1 GB of RAM. It sounds like I can’t do the iRedMail thing, then. (What would happen if I tried?) Is that enough RAM to just build a Postfix server per your companion tutorial, though?
Second, you say to name the server something like mail.example.com. But if I want the server also to be a web and shell host, can I just name it a normal name without the “mail” node prefix?
One thing I would be pleased if you’d change on these tutorials is the example hostnames you use. You use the example of “mail.your-domain.com” on this page. Well, “your-domain.com” is someone’s actual, registered domain name! You ought to be using example.com or example.net for these example names; that’s exactly what they’re there for, from the official set of IANA-managed Reserved Domains.
Thanks again for all the hard work. Quite nice to see!
If you don’t have enough RAM, your server could be losing incoming email messages and outbound emails will take more time to deliver.
If you see the following error message in the mail log (/var/log/mail.log), it indicates your server needs more RAM to run iRedMail.
The above message indicates ClamAV is killed due to out-of-memory.
You can set the hostname directly in Postfix configuration file (/etc/postfix/main.cf).
Then restart Postfix
Now you can set the OS hostname to whatever name you like.
Thanks. works like a charm.
Thank you very much Xiao, you do a great job. After port 25 was unblocked, everything went perfect. A hug 🐱👤🧙♂️🙋♂️
Hi,
Can i use this example on apache2 server, i a ready have apache2 server up and running.
Thanks
David
No. iRedMail only uses Nginx web server. It doesn’t work with Apache.
so then what your advice on setting SMPT and IMAp on Digitalocean droplet , which is runnign ubuntu 20.04 and apache2 php7.4 – should i continue on Digitalocean , have read challenges of port 25 been blocked.thanks
Don’t use DigitalOcean for email server. They never unblock port 25 for me.
hello,
Suggest what then can i kindly use – a ready i am in with digital-ocean, who are the third party smtp server providers can i link up with plus digital-ocean
Thanks
David
You can use sendinblue SMTP relay.
Hey,
I would like to register email users for my family and friends. If you can help me, Then it will be greatly appreciated! Or point me in a right dirtection…
You can log in to the iredadmin panel with the postmaster account and create email addresses for your family. They will be able to change the password in Roundcube webmail. Visitors can’t register accounts for themselves.
This is the best tutorial to install iRedMail on the Internet. Thanks so much, Xiao.
Xiao, how can we increase upload size in Roundcube from default size of 10MB to 100MB for example.
To increase the upload size limit, edit the PHP configuration file.
Find the following line.
Change the value like below. Note that this value should not be larger than the attachment size limit set by Postfix SMTP server.
Then find the following line.
Change the maximum size of POST data that PHP will accept.
Save and close the file. Then restart PHP-FPM.
Also edit the Roundcube config file.
Find the following line and change it value.
Nginx also sets a limit of upload file size. Edit the following file.
Change the default size
Save and close the file. Then reload Nginx for the changes to take effect.
To change the attachment size limit in Postfix, run
Then restart Postfix.
Hello Xiao, thanks for your continuous support! After I configure DKIM on my server and added the DNS record on the DNS Manager, when I do a test I’m receiving the following message :
TESTING#1 absburundi.bi: dkim._domainkey.absburundi.bi => invalid (public key: OpenSSL error: too long)
You DKIM record is invalid. You can go to https://www.dmarcanalyzer.com/dkim/dkim-check/, enter
dkimas the selector and enter your domain name to check DKIM record.Thanks Xiao for your prompt feedback.. I receive the following message : “We could not detect a DKIM record with the specified selector on this domain”
I did amavisd-new showkeys command and have copied the key.
I have checked on the DNS with dig mydomain.com txt and the key is the same.
I don’t understant whey it keeps with the same error.
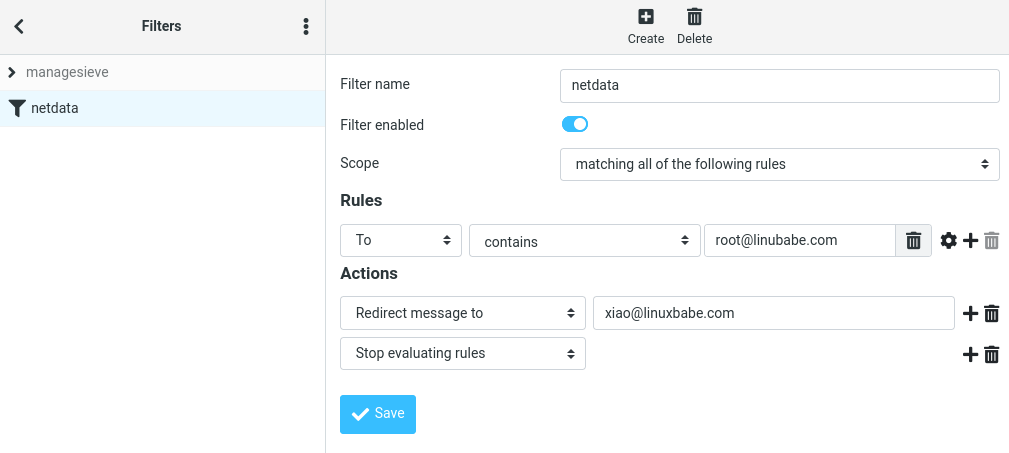
Hi Xiao, is it possible to add mail alias account without upgrading iredmail to iredmail pro ?
You can create the email address, then create a filter in Roundcube webmail to redirect all incoming emails to another email address.
Thank you Xiao for your help!!
Hello Xiao,
I followed your post and installed iRedmail succesfully, but I have following issue with iRedAdmin:
1 – I created many domains following the instruction of your related post.
2 – I create one user “postmaster” on first domain as Global Admin
3 – On account of other domain I setted as Domain Admin.
When I access as “postmaster” iRedadmin no problem I can do everythings, but when I try to access with the credentials of Domain Admin I get following error:
.https://mail.XXXXXX.it/iredadmin/domains?msg=PERMISSION_DENIED
303: Temporary redirect to .https://mail.XXXXXXX.it/iredadmin/domains?msg=PERMISSION_DENIED
Server IP Address xxx.xxx.xxx.xxxx
servernginx
dateMon, 12 Jul 2021 20:45:02 GMT
content-typetext/html
locationhttps://XXXX.XXXXXX.XX/iredadmin/domains?msg=PERMISSION_DENIED
strict-transport-securitymax-age=31536000
but on iRedadmin Access log I found the admin user regularly accessed:
2021-07-12 22:43:28 [email protected] 79.121.40.163 Admin login success
I checked all iRedmail logs but no related error I found, so I think this redirect is something related to nginx but I have no idea where to look.
Do you have some suggestions ?
Thankyou
Piercarlo
Hello Xiao,
I just installed iRedmail succesfully following your post.
This morning I received on postmaster a message that say following:
——————— clam-update Begin ————————
Last ClamAV update process started at Tue Jul 13 23:58:44 2021
Last Status:
WARNING: Your ClamAV installation is OUTDATED!
WARNING: Local version: 0.103.2 Recommended version: 0.103.3
DON’T PANIC! Read https://www.clamav.net/documents/upgrading-clamav
daily.cld database is up-to-date (version: 26230, sigs: 3995778, f-level: 63, builder: raynman)
main.cvd database is up-to-date (version: 59, sigs: 4564902, f-level: 60, builder: sigmgr)
bytecode.cvd database is up-to-date (version: 333, sigs: 92, f-level: 63, builder: awillia2)
———————- clam-update End ————————-
So
1 – Do you have some post regarding how to do? or
2 – Live it as it is, because tha db is up-to-date ?
Thankyou for suggestions
Piercarlo