How to Create a Linux VPS Server on Kamatera
This article is going to explain how to create a Linux VPS (Virtual Private Server) on Kamatera, so you can run your own email server and website.
ScalaHosting vs Kamatera
In a previous tutorial, I explained how to create a Linux VPS server on Scalahosting, which is my recommended hosting provider for running email servers, because it has the best IP reputation. However, Scalahosting plans start at $26/month (2 CPUs, 8GB RAM). It’s a bit expensive for some folks since they don’t need that much RAM to get started.
If your business depends on email, I still recommend ScalaHosting, because it will give you better email deliverability. If you are short of money, then you can choose Kamatera VPS hosting, which starts at $4/month (1 CPU, 1GB RAM) and you can try it free for 30 days.
I have email servers on both hosting providers and I will share my experience in Kamatera with you.

Why Run Your own Email Server
There’re hosted email solutions like Google Workspace and Microsoft Exchange Online, but they become very expensive when you have many users. If you run a self-hosted email server on a VPS, you can add unlimited users, unlimited domains, and send unlimited email messages for a very low price.
You can easily set up a mail server with iRedMail.
- How to Easily Set Up Your own Mail Server on Ubuntu 20.04 with iRedMail
- How to Easily Set Up Your own Mail Server on Debian 10 with iRedMail
- How to Easily Set Up Your own Mail Server on CentOS 8 with iRedMail
And you can install a self-hosted email marketing platform like Mautic on your email server, so you can cancel your Mailchimp/AWeber subscription and save hundreds of dollars every month.
Find a VPS for Email
It’s not an easy task to find a VPS provider suitable for email hosting. Many hosting companies like DigitalOcean blocks port 25. DigitalOcean would not unblock port 25, so you will need to set up SMTP relay to bypass blocking, which can cost you additional money. Another problem is that big well-known hosting providers like DigitalOcean are abused by spammers. Often the server IP address is on several blacklists.
Kamatera is a very good option to run a mail server because
- They don’t block port 25.
- The IP address isn’t on any email blacklist. (At least this is true in my case. I chose the Dallas data center.) You definitely don’t want to be listed on the dreaded Microsoft Outlook IP blacklist or the spamrats blacklist. Some blacklists block an entire IP range and you have no way to delist your IP address from this kind of blacklist.
- You can edit PTR record to improve email deliverability.
- They allow you to send newsletters to your email subscribers with no hourly limits or daily limits, whatsoever. Note that you are not allowed to send spam, also known as unsolicited bulk email. If the recipient doesn’t explicitly give you permission to send emails, and you send emails to them, that’s an unsolicited email.
- You can order multiple IP addresses for a single server. This is very useful for folks who need to send a large volume of emails. You can spread email traffic on multiple IP addresses to achieve better email deliverability.
As you can see from the screenshot below, The IP address (63.250.61.81) of my mail server (smtp01.linuxbabe.com) isn’t on any blacklist.

How To Create a Linux VPS Server on Kamatera
Go to Kamatera website and create an account.

You will need to verify your email address.

Next, you need to add a billing profile.

Enter your address and phone number.

Then add your mobile phone number for 2-step verification.


Now your billing profile is added, go to My cloud -> Create New Server to add a new server. Select your server location, OS image (Ubuntu, Debian, AlmaLinux, etc) and server type.

For an email server, I recommend the following specs, which costs $9/month. 3 GB RAM is required if you want to run a full-featured email server. If you need a simple email server, then 2GB RAM is fine.
- server type: A availability
- CPU: 1 core
- RAM: 3GB
- SSD: 20GB

Next, set a root password for the VPS and give it a hostname.

Finally, click the create server button. Note that you will not be billed right away. You can use the server for one month free. It can take several minutes for your servers to be created. You can check the progress in the task queue.
After your server is created, you will receive an email notification. And you can log into your server via SSH. If you are using Linux on your desktop computer, you can open a terminal window and run the following command to log into your server. Replace 12.34.56.78 with your server’s IP address. Then enter the root password.
ssh root@12.34.56.78

Congrats! Now you can start your Linux server project. If you are using Windows, please read the following article on how to use SSH client.
Hint: You can also use hostnames in the SSH command. For example, if you created DNS A record mail.example.com, pointing to the IP address of this server, then you can use the following command to log in.
ssh root@mail.example.com
This way, you don’t have to remember the IP address.
Creating a sudo User
I strongly recommend creating a sudo user for managing your server rather than using the default root user. Not only it increases your server’s security, but also allows you to log in as the new user if you can’t log in as the root user.
Debian/Ubuntu
If you installed Debian or Ubuntu on your server, run the following command to create a user.
adduser username

Then add the user to the sudo group.
adduser username sudo
Now you can exit from the root user.
exit
And login as the new user.
ssh username@12.34.56.78
CentOS/AlmaLinux
If you installed CentOS/AlmaLinux on your server, run the following command to create a user. Replace username with your preferred username.
adduser username
Set a password for this user.
passwd username
Add this user to the wheel group in order to use sudo.
gpasswd -a username wheel
Make sure you have the sudo utility installed.
dnf install sudo
Now you can exit from the root user.
exit
And login as the new user.
ssh username@12.34.56.78
Tips for Staying Out of the Spam Folder
I highly recommend following email sending best practices, so your emails can land in the inbox and stay out of the spam folder.
Create PTR Record for Your Kamatera VPS
If you run an email server, you need to create PTR record. Kamatera doesn’t allow you to edit PTR record in the control panel. Instead, you need to open a support ticket and tell them to add PTR record for you. It’s not convenient, you might think, but this is to keep spammers away from the platform, so legitimate email senders like us will have great IP reputation.
Hint: Kamatera might require you to run a website on their server in order to add the PTR record for you. If you have a website on their infrastructure, then you will be fine. If your website is hosted somewhere else, don’t panic. There’s a workaround.
If you temporarily change DNS A record to make the main domain resolve to the IP address of a Kamatera server, then Kamatera will think your website runs on their infrastructure. So we can set up a temporary reverse proxy on the Kamatera server to make sure your website still works during the DNS change. Once the PTR record is created by Kamatera, we can remove the reverse proxy and change the DNS A record back. You will learn a new skill, so why not? 🙂 Here’s how to set up the reverse proxy.
Install HAPorxy on the Kamatera server. It’s a high-perfermance reverse proxy and load balancer.
Debian/Ubuntu:
sudo apt install haproxy
Rocky Linux/Alma Linux:
sudo dnf install haproxy
Then edit the HAProxy config file:
sudo nano /etc/haproxy/haproxy.cfg
Add the following lines at the end of this file.
frontend http
    bind 12.34.56.78:80
    mode http
    redirect scheme https code 301


frontend https
    bind 12.34.56.78:443
    mode tcp
    tcp-request inspect-delay 5s
    tcp-request content accept if { req_ssl_hello_type 1 }

    default_backend nginx
    use_backend nginx if { req_ssl_sni -i example.com }
    use_backend nginx if { req_ssl_sni -i www.example.com }


backend nginx
    mode tcp
    option ssl-hello-chk
    server nginx 12.34.56.79:443 check
- Replace
12.34.56.78with the IP address of your Kamatera server. - Replace
12.34.56.79with the real IP address that your website is hosted on. - Replace
example.comwith your actual domain.
Save and close the file. Then restart HAProxy.
sudo systemctl restart haproxy
Now go to your DNS zone editor, and change the DNS A record of your main domain and the www domain to the IP address of the Kamatera server, so Kamatera customer support staff will think your website runs on their infrastructure. Make sure your website still works after the DNS change.
Tell Kamatera support staff that your domain is resolved to the IP address of your Kamatera server and ask them to add PTR (rDNS) record.
12.34.56.78 --->> mail.example.com
Once the PTR record is added, you can remove HAProxy.
Debian/Ubuntu:
sudo systemctl stop haproxy
sudo apt remove haproxy
Rocky Linux/Alma Linux
sudo systemctl stop haproxy
sudo dnf remove haproxy
Then change the DNS A record of your main domain/www domain back to the original IP address.
Web-based VNC Console
Kamatera provides a web-based VNC console in the account control panel. This VNC connection is not affected by SSH. If you accidentally lock yourself out of the SSH service, you can always use the VNC console to fix the errors in the SSH service. Note that after you create a fresh VPS on Kamatera, you may need to wait a few hours to use the VNC console.
Go to My cloud -> Servers -> Actions -> Console to launch the VNC console.

How to Upgrade Server Specs
If you need more resources on your VPS, then go to My Cloud -> Server -> Actions -> Configure to add more CPU, RAM, or disk space to your VPS. Click Update Configuration button to apply the changes. You can run the htop command over SSH to check if the upgrade is successful. If you still see the original server spec, then go to Kamatera website and click the reboot button to reboot your server. (Rebooting from the command line might not be able to apply the changes.)
How to Add Multiple IP Addresses to Your VPS
It’s a good practice for bulk email senders to use multiple IP addresses to send emails, so as to maintain good IP reputation and improve email deliverability. To add additional IP addresses for your Kamatera VPS, you need to shut down your VPS with the following command.
sudo shutdown -h now
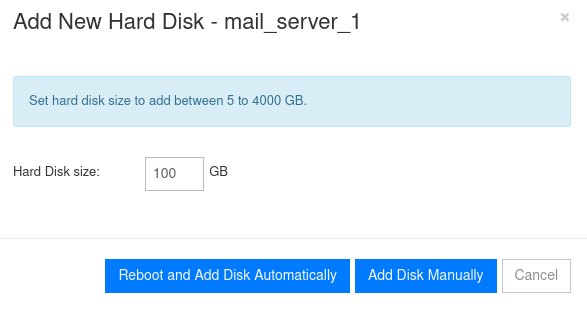
Then go to Kamatera web interface, select My Cloud -> Servers, click on your VPS, then select the Network tab -> Your WAN network interface -> Add IP address.

Next, choose automatic IP selection.

Then click Reboot and Add Automatically button, and wait for the task to finish.
Kamatera will automatically create a snapshot when adding IP address to your VPS. When you see the following message in your Kamatera account, you need to go to the Snapshots tab and commit the snapshot.
Server has active snapshots. Reconfiguring server's networks can't be done while server has active snapshots. Please commit all Snapshots to proceed.

After that is done, power on your VPS. And login via SSH. You can use the following command to check the network interface and IP addresses on your VPS.
sudo ip -c a
As you can see, the main network interface now has two public IP addresses.

Once you have multiple IP addresses, follow the tutorial linked below to set up multiple instances of Postfix SMTP server, so it can make use of the multiple IP addresses.
How to Remove an IP Address
The process is very similar to adding a new IP address. First, you need to shut down your VPS, then go to the networks tab and select the remove IP address option. Next, commit the snapshot which is automatically generated by Kamatera. Finally, power on your VPS.
Wrapping Up
I hope this article helped you create a Linux VPS on Kamatera. As always, if you found this post useful, then subscribe to our free newsletter to get more tips and tricks. Take care 🙂


Thanks for this tip regarding Kamatera VPS; very good deal, friendly tech support.
Kamatera are ok, but when I contacted them to ask them to add a PTR record, they insist on me having an ‘active website on my main domain’ to give me a PTR record for my mail server, I appreciate this will definitely deter your average spammer, it’s a frustration for someone just trying to build a personal mail server.
Hi Curly,
You can install the Ghost blogging platform on the mail server, so you will have your own blog website.
In the meantime, you can temporarily use a free SMTP relay service so you don’t have to create PTR record right now. Once you meet the requirement of adding PTR record on Kamatera VPS, you can stop using the SMTP relay service.
The SMTP relay service is also very effective for you to bypass email blacklists. How to Bypass the Microsoft Outlook IP Blacklist & Other Blacklists
They require you to host your sites with them to add the PTR record?
Kamatera says you must run a website on their server, but from my own experience and feedback from many other users, as long as you have a website and it looks legitimate (not a template), they will add the PTR record for you.
Actually, they won’t check if your website is hosted on their server and they don’t have a way to do this. If a website is behind a CDN, how do they know what hosting provider this website is using? They say you need to run website on their infrastructure because they don’t want to deal with spammers.
Just tell them what your website URL is. Don’t provide extra information that’s not requested by them.
Don’t say your website is self-hosted.
Don’t say what domain registrar you are using.
Don’t tell them what I tell you.
Hello! How can I attach a domain to an IP address on it? can’t find tab domains and NS data.
Hi Illius,
You need to create DNS records at your domain registrar. For example, if you register a domain name on NameCheap website, then log in to your NameCheap account and create DNS record there. How to Create DNS Records in NameCheap.
Thank you for doing all the research to find a great low-cost server.
Great instructions and easy to setup!
Thank you LinuxBabe!
Hello, how easy it is to add more disk space in the future for email server in Kamatera ?
Thank you
In Kamatera account dashboard, tell it how much disk space you need, then click a button and it will be added to your server.
Here’s a screenshot.
If you use a Kamatera cloud server to host your mailserver, they will not give you reverse dns (PTR) unless the cloud server also host your website: The staff assesses whether your website is worthy of providing you reverse dns. It is not all cloud server providers that have this restriction. Hetzner, for instance, does not have this restriction, you can set up reverse dns in the admin panel.
I agree that the requirement of running a website on their infrastructure (server) is too restrictive. However, there’s a workaround 🙂 (Restrictive requirements are actually good for legitimate email senders because spammers are kept away from the Kamatera platform.)
Workaround: If you temporarily change DNS A record to make the main domain resolve to the IP address of a Kamatera server, then Kamatera will think your website runs on their infrastructure. So we can set up a temporary reverse proxy on the Kamatera server. Once the PTR record is created by Kamatera, we can remove the reverse proxy and change the DNS A record back to the original. Here’s how to set up the reverse proxy.
Install HAPorxy on the Kamatera server. It’s a high-perfermance reverse proxy and load balancer.
Debian/Ubuntu:
Rocky Linux/Alma Linux:
Then edit the HAProxy config file:
Add the following lines at the end of this file.
frontend http bind 12.34.56.78:80 mode http redirect scheme https code 301 frontend https bind 12.34.56.78:443 mode tcp tcp-request inspect-delay 5s tcp-request content accept if { req_ssl_hello_type 1 } default_backend nginx use_backend nginx if { req_ssl_sni -i example.com } use_backend nginx if { req_ssl_sni -i www.example.com } backend nginx mode tcp option ssl-hello-chk server nginx 12.34.56.79:443 check12.34.56.78with the IP address of your Kamatera server.12.34.56.79with the real IP address that your website is hosted on.example.comwith your actual domain.Save and close the file. Then restart HAProxy.
Now go to your DNS zone editor, and change the DNS A record of your main domain and the www domain to the IP address of the Kamatera server, so Kamatera customer support staff will think your website runs on their infrastructure. Make sure your website still works after the DNS change.
Tell Kamatera support staff that your domain is resolved to the IP address of your Kamatera server and ask them to add PTR (rDNS) record.
Once the PTR record is added, you can remove HAProxy.
Debian/Ubuntu:
Rocky Linux/Alma Linux
Then change the DNS A record of your main domain/www domain back to the original IP address.
What do you think of OVHcloud Hosting, it has good prices, but is it possible to set up an email service, do you know if this is possible?
Thank you very much.
Thank you for all of the great work you have put into your guides! I have used a number of them and I have never been disappointed. Much appreciated!
hello,
i want to unsbscrub for web site
Roxicodone 30mgRitalin 10mgSubutex 2mg (Sublingual tablets)Xanax (Alprazolam)Diazepam 10mgSoma (Carisoprodol) 350mgDemerol (Meperidine) 50mg/30ml AmpulCodeine 30mg TabletsAdderall XR 10mgSubutex 8mg (Sublingual tablets)Percocet (oxycodone/acetaminophen) 5mg/325mgArimidex (Anastrozole) 1mgTramadol 100mg TabletsStilnox (Zolpidem) 10mgTramadol 100mg TabletsMifepristone 10mg TabletDihydrocodeinePregabalin Capsules 30mg (Lyrica)Adderall 5mg – 25mg TabletsBuy Xanax 0.25mg Codeine Phosphate 30mg TabletsArnicare creamArnicarePaxlovid
ApetaminOrajelOrajel extra strengthOrajel dental gelTylenolLevonelle
ImprylLovimaZelletaCliquePriligyAvomineEroxonLansoprazoleUtovlanStemetilwellbutrinSolpadeineSolpadeine maxSolpadeine max solubleSolpadeine plusNitrofurantoinNaproxenCiprofloxacinBenadryl AllergyBenadryl allergy reliefsudafedSudafed max strengthPanadolPanadol extraSominexnitrazepamAlleviaprochlorperazineAdaptilFexofenadine 120mgFexofenadine 180mgQlairaMelatoninRivotrilNytolNytol herbalModafinilKalmskalms nightcircadinCyclizinezopicloneGedarelGedarel 20/150KsalolmounjaroSaxendaRybelsusMysimbaOzempicFigurProvitalizeOrlosSeconal SodiumValium (Diazepam)Oxycodone 30mgSeconal SodiumMethadone 10mgOxycontin 80mg Tablet