Install NextCloud on Ubuntu 20.04 with Nginx (LEMP Stack)
This tutorial will be showing you how to install NextCloud on Ubuntu 20.04 LTS with Nginx web server.
What’s NextCloud?
NextCloud is a free open-source self-hosted cloud storage solution. It’s functionally similar to Dropbox. Proprietary cloud storage solutions (Dropbox, Google Drive, etc) are convenient, but at a price: they can be used to collect personal data because your files are stored on their computers. If you worried about privacy, you can switch to NextCloud, which you can install on your private home server or on a virtual private server (VPS). You can upload your files to your server via NextCloud and then sync those files to your desktop computer, laptop or smartphone. This way you have full control of your data.
NextCloud Features
- Free and open-source
- End-to-end encryption, meaning files can be encrypted on client devices before uploaded to the server, so even if someone steals your server, they can not read your files.
- Can be integrated with an online office suite (Collobora Online, OnlyOffice) so you can create and edit your doc, ppt, xls files directly from NextCloud.
- The app store contains hundreds of apps to extend functionality (like calendar app, contacts app, note-taking app, video conferencing app, etc).
- The sync client is available on Linux, macOS, Windows, iOS and android.
Prerequisites
NextCloud is written in PHP programing language. To follow this tutorial, you first need to install LEMP stack on Ubuntu 20.04. If you haven’t already done so, please check out the following tutorial.
You can install NextCloud on your home server or a VPS (virtual private server). You also need a domain name, so later on your will be able to enable HTTPS to encrypt the HTTP traffic. I registered my domain name from NameCheap because the price is low and they give whois privacy protection free for life. Nextcloud can be installed without a domain name, but it really doesn’t make sense if you don’t encrypt the HTTP connection to prevent snooping. I recommend buying a domain name, if you really want to tinker with server software and use them to the fullest potential.
Now let’s install NextCloud.
Step 1: Download NextCloud on Ubuntu 20.04
Log into your Ubuntu 20.04 server. Then download the NextCloud zip archive onto your server. The latest stable version is 21.0.1 at time of this writing. You may need to change the version number. Go to https://nextcloud.com/install and click the download for server button to see the latest version.

You can run the following command to download it on your server.
wget https://download.nextcloud.com/server/releases/nextcloud-21.0.1.zip
You can always use the above URL format to download NextCloud. If a new version comes out, simply replace 21.0.1 with the new version number.
Once downloaded, extract the archive with unzip.
sudo apt install unzip

sudo unzip nextcloud-21.0.1.zip -d /usr/share/nginx/
The -d option specifies the target directory. NextCloud web files will be extracted to /usr/share/nginx/nextcloud/. Then we need to change the owner of this directory to www-data so that the web server (Nginx) can write to this directory.
sudo chown www-data:www-data /usr/share/nginx/nextcloud/ -R
Step 2: Create a Database and User for Nextcloud in MariaDB Database Server
Log into MariaDB database server with the following command. Since MariaDB is now using unix_socket plugin to authentication user login, there’s no need to enter MariaDB root password. We just need to prefix the mysql command with sudo.
sudo mysql
Then create a database for Nextcloud. This tutorial name the database nextcloud. You can use whatever name you like.
create database nextcloud;
Create the database user. Again, you can use your preferred name for this user. Replace your-password with your preferred password.
create user nextclouduser@localhost identified by 'your-password';
Grant this user all privileges on the nextcloud database.
grant all privileges on nextcloud.* to nextclouduser@localhost identified by 'your-password';
Flush privileges and exit.
flush privileges;

exit;

Step 3: Create a Nginx Config File for Nextcloud
Create a nextcloud.conf file in /etc/nginx/conf.d/ directory, with a command-line text editor like Nano.
sudo nano /etc/nginx/conf.d/nextcloud.conf
Copy and paste the following text into the file. Replace nextcloud.example.com with your own preferred sub-domain. Don’t forget to create DNS A record for this sub-domain in your DNS zone editor. If you don’t have a real domain name, I recommend going to NameCheap to buy one. The price is low and they give whois privacy protection free for life.
server {
    listen 80;
    listen [::]:80;
    server_name nextcloud.example.com;

    # Add headers to serve security related headers
    add_header X-Content-Type-Options nosniff;
    add_header X-XSS-Protection "1; mode=block";
    add_header X-Robots-Tag none;
    add_header X-Download-Options noopen;
    add_header X-Permitted-Cross-Domain-Policies none;
    add_header Referrer-Policy no-referrer;

    #I found this header is needed on Ubuntu, but not on Arch Linux.
    add_header X-Frame-Options "SAMEORIGIN";

    # Path to the root of your installation
    root /usr/share/nginx/nextcloud/;

    access_log /var/log/nginx/nextcloud.access;
    error_log /var/log/nginx/nextcloud.error;

    location = /robots.txt {
        allow all;
        log_not_found off;
        access_log off;
    }

    # The following 2 rules are only needed for the user_webfinger app.
    # Uncomment it if you're planning to use this app.
    #rewrite ^/.well-known/host-meta /public.php?service=host-meta last;
    #rewrite ^/.well-known/host-meta.json /public.php?service=host-meta-json
    # last;

    location = /.well-known/carddav {
        return 301 $scheme://$host/remote.php/dav;
    }
    location = /.well-known/caldav {
       return 301 $scheme://$host/remote.php/dav;
    }

    location ~ /.well-known/acme-challenge {
      allow all;
    }

    # set max upload size
    client_max_body_size 512M;
    fastcgi_buffers 64 4K;

    # Disable gzip to avoid the removal of the ETag header
    gzip off;

    # Uncomment if your server is build with the ngx_pagespeed module
    # This module is currently not supported.
    #pagespeed off;

    error_page 403 /core/templates/403.php;
    error_page 404 /core/templates/404.php;

    location / {
       rewrite ^ /index.php;
    }

    location ~ ^/(?:build|tests|config|lib|3rdparty|templates|data)/ {
       deny all;
    }
    location ~ ^/(?:\.|autotest|occ|issue|indie|db_|console) {
       deny all;
     }

    location ~ ^/(?:index|remote|public|cron|core/ajax/update|status|ocs/v[12]|updater/.+|ocs-provider/.+|core/templates/40[34])\.php(?:$|/) {
       include fastcgi_params;
       fastcgi_split_path_info ^(.+\.php)(/.*)$;
       try_files $fastcgi_script_name =404;
       fastcgi_param SCRIPT_FILENAME $document_root$fastcgi_script_name;
       fastcgi_param PATH_INFO $fastcgi_path_info;
       #Avoid sending the security headers twice
       fastcgi_param modHeadersAvailable true;
       fastcgi_param front_controller_active true;
       fastcgi_pass unix:/run/php/php7.4-fpm.sock;
       fastcgi_intercept_errors on;
       fastcgi_request_buffering off;
    }

    location ~ ^/(?:updater|ocs-provider)(?:$|/) {
       try_files $uri/ =404;
       index index.php;
    }

    # Adding the cache control header for js and css files
    # Make sure it is BELOW the PHP block
    location ~* \.(?:css|js)$ {
        try_files $uri /index.php$uri$is_args$args;
        add_header Cache-Control "public, max-age=7200";
        # Add headers to serve security related headers (It is intended to
        # have those duplicated to the ones above)
        add_header X-Content-Type-Options nosniff;
        add_header X-XSS-Protection "1; mode=block";
        add_header X-Robots-Tag none;
        add_header X-Download-Options noopen;
        add_header X-Permitted-Cross-Domain-Policies none;
        add_header Referrer-Policy no-referrer;
        # Optional: Don't log access to assets
        access_log off;
   }

   location ~* \.(?:svg|gif|png|html|ttf|woff|ico|jpg|jpeg)$ {
        try_files $uri /index.php$uri$is_args$args;
        # Optional: Don't log access to other assets
        access_log off;
   }
}
Save and close the file. (To save a file in Nano text editor, press Ctrl+O, then press Enter to confirm. To exit, press Ctrl+X.)
Then test Nginx configuration.
sudo nginx -t
If the test is successful, reload Nginx for the changes to take effect.
sudo systemctl reload nginx
Step 4: Install and Enable PHP Modules
Run the following commands to install PHP modules required or recommended by NextCloud.
sudo apt install imagemagick php-imagick php7.4-common php7.4-mysql php7.4-fpm php7.4-gd php7.4-json php7.4-curl php7.4-zip php7.4-xml php7.4-mbstring php7.4-bz2 php7.4-intl php7.4-bcmath php7.4-gmp
Step 5: Enable HTTPS
Now you can access the Nextcloud web install wizard in your web browser by entering the domain name for your Nextcloud installation.
nextcloud.example.com

If the web page can’t load, you probably need to open port 80 in firewall.
sudo iptables -I INPUT -p tcp --dport 80 -j ACCEPT
And port 443 as well.
sudo iptables -I INPUT -p tcp --dport 443 -j ACCEPT
Before entering any sensitive information, we should enable secure HTTPS connection on Nextcloud. We can obtain a free TLS certificate from Let’s Encrypt. Install Let’s Encrypt client (certbot) from Ubuntu 20.04 repository.
sudo apt install certbot python3-certbot-nginx
Python3-certbot-nginx is the Nginx plugin. Next, run the following command to obtain a free TLS certificate using the Nginx plugin.
sudo certbot --nginx --agree-tos --redirect --hsts --staple-ocsp --email [email protected] -d nextcloud.example.com
Where:
- –nginx: Use the Nginx authenticator and installer
- –agree-tos: Agree to Let’s Encrypt terms of service
- –redirect: Enforce HTTPS by adding 301 redirect.
- –hsts: Enable HTTP Strict Transport Security. This defends against SSL/TLS stripping attack.
- –staple-ocsp: Enable OCSP Stapling.
- –email: Email used for registration and recovery contact.
- -d flag is followed by a list of domain names, separated by comma. You can add up to 100 domain names.
You will be asked if you want to receive emails from EFF(Electronic Frontier Foundation). After choosing Y or N, your TLS certificate will be automatically obtained and configured for you, which is indicated by the message below.

I found that Certbot may not be able to add HSTS header in the Nginx config file for Nextcloud. If you would like to enable HSTS (HTTP Strict Transport Security), then edit the file.
sudo nano /etc/nginx/conf.d/nextcloud.conf
We can then add the following line in the SSL server block to enable HSTS header. (If it’s already there, then your configuration are fine.)
add_header Strict-Transport-Security "max-age=31536000" always;
Also, you can enable HTTP2 protocol by adding the option http2, which will speed up webpage loading.
listen 443 ssl http2; # managed by Certbot
Like below.

Save and close the file. Then text Nginx configurations.
sudo nginx -t
If the test is successful, reload Nginx for the change to take effect.
sudo systemctl reload nginx
The above configuration will get A+ score on SSL test.

Step 6: Finish the Installation in your Web Browser
Now you can access the Nextcloud web install wizard using HTTPS connection.
https://nextcloud.example.com
To complete the installation, you need to create an admin account, enter the path of Nextcloud data folder, enter database details you created in step 2. You can use the default localhost as host address, or you can enter localhost:3306, as MariaDB listens on port 3306.
The data folder is where users’ files are stored. For security, it’s best to place the data directory outside of Nextcloud webroot directory. So instead of storing users’ files under /usr/share/nginx/nextcloud/data/, we can change it to /usr/share/nginx/nextcloud-data. which can be created with the following command:
sudo mkdir /usr/share/nginx/nextcloud-data
Then make sure Nginx user (www-data) has write permission to the data directory.
sudo chown www-data:www-data /usr/share/nginx/nextcloud-data -R

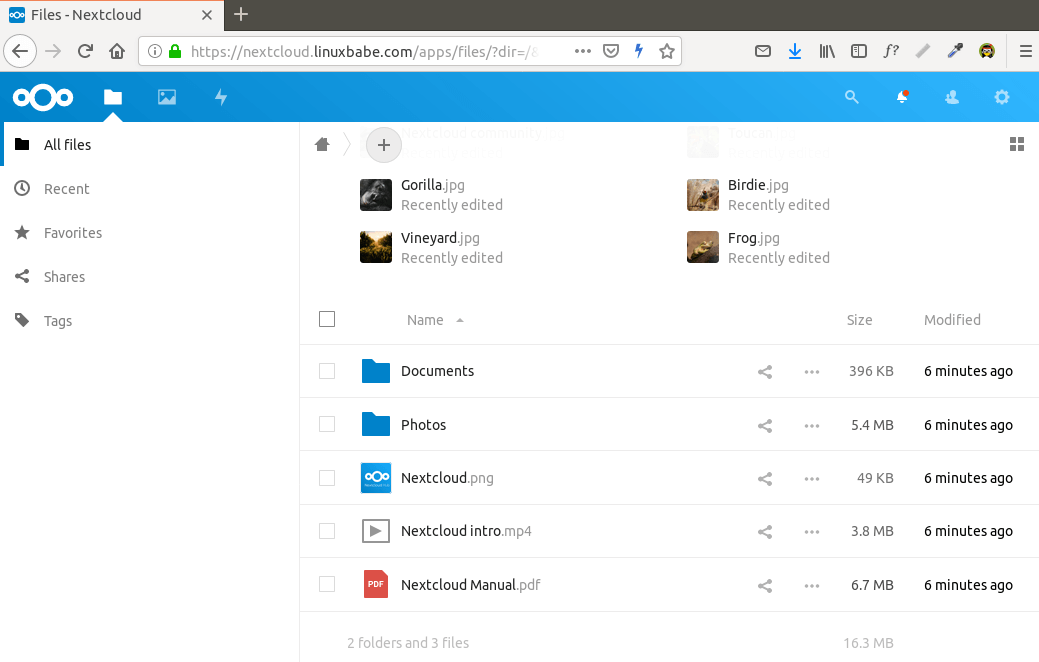
Click the Finish Setup button, you will see the Web interface of Nextcloud. Congrats! You can start using it as your private cloud storage.

How to Set up NextCloud Email Notification
If your NextCloud instance will be used by more than one person, it’s important that your NextCloud server can send transactional emails, such as password-resetting email. First, you should set an email address for your own account. Go to Settings -> Personal Info and set an email address for your account.

Then go to Settings -> Basic settings. You will find the email server settings. There are two send modes: sendmail and smtp. You can choose the sendmail mode if your NextCloud host has an SMTP server running.

If you would like to use an SMTP server running on another host, then choose smtp mode and enter the SMTP server address and login credentials like below. Choose STARTTLS for encryption.

For how to set up an email server, please check out the following tutorial. Note that I highly recommend running iRedMail mail server on a fresh clean OS. Installing iRedMail on an OS that has other web applications can fail, and likely break existing applications.
How to Reset Nextcloud User Password From Command Line
If you lost your admin account password, and you didn’t set up email delivery in Nextcloud, then you need to reset the password by running the following command on your server. Replace nextcloud_username with your real username.
sudo -u www-data php /usr/share/nginx/nextcloud/occ user:resetpassword nextcloud_username
There are also other commands you might find useful. List available commands with:
sudo -u www-data php /usr/share/nginx/nextcloud/occ
or
sudo -u www-data php /usr/share/nginx/nextcloud/console.php
How to Move the Data Directory
In case you need to move the NextCloud data directory, there are 4 steps to accomplish this. First, you need to use the cp command to copy the data directory to the new directory. For example, the mount point of my external hard drive is /media/linuxbabe/b43e4eea-9796-4ac6-9c48-2bcaa46353731. I create the new data directory on the external hard drive.
sudo mkdir /media/linuxbabe/b43e4eea-9796-4ac6-9c48-2bcaa46353731/nextcloud-data/
Then I copy the original data directory to the new data directory. -R flag means the copy operation is recursive.
sudo cp /usr/share/nginx/nextcloud-data/* /media/linuxbabe/b43e4eea-9796-4ac6-9c48-2bcaa46353731/nextcloud-data/ -R
You also need to copy the .ocdata file.
sudo cp /usr/share/nginx/nextcloud-data/.ocdata /media/linuxbabe/b43e4eea-9796-4ac6-9c48-2bcaa46353731/nextcloud-data/
Next, you need to set www-data (Nginx user) as the owner.
sudo chown www-data:www-data /media/linuxbabe/b43e4eea-9796-4ac6-9c48-2bcaa46353731/nextcloud-data/ -R
Lastly, you need to edit the config.php file.
sudo nano /usr/share/nginx/nextcloud/config/config.php
Find the following line and change the value of datadirectory.
'datadirectory' => '/usr/share/nginx/nextcloud-data',
Save and close the file. Reload NextCloud web page and you are done.
Step 7: Increase PHP Memory Limit
The default PHP memory limit is 128MB. NextCloud recommends 512MB for better performance. To change PHP memory limit, edit the php.ini file.
sudo nano /etc/php/7.4/fpm/php.ini
Find the following line. (line 409)
memory_limit = 128M
Change the value.
memory_limit = 512M
Save and close the file. Alternatively, you can run the following command to change the value without manually opening the file.
sudo sed -i 's/memory_limit = 128M/memory_limit = 512M/g' /etc/php/7.4/fpm/php.ini
Then reload PHP-FPM service for the changes to take effect.
sudo systemctl reload php7.4-fpm
Step 8: Set Up PHP to Properly Query System Environment Variables
Edit the www.conf file.
sudo nano /etc/php/7.4/fpm/pool.d/www.conf
Find the following line (line 396).
;clear_env = no
Remove the semicolon to uncomment this line.
clear_env = no
Save and close the file. Alternatively, you can run the following command to uncomment this line without manually opening the file.
sudo sed -i 's/;clear_env = no/clear_env = no/g' /etc/php/7.4/fpm/pool.d/www.conf
Then reload PHP-FPM service for the changes to take effect.
sudo systemctl reload php7.4-fpm
Step 9: Increase Upload File Size Limit
The default maximum upload file size limit set by Nginx is 1MB. To allow uploading large files to your NextCloud server, edit the Nginx configuration file for NextCloud.
sudo nano /etc/nginx/conf.d/nextcloud.conf
We have already set the maximum file size in this file, as indicated by
client_max_body_size 512M;
You can change it if you prefer, like 1G.
client_max_body_size 1024M;
Save and close the file. Then reload Nginx for the changes to take effect.
sudo systemctl reload nginx
PHP also sets a limit of upload file size. The default maximum file size for uploading is 2MB. To increase the upload size limit, edit the PHP configuration file.
sudo nano /etc/php/7.4/fpm/php.ini
Find the following line (line 846).
upload_max_filesize = 2M
Change the value like below:
upload_max_filesize = 1024M
Save and close the file. Alternatively, you can run the following command to change the value without manually opening the file.
sudo sed -i 's/upload_max_filesize = 2M/upload_max_filesize = 1024M/g' /etc/php/7.4/fpm/php.ini
Then restart PHP-FPM.
sudo systemctl restart php7.4-fpm
Step 10: Configure Redis Cache for NextCloud
If you go to your NextCloud settings -> overview page, you might see the following warning:
No memory cache has been configured. To enhance your performance please configure a memcache if available.
We will enable memory caching for nextCloud by using Redis. Run the following command to install Redis server from Ubuntu repository.
sudo apt install redis-server
You can check the version with:
redis-server -v
Sample output:
Redis server v=5.0.7 sha=00000000:0 malloc=jemalloc-5.2.1 bits=64 build=636cde3b5c7a3923
Now we can check if redis server is running.
systemctl status redis

Hint: If the above command didn’t quit immediately, you can press the Q key to gain back control of the terminal.
From the above screenshot, we can see that it’s running and auto-start is enabled. If for any reason it’s not running, execute the following command:
sudo systemctl start redis-server
And if auto-start at boot time is not enabled, you can use the following command to enable it:
sudo systemctl enable redis-server
In order to configure Redis as a cache for nextCloud, we need to install the PHP extension for interfacing with Redis.
sudo apt install php-redis
Check if the extension is enabled.
php --ri redis

We can see that Redis extension is enabled. If it’s not enabled, run the following command:
sudo phpenmod redis
Next, edit nextCloud configuration file.
sudo nano /usr/share/nginx/nextcloud/config/config.php
Add the following lines above the ending ); line.
'memcache.distributed' => '\OC\Memcache\Redis',
'memcache.local' => '\OC\Memcache\Redis',
'memcache.locking' => '\OC\Memcache\Redis',
'redis' => array(
     'host' => 'localhost',
     'port' => 6379,
     ),

Save and close the file. Then restart Nginx and PHP-FPM.
sudo systemctl restart nginx php7.4-fpm
Now go to NextCloud settings -> overview page again and refresh the web page, the warning about memory caching should be gone.
Adding Missing Indexes
If you see the following message in the NextCloud Settings -> Overview page,
The database is missing some indexes. Due to the fact that adding indexes on big tables could take some time they were not added automatically.
Then you need to manually add those indexes. Change to the Nextcloud webroot directory.
cd /usr/share/nginx/nextcloud/
Run the following command to add indexes to the Nextcloud database.
sudo -u www-data php occ db:add-missing-indices

Now if you refresh the NextCloud Settings -> Overview page, the warning about missing indexes should be gone.
Conversion to Big Int
If you see the following message in the NextCloud Settings -> Overview page,
Some columns in the database are missing a conversion to big int. Due to the fact that changing column types on big tables could take some time they were not changed automatically.
Then you need to manually change the column type. Change to the Nextcloud webroot directory.
cd /usr/share/nginx/nextcloud/
Change your Nextcloud into maintenance mode to prevent users from logging in and making changes.
sudo -u www-data php occ maintenance:mode --on
Then run the following command to change the column type.
sudo -u www-data php occ db:convert-filecache-bigint
Once it’s done, switch off the maintenance mode.
sudo -u www-data php occ maintenance:mode --off

Now if you refresh the NextCloud Settings -> Overview page, the warning about big int should be gone.
How to Install NextCloud Client on Ubuntu 20.04 Desktop
Run the following commands on Ubuntu 20.04 desktop to install the client from the default repository.
sudo apt install nextcloud-client
NextCloud Client on Ubuntu 20.04

Client software for macOS, Windows, Android and iOS can be found on the Nextcloud download page.
How to Enable OnlyOffice/Collabora Online
By default, Nextcloud ships with support for OnlyOffice, which an online office suite that allows you to edit your doc, ppt, xls files directly from NextCloud. We only need to install an app to use this feature. Go to Nextcloud Apps -> Office & Text. Find and enable the community document server app.

Now when you click the add button (+) in Nextcloud, you will be able to create Word, spreadsheet and presentation documents right from your Nextcloud server.


However, I found this app isn’t very reliable. And the community edition allows only 20 users at most. You need to purchase an enterprise edition if you have more than 20 users. There’s another open-source LibreOffice-based online office suite called Collabora Online that has the same functionality, but without the limitation on the number of users. You can read the following article to integrate it with Nextcloud.
Adding Local DNS Entry
It’s recommended to edit the /etc/hosts file on your Nextcloud server and add the following entry, so that Nextcloud itself won’t have to query the public DNS, which can improve the overall stability. If your Nextcloud server can’t resolve the nextcloud.example.com hostname, then you may encounter a 504 gateway time out error.
127.0.0.1 localhost nextcloud.example.com
An IP address in the /etc/hosts file can have multiple hostnames, so if you have other applications installed on the same box, you can also add other hostnames or sub-domains on the same line like this:
127.0.0.1 localhost focal ubuntu nextcloud.example.com collabora.example.com
Using Cron to Run Background Jobs
By default, Nextcloud uses AJAX to execute one task with each page load. You can use the more efficient system cron service to run background jobs. Go to Nextcloud Settings -> Basic Settings and select Cron.

Next, edit the www-data user’s crontab file.
sudo -u www-data crontab -e
Add the following line in this file, so the cron job will run every 5 minutes.
*/5 * * * * php7.4 -f /usr/share/nginx/nextcloud/cron.php
Save and close the file.
(Optional) Prevent Malicious Login Attempts
If your computer has a static public IP address, you can create an IP whitelist in the Nginx config file.
sudo nano /etc/nginx/conf.d/nextcloud.conf
Add the following lines in the SSL server block to restrict access to the /login URL, so only your IP address can access this URL. Replace 78.56.34.12 with your own IP address.
location ~* ^/login{
       try_files $uri /index.php;
       include fastcgi_params;
       fastcgi_split_path_info ^(.+\.php)(/.*)$;
       fastcgi_param SCRIPT_FILENAME $document_root$fastcgi_script_name;
       fastcgi_param PATH_INFO $fastcgi_path_info;
       #Avoid sending the security headers twice
       fastcgi_param modHeadersAvailable true;
       fastcgi_param front_controller_active true;
       fastcgi_pass unix:/run/php/php7.4-fpm.sock;
       fastcgi_intercept_errors on;
       fastcgi_request_buffering off;

       allow 78.56.34.12;
       deny all;
}
Save and close the file. Then test Nginx configuration.
sudo nginx -t
If the test is successful, reload Nginx for the changes to take effect.
sudo systemctl reload nginx
If you don’t have a static IP address on your home network, you can set up a VPN server in a data center.
Troubleshooting Tips
If you encounter errors, you can check one of the following log files to find out what’s wrong.
- Nginx error log:
/var/log/nginx/error.log - Nginx error log for the Nextcloud virtual host:
/var/log/nginx/nextcloud.error - Nextcloud application log:
/usr/share/nginx/nextcloud/data/nextcloud.log
For example, I once had an “Internal Server Error” on my Nextcloud instance and the /var/log/nginx/nextcloud.error file told me that
FastCGI sent in stderr: "PHP message: PHP Fatal error: Uncaught OC\HintException: [0]: Memcache \OC\Memcache\Redis not available for local cache (Is the matching PHP module installed and enabled?)
It turned out that because I used the ppa:ondrej/php PPA on my Ubuntu server, I also need to install php7.4-redis in addition to the php-redis package.
Upgrading Nextcloud
It’s important to keep your Nextcloud server up to date with the latest security and bug fixes. Read the tutorial below to learn how to upgrade Nextcloud.
Wrapping Up
I hope this tutorial helped you install NextCloud on Ubuntu 20.04 server with Nginx. As always, if you found this post useful, then subscribe to our free newsletter to get more tips and tricks. Take care 🙂


Hello,
Please help me.
command not work my computer :
sudo certbot –nginx –agree-tos –redirect –staple-ocsp –email [email protected] -d nextcloud.example.com
Get error message :
n unexpected error occurred:
There were too many requests of a given type :: Error creating new order :: too many certificates already issued for exact set of domains: corixcloud.asuscomm.com: see https://letsencrypt.org/docs/rate-limits/
Please see the logfiles in /var/log/letsencrypt for more details.
IMPORTANT NOTES:
– Your account credentials have been saved in your Certbot
configuration directory at /etc/letsencrypt. You should make a
secure backup of this folder now. This configuration directory will
also contain certificates and private keys obtained by Certbot so
making regular backups of this folder is ideal.
– We were unable to subscribe you the EFF mailing list. You can try
again later by visiting https://act.eff.org.
Thanks,
Roberto
As the error message indicates, you have obtained too many certificates for the same domain. You should use a different sub-domain for the nextcloud server.
Greetings
Yes, i have the same issue with certbot . i also have been reading this article to find a solution to access by LAN (Local Network), “trusted domains” ( https://help.nextcloud.com/t/nginx-reverse-proxy-what-to-write-in-nextclouds-config-php/9149/34 )
1) I only can have access to NextCloud using port 80 as http://localhost. However, Xginx is running fine in http://localhost:8081
2) I have been testing all Steps, Everything is Ok, Just only in Step 5 when we try to configure the HTTPS access or the Lan access become a headache.
I hope it have a solution, reading above i just figure out abour how’s Nginx controls NextCloud using a tunneling port.
Is it right?
Thanks,
Joseph
Please use a real domain name for your Nextcloud server, or you can’t get a trusted Let’s Encrypt certificate.
When I entered nextcloud.mydomain.com in the address bar of my browser, I got an error reading “The site can’t be reached.” What have I done wrong?
The reasons could be:
1.) Your DNS record is not propagated to the Internet yet.
2.) There’s a firewall that prevents access to TCP port 80 and 443.
Hello,
Thank you for the tutorial. By chance, because I made obviously a mistake with seeing only the ‘welcome’ page of nginx instead of Nextcloud, I found that there is a security alert, which you did not yet include in your config. Please see here more:
https://help.nextcloud.com/t/urgent-security-issue-in-nginx-php-fpm/62665
Thank you for the good tutorial!
Kind regards,
Markus
Thanks for pointing it out. The Nginx config is updated now.
Hello,
thank you for updating the config. Do you maybe have also a tutorial on how to use a self-signed certificate with nginx and nextcloud? I am somehow stuck on where to include the generated keys, and for being independent from any organisation I would prefer very much a self-signed certificate.
Thank you in either case for the flawless and easy to follow tutorial! Donation is on the way.
Kind regards,
Markus
There is a problem with 20.04 LTS regarding python3-certbot-nginx – see https://community.letsencrypt.org/t/ubuntu-20-04-any-tips-attributeerror-module-acme-challenges-has-no-attribute-tlssni01/115831
A tip from me:
If you want to install Nextcloud without purchasing a domain and you want to install it from a machine that has a desktop (not the same machine as you installed it on) through IP address you need to add the name to
c:\Windows\System32\drivers\etc\hosts
as
192.168.2.2 nextcloud-machine
or similar in /etc/hosts
otherwise the installed won’t load
Also Mysql 8.0 does not work with Nextcloud, it would be nice if they add support for in the future.
On Step 6, after I click “Finish setup”, the browser keeps loading for a long time and then I get a Nginx “504 Gatway time-out” error. I followed all the steps exactly as in this guide and I am using the same version of Ubuntu.
OK. I fixed it. I simply had to untick the box at the bottom that recommends the installation of additional apps.
I guess it was taking too long for the server to install them, hence the time-out.
Wow. This is the 5th tutorial on Nextcloud i’ve attempted. Yours is the ONLY one that covers everything AND worked flawlessly. Thank you so very much. Do you recommend enabling server-side encryption? Cheers.
I started out with setting up a Ubuntu 20.04 Server addition and then went on to your tutorial – https://www.linuxbabe.com/ubuntu/install-lemp-stack-ubuntu-20-04-server-desktop
– Now I am working through this tutorial and I am stuck at Step 3: Create a Nginx Config File for Nextcloud – server_name nextcloud.example.com; I would like to use a Domain name I purchased for my home use (not a public server) but I am not running a DNS name resolver and I don’t want to add the Domain name to each computers host file. I can get to Next cloud by typing in 192.168.1.x/nextcloud and it comes up fine. But I have nothing in my system that will point to my Domain name. To solve my problem do I need to install bind9 – https://www.linuxbabe.com/ubuntu/set-up-local-dns-resolver-ubuntu-20-04-bind9 or is there a smarter way to do this? FYI, this is not a public server but just a server for family members.
There are two methods I can think of:
1.) Run an internal DNS resolver with response policy zone (RPZ) capability.
2.) Use mDNS/DNS-SD protocol to automatically announce the hostname to local peers. On the Ubuntu server, you need to install
avahi-daemon, which is an open-source implementation of mDNS/DNS-SD protocol.Ubuntu can use mDNS (Multicast DNS) to announce its hostname to the local network and clients can access services on your Ubuntu box with that hostname. This hostname can always be resolved to the IP address of your Ubuntu box, even if the IP address changes. However, the clients in local network may still need to install a piece of software in order to utilise this protocol.
I am new to Linux and PHP. How does PHP know to run nextcloud.conf in the conf.d directory? I also noticed there is a defaiult.conf file there too. Which one is used?
Your question is not correct. It should be “How does Nginx know to run nextcloud.conf in the conf.d directory?”.
Then answer is because each virtual host (or server block) file in Nginx can have a
server_namedirective, so Nginx will match thehostHTTP header sent by web browsers with the virtual host file that has the same hostname.If Nginx can’t find a virtual host that has the same hostname, it will use the default virtual host.
I can’t find any linkage to the nextcloud.conf file. I access the site using https://mysite.com, yet somehow nginx knows to use the settings in nextcloud.conf. I don’t understand the server_name directive that you mentioned. The only server_name I am aware of is the one in nextcloud.conf but nginx surely can’t be reading the server_name from there.
“Nginx surely can’t be reading the server_name from there.”
What makes you think that?
I may well have misunderstood but from what I gather, nginx determines which conf file to use based on server_name. So to determine if nextcloud.conf is to be used, it looks at the server_name setting in nextcloud.conf. This is surely wrong because it means any .conf file would be valid. Furthermore, if there are several .conf files, does it look at the server_name for each .conf file?
What I am getting at is once I enter www.mysite.com in the browser, the nginx server can’t possibly know that nextcloud.conf is to be used unless something else is telling nginx to use it. The url www.mysite.com has absolute no reference to nextcloud. I thought maybe default.conf would have a reference to nextcloud.conf but no it does not. So, I am completely confused as to how entering www.mysite.com enables nextcloud.conf to be used by nginx.
Nginx can load every .conf file in /etc/nginx/conf.d/ directory. Every .conf file is valid, as long as there’s no syntax error in the files. Each .conf file can have different server_name. That’s called virtual hosting.
Don’t be certain about something you are not familiar with 🙂
I wasn’t being certain about something I didn’t know. Did I not state “I am completely confused”? I also stated that I am new to nginx. Now you mentioned that every conf file is valid, it is now clear. Your previous comment was regarding a server_name to perform the matchup, which is typical of equivocal Linux responses I see scattered over the internet and so unlike your article, which does go to great lengths to explain each command.
You did say “This is surely wrong”.
Oh, by the way, thanks for such an excellent article. I learned so much from it.
Hello, for some reason syntax in creating user had to be like this, copy paste didn’t work.
create user ‘nextclouduser’@’localhost’ identified by ‘password’;
Thanks for great tutorial!
Amazing. Best instructions i have found for installing Nextcloud!!!!!
Thank you Xiao
hey this is the most user friendly install guide for Nextcloud that i have found… well done very clear and precise…
i do have one question however could you amend it a bit to include the setup for ipv6 as well please…
The Nginx configuration in the article enables IPv6 support, so if your server has a public IPv6 address and you create an AAAA record for your Nextcloud hostname, you will be able to access your Nextcloud via IPv6.
Thanks Xioa for the wonderful article, one question I have:
If I need to install nextcloud instance in a subfolder on my domain for example https://example.com/nextcloud, what is the procedure to be followed,
what changes are required in nginx server module, please help.
Absolutely perfect tutorial. Thank you for that.
Great tutorial.
Thanks mate!
Thank you for these tutorials, these are just unbeatable. Everything works well on Intel NUC.
I’m using Let’s encrypt and have set up my nextcloud on https://nc.foo.bar with dynamic IP and would like to refer to it from another domain https://nc.foo.faa using CNAME nc.foo.bar, because foo.faa domain does not accept dynamic IP updates. Original certificate is valid only for nc.foo.bar naturally. Is it just possible to get another certificate
sudo certbot –nginx –agree-tos –redirect –hsts –staple-ocsp –email [email protected] -d nc.foo.faa
or do I need to change something in Nginx conf, or is this scenario possible at all? I didn’t want just to test it because everything works so seamlessly.
Thank you very much!
I think it’s viable. You need to create another Nginx virtual host file for nc.foo.faa.
Add the Nginx configurations in step 3. You also need to edit the
config.phpfile.Add the second domain to the trusted domain list.
  'trusted_domains' =>
  array (
    0 => 'nextcloud',
    1 => 'nc.foo.bar',
    2 => 'nc.foo.faa',
  ),
Restart Ngnix and PHP-FPM.
After creating the CNAME record, run the following command to obtain a TLS certificate.
If it works, great. If it doesn’t work, it won’t interfere with your first Nextcloud domain.
Thank you, I tried but didn’t succeed yet. It might be the issue with my foo.bar DNS configuration, it seems to pick up another A name aka co.foo.bar (same IP as nc.foo.bar) and tells that certificate is not valid because it is for co.foo.bar.
Ideal tutorial !
I have followed the guide, but when I access the subdomain for nextcloud I can’t and it appears Unable to connect
Firefox can’t establish a connection to the server at drive.netscom.id
even though I have created a DNS A record, my topology is WAN – Mikrotik (Public IP) -UbuntuServer (VMWare).
is there any solution?
Installation went fine and everything works good, but: I have tried to sort out the extremely slow transfer speed problem via browser. I followed this tutorial, and actually done it couple of times, this is absolutely great and easy to follow.
In Windows and Linux from Chrome, Chromium, Firefox upload speed is 150-200 Bytes per second, not kilo, mega or gigabytes, but 150-200 Bytes/second. Installing Linux client and rsync between machine local folder to Nextcloud folder: 24,7 Mbit/s. Typical download from browser around 2-4 Mbit/s from Nextcloud. In admin view, there are no erros, redis set etc. Webinterface of Nextcloud is normal, not especially slow or fast.
There have been some others who have faced this issue during the years and a recent one from another Nextcloud LAMP stack installation. I have also tried to ask from Nextcloud community but my personal skills are limited to follow too general hints where to troubleshoot next. (https://help.nextcloud.com/t/nextcloud-18-transfer-speed-slow/77488/12?u=infopal)
20.0.7 Ubuntu LTS 20.04 Nginx (laptop connected directly by GE cable to server) brand new fresh installation on Intel NUC 8G RAM, 1T SSD, only one user and no other services running on the same NUC.
Thank you in advance.
web server is not properly set up to resolve “/.well-known/webfinger”.
web server is not properly set up to resolve “/.well-known/nodeinfo”.
how do you fix this
After running certbot I ended up with this:
Which, as per your instructions, I changed to this:
Do I need to do anything to the ipv6 line, like add ‘http2’ somewhere? If so, where at, after the ‘ssl’ or after the ‘ipv6only=on’?
Thanks for a wonderful cookbook style tut 🙂
Thank you for this excellent tutorial. I am encountering an issue: I have already followed your tutorial to setup an iRedMail server, and am now trying to add NextCloud on to the same virtual server. Everything seems to have gone smoothly, but when I go to nextcloud.myserver.com it automatically redirects me to nextcloud.myserver.com/mail and loads the RoundCube login page for my iRedMail, instead of bringing me to the NextCloud page to finish the setup. Is there an easy fix to this redirection? Thank you again for your tutorials.
Edit
/etc/nginx/nginx.conffile and add the following line in thehttp {..}section.Hello. Thank you very much again for this great tutorial. However, I have the same issue when trying to connect to nexctloud.mydomain.com, it redirects me to the roundcube login page nextcloud.mydomain.com/mail (I have also followed your tutorial on setting a mail server with Iredmail on debian 11). Even after editing /etc/nginx/nginx.conf same result. I am on Debian 11, so maybe I am missing something? Thank you for your help.
Remember to restart Nginx.
Hello,
I have an error:
Your web Server is not properly set up to resolve “/.well-known/webfinger”. Fürther information can be found in the documentation.
Your web Server is not properly set up to resolve “/.well-known/nodeinfo”. Fürther information can be found in the documentation.
The setting is missing in the nginx server:
web server is not properly set up to resolve “/.well-known/webfinger”.
web server is not properly set up to resolve “/.well-known/nodeinfo”.
I tried to fix but could not. That was my approach:
https://github.com/nextcloud/documentation/issues/6157
anyone have a solution?
Thanks for help
Did you ever figure this out? I’m getting the same error and don’t know what it means or how to fix it. Thanks.
Hi 🙂
First, I will say thanks for the nice guide. I have used it many times before. I also have the same problem as the comment over this
I get this warning in my control panel! (I have also uploaded a picture)
You can see my config here: https://pastebin.com/6JpqwGc0
Please help.
Regards
Thomas
Hi Thomas, this issue was solved for me from this github issue.
You just have to erase or comment out these two lines and the error disappears:
error_page 403 /core/templates/403.php;
error_page 404 /core/templates/404.php;
Can you post a link to “this github issue”? also, could you explain what exactly this does and why linuxbabe told us to put in those lines just so we could comment them out? Just trying to understand what I’m doing here. Thanks.
I have a Jellyfin server in the same server and I use nginx reserve reverse proxy to access it. But it always go to nextcloud, even though I deleted the jellyfin virtual host config. The nextcloud virtual host config is as same as the tutorial.
I solved the problem
Hi Xiao,
How to get rid of this warning on NC 21.0.1 ?
Your web server is not properly set up to resolve “/.well-known/webfinger”. Further information can be found in the documentation.
Your web server is not properly set up to resolve “/.well-known/nodeinfo”. Further information can be found in the documentation.
I follow the documentation for nginx and add those 2 lines but the warning won’t go away.
Thanks for the tutorial.
Unfortunately I always get the message ” – Unable to install the certificate”
Can you give me a hint?
Letsencryptlog:
File “/usr/lib/python3/dist-packages/certbot_nginx/configurator.py”, line 428, in _get_default_vhost
raise errors.MisconfigurationError(“Could not automatically find a matching server”
certbot.errors.MisconfigurationError: Could not automatically find a matching server block for *myserver.dns*. Set the `server_name` directive to use the Nginx installer.
You don’t have a Nginx virtual host file that use
server_name myserver.dns;.Hint: You can’t obtain Let’s Encrypt TLS certificate if you don’t have a public registered domain name.
I have a virtual host file as mentioned in the tutorial (nextcloud.conf) and also have the server_name with a dynamic dns pointing to my ip.
I am guessing that Nginx doesn’t know about it.
It actually was a conflict with the already existing default.conf from the LEMP Stack tutorial
So I deleted the default and reloaded nginx.
Thanks
Great Article! Nicely written!
While having an in-house NextCloud is great — even for a small/home office environment, I find it useful to have an external (in the cloud) NextCloud account to use as backing store for my in-house server. In addition, it allows my mobile devices to use that store regardless of ability to reach into the in-house LAN.
Consider an article that reviews available NextCloud server vendors.
Thank you in advance,
~~~ 0;-Dan
Thanks very much for your detailed tutorial. I followed your instructions and Nextcloud works great on my VPS.
Hi,
thanks for this wonderful tutorial. I started using them while making my first steps in the Linux-world. It usually all works fine, but in your step 6, when I want to finish the installation in the web browser, I keep getting the error that mysql name and password are invalid. I even added a new user in mysql, granted all privileges, still won’t work.
…now, since I am such a noob, I guess I have a fundamental flaw somewhere.. any idea?
Thanks in advance and best regards from Germany
Great article! One more thing: crontab will not work without installing php-apcu and enable it with apc.enable_cli=1
See this:
https://help.nextcloud.com/t/cron-not-running-in-nc-21-0-3/119415/3
Im stuck with not being able to create DNS A record how do i go about doing this? i can’t reach to nextcloud login i just get
DNS_PROBE_FINISHED_NXDOMAIN
I moved forward with steps 4 & 5 but not sure how to proceed
when i try to run the cert box command i get this:
– The following errors were reported by the server:
Domain: nextcloud.athenaxcloud.xyz
Type: dns
Detail: DNS problem: NXDOMAIN looking up A for
nextcloud.athenaxcloud.xyz – check that a DNS record exists for
this domain
in step 3 how do I go about this part?
Don’t forget to create DNS A record for this sub-domain in your DNS zone editor.
This is my first time setting up something like this. Thanks for any help: 🙂
Read this article: How to Create DNS Records in NameCheap
A very neat tutorial, yet I would add some recommendations, as my team and me are in the Nextcloud developer community since the ownCloud times:
1. You really do not want to put the Nextcloud directory in
, but to
or at least to
2. Save your time of optimising MariaDB to perform well with Nextcloud on something better: Deploy PostgreSQL.
3. When you are connecting to localhost anyway, you better close the
ports and rather connect to it via UNIX socket
.
4. You should also connect to your Postgres via UNIX socket:
– better security and faster than via TCP/IP.
Yes, PostgreSQL is indeed faster. I had directories with lots of files and the default MariaDB database server is slow processing the requests.
To switch from MariaDB to PostgreSQL, follow these steps.
Step 1: Install Postgresql
PostgreSQL and MariaDB can run on the same server. You don’t need to remove MariaDB.
Step 2: Install PostgreSQL PHP module
Step 3: Create Database for NextCloud in PostgreSQL
Log into PostgreSQL as the postgres user.
Create the nextcloud database
Create a user.
Grant permissions to the database user.
Press
Ctrl+Dto log out of PostgreSQL console.Run the following command to test if you can log in to PostgreSQL as nextclouduser.
Step 4: Start the Migration.
Once it’s done, go to Nextcloud web interface
settings->System, scroll down and you will find that Nextcloud is now using PostgreSQL.Hi there!
Great tutorial so far, except for those new to DNS, I’m stuck with adding my A record.
I’ve read through your How to Guide for adding DNS records in NameCheap, however, my NextCloud web portal does not resolve. Perhaps in NextCloud config I only need to add my domain and not with the NextCloud prefix? (I had input nextcloud.foo.ca instead of perhaps foo.ca)
Anyways, hope you can help.
-Applesauce
Thanks, this is the best tutorial I have found.
Everything has worked perfectly except the part where I want to move my nextcloud-data folder.
I’m trying to copy to a raid array sitting on /mnt/md0/nextcloud-data but if I understand the error, Linux cannot find the folder but it’s clearly there.
I’m using Linux Mint 20.3 Cinnamon – hopefully you spot my error – thanks.
second time i’m following this tutorial, and frankly, thank you man. It’s very well written, extremely clear, and with tons of additional infos helping us learn. Keep up the good job, where can we donate ? 🙂
Hi Piti.
For doantion information, please check this page: https://www.linuxbabe.com/donation
Why do you put your web files in /usr/share ? that’s just wrong.
Nginx’s default web root folder is
/usr/share/nginx/html/.Convince Nginx to change it.
Followed your awesome tutorial (after trying many others and starting from scratch again).
All went very well and I could login into https://cloud.mydomain.com and got the initial setup page.
However, after clicking install I am redirected to https://cloud.mydomain.com/index.php/login and this page is a 404 Not Found Nginx 1.18.0
I have been searching all day and not coming up with a solution. Hope you can help.
I have this working for a while now and its just awesome (I have used the apache2 version).
What I want to do next is run the nginx reverse proxy on a separate machine, it would be a lcx container with nginx installed which routes traffic to a different a VM depending on the subdomain used, i.e. nextcloud.mydomain.com goes to the nextcloud VM and homeassistant.mydomain.com goes to the home assistant vm).
I’m struggling to get the nginx nextcloud config for this scenraio correct any help would be apricated?
This question has been asked by FOUR different USERS (I Allen. Tempper, Thomas, and Jerry) and you still have yet to answer it. I know you are a busy guy, but i’m hoping this post encourages you to kill 4 birds with one stone, so I am going to ask it again in hopes that you will reply with a real answer/solution.
In the nextcloud admin overview page, I am getting the following errors:
I have looked at the documentation and just can’t figure this one out. What exactly does this mean and how do I fix this? Thanks!
You are the best, always save us.