How to Install Jellyfin Media Server on Ubuntu 22.04/20.04 Server/Desktop
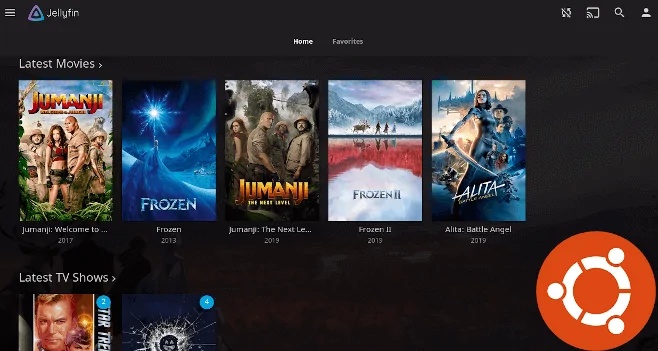
This tutorial will be showing you how to install Jellyfin media server on Ubuntu 22.04/20.04 LTS server/desktop. Jellyfin is a free, open-source application that allows you to organize your movies, TV shows, music and photos in one beautiful interface and stream those media files on your PC, tablet, phone, TV, Roku, etc on the network or over the Internet. Jellyfin can be installed on Linux, MacOS and Windows.
Jellyfin Features
Jellyfin is a fork from the Emby media server. It packs a lot of the same features as Plex and Emby.
- Unlike Plex or Emby, Jellyfin is 100% free and open-source. No ads. No playback limit on mobile apps. (Though the iOS app can’t play videos in the background.)
- Watch Live TV and set automatic recordings to expand your library.
- Automatically fetch artwork, metadata from TheTVDB, TheMovieDB, The OpenMovie Database and Rotten Tomatoes.
- Supports DLNA.
- Optional plugins can be installed to provide additional features.
- Supports hardware acceleration of video encoding/decoding using FFMpeg.
- And more.
Install Jellyfin Media Server on Ubuntu 22.04/20.04
Jellyfin isn’t included in the default Ubuntu repository, but it has its own repository. Run the following command to add Jellyfin repository to your Ubuntu system.
echo "deb [signed-by=/etc/apt/keyrings/jeyllyfin_team.gpg.key arch=$( dpkg --print-architecture )] https://repo.jellyfin.org/ubuntu $(lsb_release -cs) main" | sudo tee /etc/apt/sources.list.d/jellyfin.list
Next, run the following command to import the Jeffyfin GPG key to Ubuntu system so that APT can verify package integrity during installation.
wget --quiet -O - https://repo.jellyfin.org/jellyfin_team.gpg.key | sudo tee /etc/apt/keyrings/jeyllyfin_team.gpg.key
And because this repository uses HTTPS connection, we also need to install apt-transport-https and ca-certificates package.
sudo apt install apt-transport-https ca-certificates
Finally, update the package index on your Ubuntu system and install Jellyfin.
sudo apt update

sudo apt install jellyfin
This command will also install 3 other packages as dependencies:
jellyfin-ffmpeg: for video transcoding.jellyfin-server: the back end server.jellyfin-web: the front end web interface.
Now Jellyfin media server is installed, we can check its status with:
systemctl status jellyfin
As you can see, it’s running on my Ubuntu 22.04/20.04 system. (Press q key to take back control of the terminal.)

If Jellyfin media server isn’t running, you can start it with:
sudo systemctl start jellyfin
Jellyfin Media Server Initial Setup
The web-based management interface is available at port 8096. You can access Jellyfin web interface via the following URL.
http://127.0.0.1:8096
or
http://127.0.0.1:8096/web
If you installed Jellyfin on a remote Ubuntu server, you need to set up a reverse proxy with Nginx or Apache in order to access the web UI, which is explained later in this tutorial.
The first step is to choose your preferred language.

On the next screen, create a user account.

Now you can add libraries. Click Add Media Library button.

Select a content type (movies, music, tv shows, etc) and display name.

Then click the Plus (+) button to select a folder of the content.

Note that the jellyfin user needs to have read and execute permission on your media directories. For example, my 2T external hard drive is mounted under /media/linuxbabe/ , which is owned by root. Users not in group root can’t access it, so I run the following command to give user jellyfin read and execute permission. (I do not recommend changing ownership with chown or chgrp command. Using the setfacl command will suffice.)
sudo setfacl -m u:jellyfin:rx /media/linuxbabe/
You may also need to assign permission on individual media directories like below.
sudo setfacl -m u:jellyfin:rx /media/linuxbabe/directory-name
It can be tempting to add the recursive flag (-R), which gives jellyfin read and execute permission on every file and sub-directory on the drive.
sudo setfacl -R -m u:jellyfin:rx /media/linuxbabe/
If your external hard drive is only used for storing media files, then you can do so, but if you have sensitive files on the external hard drive, don’t do it.
Once you finish adding your media folders, you can configure the library settings. Choose your language, country, etc.

Click Ok and Next button. You can always add more libraries later. The next step allows you to choose if remote access will be enabled. I don’t recommend enabling the native remote access method, because it doesn’t provide HTTPS encryption, so untick both checkboxes. If you need remote access, please read how to set up reverse proxy later in this article.

Click Next and Finish button. Finally, log into your Jellyfin account.
Redo the Initial Setup
If you made a mistake in the initial setup, you can start it over. First, edit the Jellyfin configuration file.
sudo nano /etc/jellyfin/system.xml
Change
<IsStartupWizardCompleted>true</IsStartupWizardCompleted>
to
<IsStartupWizardCompleted>false</IsStartupWizardCompleted>
Save and close the file. Then restart Jellyfin.
sudo systemctl restart jellyfin
Now visit localhost:8096/web and you will see the setup wizard again.
Where to Download Movie and TV Shows
- Use a torrenting client like Deluge.
- Learn how to download from Usenet.
Advantages of Usenet
- It gives you better privacy because others can’t see what you are downloading.
- Superfast download speed.
- Files on Usenet are usually kept much longer than torrent files. For example, Newsdemon stores files for 4430 days (more than 12 years), so you can download old content at a very fast speed.
Setting Up Reverse Proxy
Since it listens on 127.0.0.1:8096, Jellyfin Web interface is only available to connections from the same computer. To be able to access the Jellyfin Web interface from a remote computer, we can set up a reverse proxy for Jellyfin with Nginx or Apache.
Nginx
Nginx is a very popular web server and reverse proxy. If you prefer to use Nginx, run the following command to install it.
sudo apt install nginx
Then create a server block file for Jellyfin.
sudo nano /etc/nginx/conf.d/jellyfin.conf
Add the following content to this file. Replace jellyfin.example.com with your own domain name. You should also create DNS A record for this sub-domain. If you don’t have a real domain name, I recommend going to NameCheap to buy one. The price is low and they give whois privacy protection free for life.
server {
      listen 80;
      listen [::]:80;
      server_name jellyfin.example.com;

      access_log /var/log/nginx/jellyfin.access;
      error_log /var/log/nginx/jellyfin.error;

      set $jellyfin 127.0.0.1;

      location / {
          proxy_pass http://127.0.0.1:8096;
          proxy_set_header Host $host;
          proxy_set_header X-Real-IP $remote_addr;

          proxy_set_header X-Forwarded-For $proxy_add_x_forwarded_for;
          proxy_set_header X-Forwarded-Proto $scheme;
          proxy_set_header X-Forwarded-Protocol $scheme;
          proxy_set_header X-Forwarded-Host $http_host;

          # Disable buffering when the nginx proxy gets very resource heavy upon streaming
          proxy_buffering off;
      }

      # location block for /web - This is purely for aesthetics so /web/#!/ works instead of having to go to /web/index.html/#!/
      location ~ ^/web/$ {
          # Proxy main Jellyfin traffic
          proxy_pass http://$jellyfin:8096/web/index.html;
          proxy_set_header Host $host;
          proxy_set_header X-Real-IP $remote_addr;
          proxy_set_header X-Forwarded-For $proxy_add_x_forwarded_for;
          proxy_set_header X-Forwarded-Proto $scheme;
          proxy_set_header X-Forwarded-Protocol $scheme;
          proxy_set_header X-Forwarded-Host $http_host;
      }

      location /socket {
          # Proxy Jellyfin Websockets traffic
          proxy_pass http://$127.0.0.1:8096;
          proxy_http_version 1.1;
          proxy_set_header Upgrade $http_upgrade;
          proxy_set_header Connection "upgrade";
          proxy_set_header Host $host;
          proxy_set_header X-Real-IP $remote_addr;
          proxy_set_header X-Forwarded-For $proxy_add_x_forwarded_for;
          proxy_set_header X-Forwarded-Proto $scheme;
          proxy_set_header X-Forwarded-Protocol $scheme;
          proxy_set_header X-Forwarded-Host $http_host;
      }

        # Security / XSS Mitigation Headers
        add_header X-Frame-Options "SAMEORIGIN";
        add_header X-XSS-Protection "1; mode=block";
        add_header X-Content-Type-Options "nosniff";

}
Save and close this file. Then test Nginx configuration.
sudo nginx -t
If the test is successful, reload Nginx for the change to take effect.
sudo systemctl reload nginx
Now you can access Jellyfin media server via jellyfin.example.com.
Apache
If you prefer Apache over Nginx, then install Apache web server by using the following command.
sudo apt install apache2
To use Apache as a reverse proxy, we need to enable the proxy modules and the header module.
sudo a2enmod proxy proxy_http headers proxy_wstunnel
Then create a virtual host file for Jellyfin.
sudo nano /etc/apache2/sites-available/jellyfin.conf
Put the following configurations into the file. Replace jellyfin.example.com with your actual domain name. Don’t forget to create DNS A record for this sub-domain. If you don’t have a real domain name, I recommend going to NameCheap to buy one. The price is low and they give whois privacy protection free for life.
<VirtualHost *:80>
   ServerName jellyfin.example.com
   ErrorDocument 404 /404.html

   #HTTP proxy
   ProxyPass / http://localhost:8096/
   ProxyPassReverse / http://localhost:8096/

   #Websocket proxy
   SSLProxyEngine on
   <Location /:/websockets/notifications>
        ProxyPass wss://localhost:8096/:/websockets/notifications
        ProxyPassReverse wss://localhost:8096/:/websockets/notifications
   </Location>

   Header always unset X-Frame-Options
</VirtualHost>
Save and close the file. Then enable this virtual host.
sudo a2ensite jellyfin.conf
Restart Apache
sudo systemctl restart apache2
Now you can access Jellyfin media server using the domain name jellyfin.example.com.
How to Enable HTTPS
To encrypt the HTTP traffic when you visit Jellyfin server from outside, we can enable HTTPS by installing a free TLS certificate issued from Let’s Encrypt. Run the following command to install Let’s Encrypt client (certbot) on Ubuntu 22.04/20.04.
sudo apt install certbot
If you use Nginx, then you also need to install the Certbot Nginx plugin.
sudo apt install python3-certbot-nginx
Next, run the following command to obtain and install TLS certificate.
sudo certbot --nginx --agree-tos --redirect --hsts --staple-ocsp --email [email protected] -d jellyfin.example.com
If you use Apache, then you need to install the Certbot Apache plugin.
sudo apt install python3-certbot-apache
Next, run the following command to obtain and install TLS certificate.
sudo certbot --apache --agree-tos --redirect --hsts --staple-ocsp --email [email protected] -d jellyfin.example.com
Where:
--nginx: Use the nginx plugin.--apache: Use the Apache plugin.--agree-tos: Agree to terms of service.--redirect: Force HTTPS by 301 redirect.--hsts: Add the Strict-Transport-Security header to every HTTP response. Forcing browser to always use TLS for the domain. Defends against SSL/TLS Stripping.--staple-ocsp: Enables OCSP Stapling. A valid OCSP response is stapled to the certificate that the server offers during TLS.
The certificate should now be obtained and automatically installed.

And you can access Jellyfin web interface via HTTPS: https://jellyfin.example.com.

How to Upgrade Jellyfin on Ubuntu 22.04/20.04
When a new version of Jellyfin media server comes out, you can upgrade it by executing the following commands.
sudo apt update

sudo apt upgrade
Then restart Jellyfin.
sudo systemctl restart jellyfin
Troubleshooting Tips
Error Sending Socket Message
If your Ubuntu server runs WireGuard VPN, you might see the following error in Jellyfin log (sudo journalctl -eu jellyfin).
[ERR] Error sending socket message from 10.0.0.102 to 239.255.255.250:1900
System.Net.Sockets.SocketException (0xFFFFFFFF): Bad value for ai_flags
This error means that message can’t be sent from your WireGuard interface to 239.255.255.250, which is the SSDP (Simple Service Discovery Protocol) multicast address. This is due to your WireGuard interface is not allowed to reach the IP address.
To solve this problem, edit your WireGuard interface configuration file.
sudo nano /etc/wireguard/your-interface.conf
Find the AllowedIPs parameter. Mine is like below.
AllowedIPs = 10.0.0.0/8
As you can see, the VPN client is allowed to connect to the 10.0.0.0/8 network only. Now add the 239.255.255.250 address.
AllowedIPs = 10.0.0.0/8, 239.255.255.250
Save and close the file. Restart WireGuard.
sudo systemctl restart wg-quick@your-interface
Restart Jellyfin.
sudo systemctl restart jellyfin
Check the Jellyfin log (sudo journalctl -eu jellyfin) again. The above error should be gone.
Invalid Signature
If you see the following error when running sudo apt update command,
The following signatures were invalid: EXPKEYSIG 49023CD01DE21A7B Jellyfin Team <[email protected]>
you need to re-import the Jellyfin public key with the following command.
wget --quiet -O - https://repo.jellyfin.org/jellyfin_team.gpg.key | sudo tee /etc/apt/keyrings/jeyllyfin_team.gpg.key
Wrapping Up
I hope this tutorial helped you install Jellyfin media server on Ubuntu 22.04/20.04. As always, if you found this post useful, then subscribe to our free newsletter to get more tips and tricks. Take care 🙂


Hi,
It’s not possible to use the setfacl command on my 1 To external drive SSD ; I get an error message “Operation not supported”. Do you have any clue on how I could fix that issue ?
Thanks
Freddy
I have formated my external drive and it works now
hello Linuxbabe
another amazing guide. i might use the wireguard set up later on. better security!
i am wondering, what is the best way to idle down my external HDD?
i am running jellyfin on ubuntu and nginx.
Thank you for the great instructions.
What do you mean by “idle down external HDD”? Make it stop when it’s not being used?
Yes, make it stop when it is not being used.
1 year later i have finally set-up Wireguard.
I highly suggest you follow the LinuxBabe instructions below.
This guide is really amazing, thanks for taking the time to put it together. It worked first time through! In the
Admin Dash>Advanced>Networkingthere are encryption options that can be set. I presume that it is unnecessary to change these because that configuration was done in the nginx conf.d file. Correct?Thanks again
Yes. If HTTPS is already enabled in Nginx, you don’t need to enable it again in the Jellyfind dashboard.
for some reason im not able to understand whenever i try to install jellfin with
**sudo apt install jellyfin**
command my ubuntu returns me this error
**jellyfin-ffmpeg : Depends: libx264-155 but it is not installable
Depends: libx265-179 (>= 3.2) but it is not installable**
and jellyfin doesnt get installed. im on ubuntu 20.10 if that matters. what might be the problem?
This repository currently supports Ubuntu 20.04, 18.04 and 16.04.
Update [2022]: Jellyfin works on Ubuntu 22.04 now.
Thanks for your work.
It was very useful and now i use jellyfin with ubuntu 20.04 on my pi4.
I have a problem when i copy files from my pc (win10) to my hdd (ext4) on the pi.
i use samba to move files.
Jellyfin tells me permission denied (journal log) when i try to see the movie. I can see the file in the jellyfin libray but impossible to read it with jellyfin (i can read it with vlc or from win 10 with samba share)…
any idea?
Maybe it has to do with the permissions you’ve set on the folder that contains the media? If you scroll up in the how-to you’ll see how to set the permissions so that Jellyfin can read the files. I’m no expert in Samba though, might be something else
Hi, while installing the software on the server I encountered an error in the last step of the configuration. The problem is related to the connection to the server. I am trying to enter ip address + port, ip address alone, 127.0.0.1:8096, localhost etc. – nothing works. I also tried typing the web domain after configuring the nginx server, but it doesn’t work either. I keep getting this message: “Connection to the selected server is now impossible. Please make sure it is running and try again.”. What could be the problem ? I will also add that I opened port 8096 for connections.
Is there a way to run jellyfin as a system service in Ubuntu 20.04
sudo systemctl start jellyfin
This was a wonderful guide. My only issue now is that my media resides on a Synology NAS. I’ve got the smb share mounted in Ubuntu, but I can’t figure out how to get Jellyfin to see the smb mount. Any advice would be appreciated.
thanks!
I feel a bit lost on creating a reverse proxy for Jellyfin. I went to namecheap and purchased a cheap domain name. I went into the settings and created a DNS a record. I don’t
actually know what I’m doing to be honest to really don’t even know what to enter into the fields or which IP to use Honestly, I wish someone would explain it to me like I’m
5 years old because I am stuck on this section. I’ve actually spent a few days on it and gave up.
I don’t know what goes where in regards to namecheap dns a record. I can access my Jellyfin web interface with my Ubuntu 20.04 server IP address and the :8096 but
lost on reverse proxy set up. The namecheap management page is a little overwhelming to a noob and not very user friendly to be honest.
At namecheap set up an “A” record on jellyfin.domain.com pointing towards your server IP address.
Hello i am following this guide but I have issues with Apache. I cant manage to get the reverse proxy working. I got to the end of configuring apache but when I get in to my jellyfin.example.com link I get nothing. I need to use “jellyfin.example.com:8096” but thats only because I had turned on the access over the internet in the jellyfin server for http. Because of that I know my domain name is pointing to the correct IP (Home PC). I do not know what to do I have been searching for 2 days with no success. I have a dynamic IP so I will use a CNAME with my duckdns address but for testing and making it work I am puting my IP by hand. so on apache doing the sudo apache2ctl configtest I get a Syntax OK, Yes Apache is running
do i need to literally type jellyfin.domain.com or is this just an example url??? I gave up months ago and just now coming back to this project.
Did you ever get this working for outside jellyfin access via https? I gave up and just used at the house. Read countless hard to follow threads on reddit and jellyfin. No dice for me. It just never clicked for me. I kinda of regret installing Ubuntu Server and may install regular Ubuntu. Maybe a GUI would make it easier because the command line terminal has been a nightmare for me with jellyfin. I just don’t get it and it’s been 8 months.
I just do NOT understand the reverse proxy thing. I’ve watched a few videos but they always get far too technical. I got to reddit and there are pages and pages of threads but always screenshots of terminal code. I just wish I could download something and be done. Why is this so hard to accomplish???? I totally admit this is me but OMG this is frustrating.
If you are a total Linux beginner, it’s better to get familiar with Linux Desktop first. Use it as your daily driver for some time, then consider tinkering with Linux server.
Linux server requires you to understand basic concepts in computer networking, such as the DNS system (Root DNS servers, authoritative DNS servers, DNS resolvers, DNS zones), TCP/IP, etc.
I was not a computer science student, but I learned computer networking by myself at university, so I got into the Linux server world fairly easily.
You are using apt-key in this tutorial (which looks like an exact copy of another one online)..
This causes the ascii based key to be inserted…which apt-key cannot process (because GPG is binary).
Please update this part of your instruction. The repo will not be pulled in by apt when you follow your existing procedure.
[as of 2022.08]
Please do not blindly accuse me of copying other tutorials online.
In fact, many other websites copy my tutorials.
As you can see from the comment section, this tutorial was originally published two years ago.
How do you find out if a website is copying another website? You can use the Google Cache or The Wayback Machine to find the original publish date of a web page and compare it to the date of the other web page.
You are wrong.
The repo will be pulled by apt. It’s just that the apt-key method is deprecated on Ubuntu 22.04. It still works.
The majority of Linux users don’t understand the difference between a warning and an error.
A warning means the thing still works, but is not perfect.
An error means the thing doesn’t work.
Here is the apt update resulting error:
The
W:at the beginning means it’s a warning, not an errorE:.A warning means the repository still works, but not in perfect state.
An error means the repository doesn’t work.
You can fix this by NOT using ***apt-key*** at all. Instead, do this:
Download the jellyfin repo key (note: it SAYS gpg in the filename but it is NOT a gpg file) and convert it to a *actual* gpg file using “gpg –dearmor -o” and placing it in the keyrings directory:
Then go into the sources.list file for jellyfin (should be in /etc/apt/sources.list.d/jellyfin.list) and edit the first line (there should only be one line):
[*note: if it doesn’t exist…create it]
It should initially look something like this:
Make it look like this:
NOW…when you do the sudo apt update… it will work.
MANY THANKS to the Digital Ocean boys for this help. This comment section does not let me paste urls.. but if you go to
(replace the X with a directory/forward-slash)
You can post links. I just need to check if the links are spammy before publishing the comment.
You said that you can use
facland that it would suffice. But lets say I wanted to add permission usingchmod. After install in terminal i typedto list all the groups i have and found # jellyfin at the very bottom.. said jellyfin:x:189
my user is
$ brucewayne, so I addedjellyfingroup to userbrucewaynewith this command..then
and now it says
then I changed all users and groups to have rwx permissions and others nothing cause i dont want anyone else to have access using
but jellyfin still can’t see into that folder when i’m adding my media. Should that not have given jellyfin access through the group. Now that it’s part of the group brucewayne?
Anyhow I did what you said and used the facl command and it worked but I dont understand why. I am just learning linux as well and watched tonz of youtube video’s on permissions for folders and files and thought I had a grasp on things untill this. Hope you can help me. I have never reached out to anyone before so I hope this explanation was easy to understand.
Hope this message finds you well
This guide has been my go-to for every time I need to set up JF. Many thanks!
There is an issue though with the jellyfin.conf file under the nginx instructions. The block that starts with:
breaks the remote connection to Jellyfin and now needs to be removed as of JF 10.9.