Install NextCloud on Ubuntu 18.04 with Nginx (LEMP Stack)
This tutorial will be showing you how to install NextCloud on Ubuntu 18.04 LTS with Nginx web server.
Note: Ubuntu 20.04 users should follow this guide instead: Install NextCloud on Ubuntu 20.04 with Nginx (LEMP Stack)
What’s NextCloud?
NextCloud is a free open-source self-hosted cloud storage solution. It’s functionally similar to Dropbox. Proprietary cloud storage solutions (Dropbox, Google Drive, etc) are convenient, but at a price: they can be used to collect personal data because your files are stored on their computers. If you worried about privacy, you can switch to NextCloud, which you can install on your private home server or on a virtual private server (VPS). You can upload your files to your server via NextCloud and then sync those files to your desktop computer, laptop or smart phone. This way you have full control of your data.
NextCloud Features
- Free and open-source
- End-to-end encryption, meaning files can be encrypted on client device before uploaded to the server, so even if someone steals your server, they can not see your files.
- Can be integrated with an online office suite (Collobora, OnlyOffice) so you can create and edit your doc, ppt, xls files directly from NextCloud.
- The app store contains hundreds of apps to extend functionality (like calendar app, notes-taking app, video conferencing app, etc).
- The sync client are available on Linux, macOS, Windows, iOS, and android.
Prerequisites
NextCloud is written in PHP programing language. To follow this tutorial, you first need to install LEMP stack on Ubuntu 18.04. If you haven’t already done so, please check out the following tutorial.
You can install NextCloud on your home server or a VPS (virtual private server). You also need a domain name. I registered my domain name from NameCheap because the price is low and they give whois privacy protection free for life.
Now let’s install NextCloud.
Step 1: Download NextCloud on Ubuntu 18.04
Login into your Ubuntu 18.04 server. Then download the NextCloud zip archive onto your server. The latest stable version is 13.0.2 at time of this writing. You may need to change the version number. Go to https://nextcloud.com/install and click the download button to see the latest version.

You can run the following command to download it on your server.
wget https://download.nextcloud.com/server/releases/nextcloud-13.0.2.zip
You can always use the above URL format to download NextCloud. If a new version comes out, simply replace 13.0.2 with the new version number.
Once downloaded, extract the archive with unzip.
sudo apt install unzip

sudo unzip nextcloud-13.0.2.zip -d /usr/share/nginx/
The -d option specifies the target directory. NextCloud web files will be extracted to /usr/share/nginx/nextcloud/. Then we need to change the owner of this directory to www-data so that the web server (Nginx) can write to this directory.
sudo chown www-data:www-data /usr/share/nginx/nextcloud/ -R
Step 2: Create a Database and User in MariaDB
Log into MariaDB database server with the following command. Since MariaDB is now using unix_socket plugin to authentication user login, there’s no need to enter MariaDB root password. We just need to prefix the mysql command with sudo.
sudo mysql
Alternatively, you can also use this command to login.
sudo mariadb
Then create a database for Nextcloud. This tutorial name the database nextcloud. You can use whatever name you like.
create database nextcloud;
Create the database user. Again, you can use your preferred name for this user. Replace your-password with your preferred password.
create user nextclouduser@localhost identified by 'your-password';
Grant this user all privileges on the nextcloud database.
grant all privileges on nextcloud.* to nextclouduser@localhost identified by 'your-password';
Flush privileges and exit.
flush privileges;

exit;
Step 3: Create a Nginx Config File for Nextcloud
Create a nextcloud.conf file in /etc/nginx/conf.d/ directory.
sudo nano /etc/nginx/conf.d/nextcloud.conf
Put the following text into the file. Replace nextcloud.example.com with your own preferred sub-domain. Don’t forget to create DNS A record for this sub-domain in your DNS zone editor. If you don’t have a real domain name, I recommend going to NameCheap to buy one. The price is low and they give whois privacy protection free for life.
server {
    listen 80;
    listen [::]:80;
    server_name nextcloud.your-domain.com;

    # Add headers to serve security related headers
    add_header X-Content-Type-Options nosniff;
    add_header X-XSS-Protection "1; mode=block";
    add_header X-Robots-Tag none;
    add_header X-Download-Options noopen;
    add_header X-Permitted-Cross-Domain-Policies none;
    add_header Referrer-Policy no-referrer;

    #I found this header is needed on Ubuntu, but not on Arch Linux.
    add_header X-Frame-Options "SAMEORIGIN";

    # Path to the root of your installation
    root /usr/share/nginx/nextcloud/;

    access_log /var/log/nginx/nextcloud.access;
    error_log /var/log/nginx/nextcloud.error;

    location = /robots.txt {
        allow all;
        log_not_found off;
        access_log off;
    }

    # The following 2 rules are only needed for the user_webfinger app.
    # Uncomment it if you're planning to use this app.
    #rewrite ^/.well-known/host-meta /public.php?service=host-meta last;
    #rewrite ^/.well-known/host-meta.json /public.php?service=host-meta-json
    # last;

    location = /.well-known/carddav {
        return 301 $scheme://$host/remote.php/dav;
    }
    location = /.well-known/caldav {
       return 301 $scheme://$host/remote.php/dav;
    }

    location ~ /.well-known/acme-challenge {
      allow all;
    }

    # set max upload size
    client_max_body_size 512M;
    fastcgi_buffers 64 4K;

    # Disable gzip to avoid the removal of the ETag header
    gzip off;

    # Uncomment if your server is build with the ngx_pagespeed module
    # This module is currently not supported.
    #pagespeed off;

    error_page 403 /core/templates/403.php;
    error_page 404 /core/templates/404.php;

    location / {
       rewrite ^ /index.php;
    }

    location ~ ^/(?:build|tests|config|lib|3rdparty|templates|data)/ {
       deny all;
    }
    location ~ ^/(?:\.|autotest|occ|issue|indie|db_|console) {
       deny all;
     }

    location ~ ^/(?:index|remote|public|cron|core/ajax/update|status|ocs/v[12]|updater/.+|ocs-provider/.+|core/templates/40[34])\.php(?:$|/) {
       include fastcgi_params;
       fastcgi_split_path_info ^(.+\.php)(/.*)$;
       try_files $fastcgi_script_name =404;
       fastcgi_param SCRIPT_FILENAME $document_root$fastcgi_script_name;
       fastcgi_param PATH_INFO $fastcgi_path_info;
       #Avoid sending the security headers twice
       fastcgi_param modHeadersAvailable true;
       fastcgi_param front_controller_active true;
       fastcgi_pass unix:/run/php/php7.2-fpm.sock;
       fastcgi_intercept_errors on;
       fastcgi_request_buffering off;
    }

    location ~ ^/(?:updater|ocs-provider)(?:$|/) {
       try_files $uri/ =404;
       index index.php;
    }

    # Adding the cache control header for js and css files
    # Make sure it is BELOW the PHP block
    location ~* \.(?:css|js)$ {
        try_files $uri /index.php$uri$is_args$args;
        add_header Cache-Control "public, max-age=7200";
        # Add headers to serve security related headers (It is intended to
        # have those duplicated to the ones above)
        add_header X-Content-Type-Options nosniff;
        add_header X-XSS-Protection "1; mode=block";
        add_header X-Robots-Tag none;
        add_header X-Download-Options noopen;
        add_header X-Permitted-Cross-Domain-Policies none;
        add_header Referrer-Policy no-referrer;
        # Optional: Don't log access to assets
        access_log off;
   }

   location ~* \.(?:svg|gif|png|html|ttf|woff|ico|jpg|jpeg)$ {
        try_files $uri /index.php$uri$is_args$args;
        # Optional: Don't log access to other assets
        access_log off;
   }
}
Save and close the file. Test Nginx configuration, then reload Nginx for the changes to take effect.
sudo nginx -t

sudo systemctl reload nginx
Step 4: Install and Enable PHP Modules
Run the following commands to install PHP modules required or recommended by NextCloud.
sudo apt install php-imagick php7.2-common php7.2-mysql php7.2-fpm php7.2-gd php7.2-json php7.2-curl php7.2-zip php7.2-xml php7.2-mbstring php7.2-bz2 php7.2-intl php7.2-bcmath
Step 5: Enable HTTPS
Now you can access the Nextcloud web install wizard in your browser by entering the domain name for your Nextcloud installation.
nextcloud.your-domain.com

If the web page can’t load, you probably need to open port 80 in firewall.
sudo iptables -I INPUT -p tcp --dport 80 -j ACCEPT
And port 443 as well.
sudo iptables -I INPUT -p tcp --dport 443 -j ACCEPT
Before entering any sensitive information, we should enable secure HTTPS connection on Nextcloud. We can obtain a free TLS certificate from Let’s Encrypt. Install Let’s Encrypt client (certbot) from Ubuntu 18.04 repository.
sudo apt install certbot python3-certbot-nginx
Python-certbot-nginx is the Nginx plugin. Next, run the following command to obtain a free TLS certificate using the Nginx plugin.
sudo certbot --nginx --agree-tos --redirect --staple-ocsp --email your-email-address -d nextcloud.your-domain.com
Explanation:
- –nginx: Use the Nginx authenticator and installer
- –agree-tos: Agree to Let’s Encrypt terms of service
- –redirect: Add 301 redirect.
- –staple-ocsp: Enables OCSP Stapling.
- -d flag is followed by a list of domain names, separated by comma. You can add up to 100 domain names.
- –email: Email used for registration and recovery contact.
You will be asked if you want to receive emails from EFF(Electronic Frontier Foundation). After choosing Y or N, your TLS certificate will be automatically obtained and configured for you, which is indicated by the message below.

I found that Certbot can’t automatically add HSTS header in the Nginx config file for Nextcloud. If you would like to enable HSTS (HTTP Strict Transport Security), then edit the file.
sudo nano /etc/nginx/conf.d/nextcloud.conf
We can then add the following line in the ssl server block to enable HSTS header.
add_header Strict-Transport-Security "max-age=31536000" always;
Also, you can enable HTTP2 protocol by adding the option http2.
listen 443 ssl http2; # managed by Certbot
Like below.

Save and close the file. Then text Nginx configurations.
sudo nginx -t
If the test is successful, reload Nginx for the change to take effect.
sudo systemctl reload nginx
The above configuation will get A+ score on SSL test.

Finish the Installation in your Web Browser
Now you can access the Nextcloud web install wizard using HTTPS connection. To complete the installation, you need to create an admin account, enter the path of Nextcloud data folder, enter database details created earlier. You can use the default localhost as host address, or you can enter localhost:3306, as MariaDB listens on port 3306.
The data folder is where users’ files are stored. For security, it’s best to place the data directory outside of Nextcloud web root. So instead of storing users’ files under /usr/share/nginx/nextcloud/data/, we can change it to /usr/share/nginx/nextcloud-data. which can be created with the following command:
sudo mkdir /usr/share/nginx/nextcloud-data
Then make sure Nginx user (www-data) has write permission to the data directory.
sudo chown www-data:www-data /usr/share/nginx/nextcloud-data -R

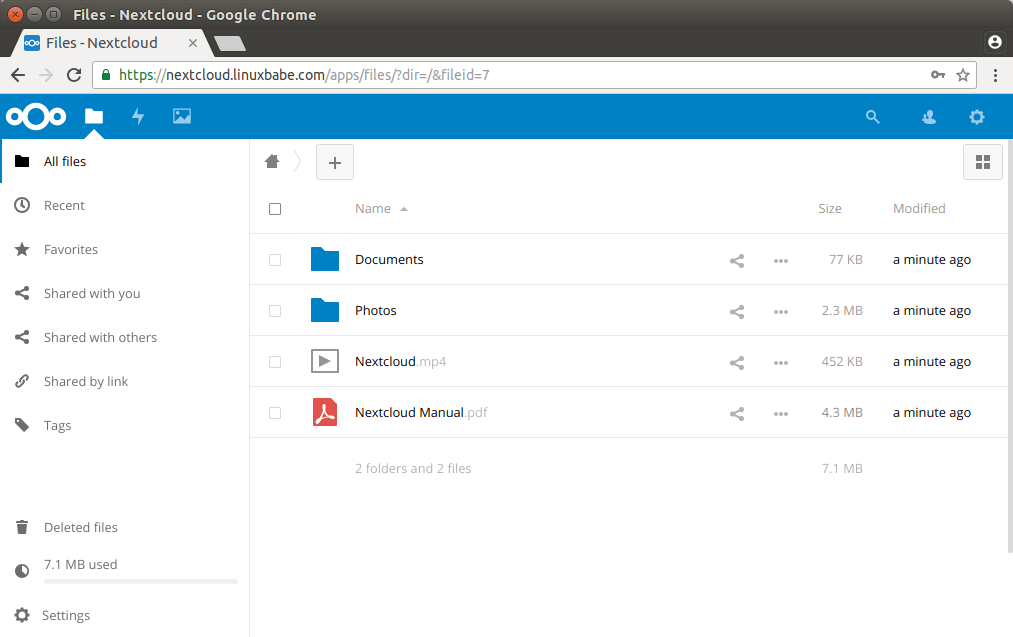
Once it’s done, you will see the Web interface of Nextcloud. Congrats! You can start using it as your private cloud storage.

How to Set up NextCloud Email Notification
If your NextCloud instance will be used by more than one person, it’s important that your NextCloud server can send transactional emails, such as password-resetting email. First, you should set an email address for your own account. Go to Settings -> Personal Info and set an email address for your account.

Then go to Settings -> Basic settings. You will find the email server settings. There are two send modes: sendmail and smtp. You can choose the sendmail mode if your NextCloud host has an SMTP server running.

If you would like to use an SMTP server running on another host, then choose smtp mode and enter the SMTP server address and login credentials like below. Choose STARTTLS for encryption.

For how to set up an email server, please check out the following tutorial:
How to Move the Data Directory
In case you need to move the NextCloud data directory, there are 4 steps to accomplish this. First, you need to use the cp command to copy the data directory to the new directory. For example, the mount point of my external hard drive is /media/linuxbabe/b43e4eea-9796-4ac6-9c48-2bcaa46353731. I create the new data directory on the external hard drive.
sudo mkdir /media/linuxbabe/b43e4eea-9796-4ac6-9c48-2bcaa46353731/nextcloud-data/
Then I copy the original data directory to the new data directory. -R flag means the copy operation is recursive.
sudo cp /usr/share/nginx/nextcloud-data/* /media/linuxbabe/b43e4eea-9796-4ac6-9c48-2bcaa46353731/nextcloud-data/ -R
You also need to copy the .ocdata file.
sudo cp /usr/share/nginx/nextcloud-data/.ocdata /media/linuxbabe/b43e4eea-9796-4ac6-9c48-2bcaa46353731/nextcloud-data/
Next, you need to set www-data (Nginx user) as the owner.
sudo chown www-data:www-data /media/linuxbabe/b43e4eea-9796-4ac6-9c48-2bcaa46353731/nextcloud-data/ -R
Lastly, you need to edit the config.php file.
sudo nano /usr/share/nginx/nextcloud/config/config.php
Find the following line and change the value of datadirectory.
'datadirectory' => '/usr/share/nginx/nextcloud-data',
Save and close the file. Reload NextCloud web page and you are done.
Increase PHP Memory Limit
The default PHP memory limit is 128MB. NextCloud recommends 512MB for better performance. To change PHP memory limit, edit the php.ini file.
sudo nano /etc/php/7.2/fpm/php.ini
Find the following line. (line 406)
memory_limit = 128M
Change the value.
memory_limit = 512M
Save and close the file. Alternatively, you can run the following command to change the value without manually opening the file.
sudo sed -i 's/memory_limit = 128M/memory_limit = 512M/g' /etc/php/7.2/fpm/php.ini
Then reload PHP-FPM service for the changes to take effect.
sudo systemctl reload php7.2-fpm
Set Up PHP to Properly Query System Environment Variables
Edit the www.conf file.
sudo nano /etc/php/7.2/fpm/pool.d/www.conf
Find the following line (line 381).
;clear_env = no
Remove the semicolon to uncomment this line.
clear_env = no
Save and close the file. Alternatively, you can run the following command to uncomment this line without manually opening the file.
sudo sed -i 's/;clear_env = no/clear_env = no/g' /etc/php/7.2/fpm/pool.d/www.conf
Then reload PHP-FPM service for the changes to take effect.
sudo systemctl reload php7.2-fpm
Increase Upload File Size Limit
The default maximum upload file size limit set by Nginx is 1MB. To allow uploading large files to your NextCloud server, edit the Nginx configuration file for NextCloud.
sudo nano /etc/nginx/conf.d/nextcloud.conf
We have already set the maximum file size in this file, as indicated by
client_max_body_size 512M;
You can change it if you prefer, like 1G.
client_max_body_size 1024M;
Save and close the file. Then reload Nginx for the changes to take effect.
sudo systemctl reload nginx
PHP also sets a limit of upload file size. The default maximum file size for uploading is 2MB. To increase the upload size limit, edit the PHP configuration file.
sudo nano /etc/php/7.2/fpm/php.ini
Find the following line (line 827).
upload_max_filesize = 2M
Change the value like below:
upload_max_filesize = 1024M
Save and close the file. Alternatively, you can run the following command to change the value without manually opening the file.
sudo sed -i 's/upload_max_filesize = 2M/upload_max_filesize = 1024M/g' /etc/php/7.2/fpm/php.ini
Then restart PHP-FPM.
sudo systemctl restart php7.2-fpm
Configure Redis Cache for NextCloud
If you go to your NextCloud settings -> overview page, you might see the following warning:
No memory cache has been configured. To enhance your performance please configure a memcache if available.
We will enable memory caching for nextCloud by using Redis. Run the following command to install Redis server from Ubuntu repository.
sudo apt install redis-server
You can check the version with:
redis-server -v
Sample output:
Redis server v=4.0.9 sha=00000000:0 malloc=jemalloc-3.6.0 bits=64 build=9435c3c2879311f3
Now we can check if redis server is running.
systemctl status redis

Hint: If the above command didn’t quit immediately, you can press the Q key to gain back control of the terminal.
From the above screenshot, we can see that it’s running and auto-start is enabled. If for any reason it’s not running, execute the following command:
sudo systemctl start redis-server
And if auto-start at boot time is not enabled, you can use the following command to enable it:
sudo systemctl enable redis-server
In order to configure Redis as a cache for nextCloud, we need to install the PHP extension for interfacing with Redis.
sudo apt install php-redis
Check if the extension is enabled.
php --ri redis

We can see that Redis extension is enabled. If it’s not enabled, run the following commmand:
sudo phpenmod redis
Next, edit nextCloud configuration file.
sudo nano /usr/share/nginx/nextcloud/config/config.php
Add the following lines above the ); line.
'memcache.distributed' => '\OC\Memcache\Redis',
'memcache.local' => '\OC\Memcache\Redis',
'memcache.locking' => '\OC\Memcache\Redis',
'redis' => array(
     'host' => 'localhost',
     'port' => 6379,
     ),

Save and close the file. Then restart Nginx and PHP-FPM.
sudo systemctl restart nginx php7.2-fpm
Now go to nextCloud admin page again, the warning about memory caching should be gone.
How to Enable 4-Byte Characters in MariaDB to Display Emojis
If you see the following message in the NextCloud Settings -> Overview page, then you need to enable 4-byte characters in MariaDB.
MySQL is used as database but does not support 4-byte characters. To be able to handle 4-byte characters (like emojis) without issues in filenames or comments for example it is recommended to enable the 4-byte support in MySQL.
First, I recommend upgrading MariaDB server to the latest stable version by running the following commands.
sudo apt-get install software-properties-common

sudo apt-key adv --recv-keys --keyserver hkp://keyserver.ubuntu.com:80 0xF1656F24C74CD1D8

sudo add-apt-repository 'deb [arch=amd64,arm64,ppc64el] http://mirror.lstn.net/mariadb/repo/10.4/ubuntu bionic main'

sudo apt update

sudo apt install mariadb-server
Then login into MariaDB console.
sudo mysql -u root
Change the character set and collation of the nextcloud database.
ALTER DATABASE nextcloud CHARACTER SET utf8mb4 COLLATE utf8mb4_general_ci;
Exit MariaDB.
exit;
Change to the NextCloud installation directory.
cd /usr/share/nginx/nextcloud/
Enable mysql.utf8mb4 in the config.php file.
sudo -u www-data php occ config:system:set mysql.utf8mb4 --type boolean --value="true"
Then repair MariaDB collation.
sudo -u www-data php occ maintenance:repair
Now the warning should be gone on the NextCloud Settings -> Overview page and you are able to use Emojis in your file names, calendar events and comments.
How to Install NextCloud Client on Ubuntu 18.04 Desktop
The NextCloud team provides an official PPA. Run the following commands on Ubuntu 18.04 desktop to isntall the client.
sudo add-apt-repository ppa:nextcloud-devs/client

sudo apt install nextcloud-client
Note that you don’t need to run sudo apt update anymore in Ubuntu 18.04 when addding PPA. It will run automatically 🙂

NextCloud Client on Ubuntu 18.04

Troubleshooting Tips
If you encounter errors, you can check one of the following log files to find out what’s wrong.
- Nginx error log:
/var/log/nginx/error.log - Nginx error log for the Nextcloud virtual host:
/var/log/nginx/nextcloud.error - Nextcloud application log:
/usr/share/nginx/nextcloud/data/nextcloud.log
For example, I once had an “Internal Server Error” on my Nextcloud instance and the /var/log/nginx/nextcloud.error file told me that
FastCGI sent in stderr: "PHP message: PHP Fatal error: Uncaught OC\HintException: [0]: Memcache \OC\Memcache\Redis not available for local cache (Is the matching PHP module installed and enabled?)
It turned out that because I used the ppa:ondrej/php PPA on my Ubuntu server, I also need to install php7.2-redis in addition to the php-redis package.
Upgrading Nextcloud
It’s important to keep your Nextcloud server up to date with the latest security and bug fixes. Read the tutorial below to learn how to upgrade Nextcloud.
Wrapping Up
I hope this tutorial helped you install NextCloud on Ubuntu 18.04 server with Nginx. You might also want to use Nginx Amplify to monitor Nextcloud back end performance.
As always, if you found this post useful, then subscribe to our free newsletter to get more tips and tricks. Take care 🙂


Hello,
Thank you very much for this well done tutorial. I especially appreciated the way you provided an explanation of what was going to be done at each step before giving the actual code to do it.
All went smoothly until I got to the security section at step 5. I could not obtain a certificate because I don’t have a publicly registered domain. My server is connected to a private LAN and not exposed to the Internet. My router does dns internally so the server has a host name that is usable. I can get the nextcloud wizard using http:///
Will the desktop software work if I never use SSL? I really don’t need the security since my LAN is behind a router that does no port forwarding. Thank you in advance for any advice you might offer.
Regards, Steve W.
It should work. But if you are going to sync files when you are away from home, register a domain name and enable HTTPS. I recommend NameCheap because you get whois privacy protection free for life.
Hey Linux Babe
I followed your guide and for only being on Linux for 3 weeks, it worked GREAT!.
I have two quandaries at this point:
A: I have installed this setup exactly per your guide on a small 256 NVME ssd @ /usr/share/nginx/nextcloud-data
as you said. Can i now move this elsewhere? for example an external 2tb ssd? or Internal ssd?
Can you tell me how i can accomplish to move the data/ or move the location of where i store my actual files such as photos,videos so that i dont fill up my small NVME ssd?
B: On the nextcloud start page- where username, password, data folder, database user etc etc goes,
i filled everything out correctly i believe, except for the localhost section. I used the example they gave for this. So i typed “localhost:5432” Is this bad or good. Should i change this?
Thank you!! im a big fan!
Hi Jacob,
I just added instruction for moving the data directory at the end of this tutorial.
If you are using MariaDB/MySQL as the database server, you should enter
localhostorlocalhost:3306. 3306 is the port used by MariaDB/MySQL. Port 5432 is used by PostgreSQL database server.If you made a mistake, you can always change the port in
/usr/share/nginx/nextcloud/config/config.phpfile. The database configuration is saved like below.Thanks Xiao!
Can you tell me if now i have the correct syntax in my config.php?
https://postimg.cc/image/zfnjy1hr5/
Yes, it’s correct.
Hey, is it possible to use two hdd for storage at the same time?
Yes, you can set up RAID 0 to make two physical hdd as one logical hdd. The total disk space is the space of smaller disk * 2.
If you want redundancy, set up RAID 1 instead.
Hello,
I have been trying to install Nextcloud on my Ubuntu server attached to my home network for several weeks now and have never gotten past the Wizard. I have not installed security because I will never need to access from the WAN side of my router.
DNS service is supplied by my dd-wrt router. I’m no expert but it seems to be working because I can ping the various host names and get replies. Even Windows to Ubuntu and the reverse.
I am following your procedure from an Ubuntu desktop machine ssh into the Ubuntu server. The communication seems to work as always.
I feel like a dunce that I cannot get this going. I think the problem is my interpretation of the red type, replacing it with the correct interpretation of my actual network.
In every case I have reloaded Ubuntu Server 18.04 so that I start with a pristine instance running.
Is there a common mistake made by Linux newbe’s like me that you could mention? Any help would be appreciated.
Regards,
Steve W.
Hi, can you post a screenshot of which step you are stuck at and also any error messages produced?
Hello,
Thank you for trying to answer my cryptic question. My problem is in filling in the blanks on the Wizard page. I need to go to at least the step where I can fill in the data folder path. I have given Nginx ownership with sudo chown www-data:www-data /home/nextcloud/data. I previously made that directory on a larger spinning drive. I have always given a user and password in the top two fields of the wizard. At that point should I just click on the “finish” button?
In the past, once I clicked on finish I seemed to have full control. But, if I closed the web page I couldn’t get back to it. I don’t know the URL to get back there. Can you tell me the URL?
Thank you for your help and patience.
Regards,
Steve
In the Wizard, you also need to enter the database name, database username and password. The URL is what you write for
server_namein/etc/nginx/conf.d/nextcloud.conffile.Outstanding tutorial, thank you!
Thanks for the help again Xiao!!!
This is the best nextcloud guide on the web!
One final question:
I accidentally added or deleted { or } from my conf as im now getting
pre> nginx: [emerg] unexpected “{” in /etc/nginx/conf.d/nextcloud.conf:114
these errors.
I kept adding and deleting these at the end between lines 110 and 120
What would you recomend to fix this?
Is the code default to where i could simply copy and past in what is supposed to be there originally?
Do you think that making a backup of this first is a good idea? Or no?
Thanks again! Keep up the awesome job!!!!
Every opening brace
{must have a corresponding closing brace}.Thanks a lot for the super guide. Really thankfull for your great work.
Hi,
I am having some problems with the last part of this guide, where I wanna change the data directory.
The problem is that I am not able to give permissions to the folder that I am changing it to.
I have a hunch that it might be the other disk’s setup that is causing the problem, but this is my first ubuntu server, so very new to this.
I have a NTFS disk that I would like to store the data on, but I cannot seem to give the permissions for the www-data user there.
Can anyone give a hit to why this could be, and how to fix it ?
Thanks a lot.
I have now tried to reinstall the nextcloud, and start over.
Also changed the harddisk to ext4 instead, so that I was able to set the permissions on the drive.
I am still not allowed to choose the folder that I created there, as the data folder.
I get the error:
Error
Can’t create or write into the data directory /media/michael/data/nextcloud-data
Can you help me with this ?
Try these two commands:
I have just tried the two commands, and it doesn’t do anything 🙁
I can see that the log shows this entry: “Permission denied at \/usr\/share\/nginx\/nextcloud\/lib\/private\/Setup.php#299”
To me it seems that it is not possible to use a location, on another disk as the data location, in the initial setup screen ?
Is this really correct, or am I misunderstanding something.
Micheal,
when youre at the nextcloud wizard(initial setup screen), put the path of the new place where your data is located in the wizard and do
sudo chown www-data:www-data /Path to your new nextcloud data folder
Hi. Excellent tutorial, thank you!!
Two questions:
1.) How to make Certbot automatically renew the certificate? I think that would make a great addition to the tutorial.
2.) This works well for remote (hosted) servers, but since Nginx uses the host header to determine which website to serve, it doesn’t work well on local networks. Entering the IP address of the server into the browser will lead to the default website, and entering the FQDN leads to the external address. Is it possible to make Nginx listen to multiple alias addresses on the same virtual host? Like “cloud.local”, for example?
Thanks!
1.) The certbot debian package ships with its own cron job (/etc/cron.d/certbot) and a systemd timer (/lib/systemd/system/certbot.timer) to automatically renew TLS certificate. So you don’t need to manually add cron job or systemd timer. The timer runs certbot.service twice a day.
2.) You can create a separate .conf file for Nextcloud with
server_nameset to cloud.local.Oh, excellent. I didn’t know Certbot came with its own cron job now. Last time I installed it (at least a year ago) that was still a manual process. Thanks!
Hi Xiao!!
Thanks for the tutorial!! It works perfectly!!!
I got one question…
How do you set the session time, if I login the session will still continue after 24 hours. For security purposes the session should disconnect after 5 minutes of inactivity, but I can not find where to change that. Do you have any idea where can I change that or what code do I need to add and where?
Thanks!!!
You can check out this page: NextCloud logout on idle time
This all worked for me, however, I’m not able to access Nextcloud via nextcloud.domain.com on my internal network. I can access on my mobile when its only on LTE. I also tried IP address/nextcloud and no luck. What am I missing?
Also, when navigating to https://localhost/ I get the phpmyadmin page, not the nextcloud page
Nevermind. I didn’t get my cert in yet. Once I did that step, I was able to get in via address/nexcloud
Hi Guo An,
Thanks for the informative guide and I have been struggling to set the server up for the last two weeks. There are various issues I wish to address and please help me to understand –
1) Standard set up using your guild (not changing data directory) – IT WORKED LIKE A CHARM, THANK YOU
2) Adding an external HDD – I followed the guide on official nextcloud document but it simply won’t allow me to add local mounted device (1TB EXT4 partition) with www-data and also chmod 0750. https://docs.nextcloud.com/server/9/admin_manual/configuration_files/external_storage/local.html
If I use chmod -R 0750 or chown -R www-data:www-data /path/to/externalHDD and they work and ls -al shows www-data. But if I use the sudo -u www-data chown -R www-data:www-data /localdir, then I get permission denied (on both commands) and I will not be able to add the EXTERNAL HDD
3) If I follow your guide to change to EXTERNAL HDD (change of datadirectory) and I also added chown -R 0750. And I then changed in config.php – ‘datadirectory’ => ‘/path/to/new/drive/directory’, . Then I restart systemctl reload nginx – Then I get the following error on Chrome
Internal Server Error
The server encountered an internal error and was unable to complete your request.
Please contact the server administrator if this error reappears multiple times, please include the technical details below in your report.
More details can be found in the server log.
I will check the log again and see what could be the possible error but I have been battling for the last two week so any assistance would be greatly appreciated. Thanks, Brad
Hi Guo An,
Thanks for the great article and I managed to make it work as it had something to do with user/group permission. And it is now 100%. But just one step is missing, after you changed datadirectory, you got to rescan the files sudo -u www-data php occ files:scan –all for NC to see all the new files and update cache.
This is a more general question. I have looked elsewhere first but can’t find a clear answer. I am running Ubuntu on an actual machine, not in a virtual machine. Do I have to type all the information in step 3 by hand? I have tried a ‘curl’ this link, but I get more information than I can scroll back up and see (using shift page up, I can only see the last three pages).
Thanks,
Timo
You can copy all the lines and paste them into your nextcloud.conf file and replace the placeholder in red color.
Hi,
At the end of step 3 when I run sudo nginx -t I get the comment:
nginx: [emerg] unknown directive “PK” in /etc/nginx/sites-enabled/nextcloud-14.0.3.zip:4
nginx: configuration file /etc/nginx/nginx.conf test failed
When I check, the only line in nginx.conf that points at /etc/nginx/sites-enabled/nextcloud-14.0.3.zip is the one under
gzip on;
include /etc/nginx/conf.d/*.conf;
include /etc/nginx/sites-enabled/*;
Should I maybe put a hashtag in front of gzip on; and the two lines that follow?
Thanks again
You shouldn’t put the nextcloud-14.0.3.zip file in
/etc/nginx/sites-enabled/directory, which is for virtual host file only.Put the zip archive in your home directory first.
Sorry – meant I don’t have a graphical interface at all on the machine I’m installing on, only Ubuntu Server. Somebody showed me how to ssh from the terminal of another computer and copy & paste text like that.
Got it. thanks.
Sorry – I can see now that the line
include /etc/nginx/sites-enabled/*;
is not related to the gzip section.
Can I put a # in front of this line?
You don’t need to edit the
/etc/nginx/nginx.conffile 🙂Hi,
Just wondering what would i put for the server_name if I am running on a free ddns service? i use no-ip’s service, so my server is name.ddns.net. Would the server_name be nextcloud.name.ddns.net?
Thanks
The name must exist in your no-ip account and not being used by another Nginx virtual host (server block) on your server.
You can use nextcloud.name.ddns.net if you can create this sub-domain in your no-ip account.
dude help me please,
nginx: [emerg] BIO_new_file(“/etc/letsencrypt/live/nextcloud.sankalemmm.com/fullchain.pem”) failed (SSL: error:02001002:system library:fopen:No such file or directory:fopen(‘/etc/letsencrypt/live/nextcloud.sankalemmm.com/fullchain.pem’,’r’) error:2006D080:BIO routines:BIO_new_file:no such file)
nginx: configuration file /etc/nginx/nginx.conf test failed
Check if the certificate file exists.
ls: cannot access ‘/etc/letsencrypt/live/nextcloud.sankalemmm.com/fullchain.pem’: No such file or directory
Have you successfully obtained a TLS certificate with certbot? I cannot find DNS A record for nextcloud.sankalemmm.com.
Followed the strep to install but I can access the Web install Wizard. Hosting on my local server before moving to HTTPS. I was able to get everything running using the snap version of nextcloud but could not get smb share to work. So i moved to the full install. Since I using a local static ip address how do enter the server_name?
Just enter the IP address of your Ubuntu server. If you need to securely access Nextcloud from outside of home network, you need to use a domain name and enable HTTPS. Usually dynamic DNS providers like no-ip.com can provide a free hostname to you.
Thanks I actually had the root pointing to a folder that did not exist. I have a domain I want to use but not sure what ip address to use. My service provider IP but I always assumed that the IP address provided by the ISP was dynamic.
Hi Xiao,
I’ve followed your instructions through many iterations and it has worked perfectly every time. This version seems to have worked except for the step 5 (for me, I see others have been successful). I wondered if you have any ideas.
I have nextcloud installed on an Ubuntu 18 machine. I have completed step 3 for Nginx. If I go to my WAN IP I get the Nginx welcome screen. If I go to my DynDNS host I get the Nginx Welcome screen.
If I go to the subdomain.domain.com, I get the page cannot be found error:
This site can’t be reached [removed] refused to connect.
Try:
Checking the connection
Checking the proxy and the firewall
ERR_CONNECTION_REFUSED
As I can get to the Nginx Welcome via DynDNS Host and WAN IP I know my router is forwarding correctly.
I followed your instructions step by step so have everything you have in this post. The only thing I can think of is that the Nginx file has something wrong.
/etc/nginx/conf.d/nextcloud.conf
I copied your example and just change the server to my subdomain.domain.com
Any help would be appreciated.
You can check the Nginx error log (/var/log/nginx/error.log) to see what went wrong.
Hi Xiao,
I followed your instructions and install nextcloud successful with the domain: cloud.xxx.com,
now i deployed another domain: www.xxx.com with the same VPS which ran nextcloud,
i configured the .conf file for www.xxx.com like nextcloud.conf file ,
but when i access www.xxx.com, the browse notified:
{This server could not prove that it is www.xxx.com; its security certificate was issued for cloud.xxx.com. This may be caused by a misconfiguration or an attacker intercepting your connection.}
how can i configure it?
any help will be appreciated.
You need to use a separate TLS certificate for the second domain. Create a Nginx config file (only the port 80 server block) for the second domain and use certbot to install a new TLS certificate.
thank you so much! the nextcloud is running stable.
so i wanna reuse the LEMP stack to run a blog application(hexo), but i encounter a problem-confusing with the configuration of nginx and php-fpm.
could you post a tutorial for one VPS running both nextcloud and blog with 2 subdomain, based on LEMP stack?
thanks in advance.
Awesome write up. Only problem is this error:
nginx: [emerg] a duplicate listen 0.0.0.0:443 in /etc/nginx/conf.d/nextcloud.conf:116
How do I resolve this?
This means that in file
/etc/nginx/conf.d/nextcloud.conf, there are twolisten 443 ssllines. Simply remove one of them.Yes, thanks! I realised that. Just had no chance to post it yet.
Cheers!
I have just installed this perfectly, but before I started to do anything with files, users etc I wanted to update to the latest version (15.02 at the time of writing). I am getting the following warnings
when I try to run the command
I get
I have tried all sorts of things and various suggests from other forums, but nothing I find works. I wonder if you would be able to help?
Thank you
Don’t want to reply to my own post, but for anyone else, I found the answer.
cd /usr/share/nginx/nextcloud
then run the commands in the form
appears to have done the trick
hi, i followed this guide and it worked great.
but the guide configures the nextcloud url as the domain (abc.com) itself.
how can i update it such that nextcloud can be accessed at domain/nexcloud (abc.com/nextpath) path?
I followed this tutorial on a raspbian OS and ended up with a 502 bad gateway visiting http://myip/nextcloud. If I visit http://myip I can see an ugly nginx welcome page only. If I visit nextcloud.servername, it says router can’t find this server even if I added this server in router’s hosts file. Completely frustrated after 2 days of struggling.
The tutorial has worked well. However on trying to configure external storages i get this error “No external storage configured or you don’t have the permission to configure them”
Silly linux noob here wondering where the hell i’m supposed to set this “A” record. The linux machine, My Router, the Domain?
All i want to do at the moment is access this installation from my internal network, not from an external WAN Connection
I do have a Problem with Step 3:
/etc/nginx/conf.d/nextcloud.conf
When i put my “nextcloud.dmydomain.de” in there i can’t reach my Nextcloud anymore
When i instead put the internel IP Adress of my nextcloud 192.168.23.235 in that spot i can reach the nextcloud with my browser only if i type in 192.168.23.235/index.php (Why is that so? is that configurable to “ip/nextloud”?)
Same goes for phpmyadmin wich is unreachable from my browser (pma.mydomain.de)
Hello Linuxbabe, First want to tjank You for this awesome tutorial !
I followed it and before the HTTPS secure part of the tutorial all is working and i can access the nextcloud site also from outside my LAN (via the WAN/internet)
After I enable the HTTPS ( i tested NGINX conf gile as OK and reloaded) i get “This page isnt working” from all browsers from the outside of my LAN and it also says “mydomain.com (example) redirected You too many times” as well as ” ERR-TOO-MANY-REDIRECTS”
What did i do wrong ?
I appreciate Your help
Thank You
Lars
Hey again, I got it working by adding the listen 443 part to the TOP of the NGINX config file (it was at bottom)
Now i can get to the https://cloud.mydomain.com (still example) but now Nextcloud tells me “Access through untrusted domain” and somethign about editing “trusted_domains” settings in config/config.php
I have NO idea how to solve this or continue form here…please help ! seems i got so far and now stuck !
Thank You
So now i got help from a friend and got it working by editing the trusted domains section of the config.php file 🙂
SO i can now access nextcloud from OUTSIDE via WAN/Internet.
But what do i need to do to be able to access my nextcloud server from INSIDE my LAN ?
Do i need to add some virtual section in nextcloud.conf file ? or what do i call the server here ?
Thank You
I also wanted to ask how i access the file son the local nextcloud server that i uploaded as a test from one of my clients (my phone), i uploaded a video file but when i navigate in Ubuntu on the nextcloud server via the filemanager to the “nextcloud-data” folder (as You recommended in your tutorial above) all folders have a small X in lower right corner and i cant copy or open them (like in a VLC video player)
SO how do i access all the user files in the nextcloud-data folder (to back them up or copy them elsewhere etc) ???
You can’t access the nextcloud-data folder from the file manager because your user account doesn’t have permission to read or write to the folder. You can run the following command to grant read permission to your user account.
To grant read and write permission, run
You can access NextCloud from LAN with the https://cloud.example.com domain name. You can add an entry in the /etc/hosts file on the client computer like below
So the client computer can access NextCloud without sending packets to Internet.
The line:
sudo cp /usr/share/nginx/nextcloud-data/* /media/linuxbabe/b43e4eea-9796-4ac6-9c48-2bcaa46353731/nextcloud-data/ -R
is incorrect.
It should read:
sudo cp /usr/share/nginx/nextcloud-data/ /media/linuxbabe/b43e4eea-9796-4ac6-9c48-2bcaa46353731/ -R
Also with the correction, you dont have to copy the hidden file. It will have been copied already.
Most of the problems with permissions moving the data to a new drive are caused by windows.
Hi guys!
I followed this tutorial for a successful deployment of nextcloud, but I am configuring the certificate issued by my “CA COMODO” certifier when I run the ‘nginx -t’ command, returns error on line 24
hi help me with this problem?
The
serverdirective can only be used under thehttpblock.Hi Xiao,
I don’t understand your interaction, I am not a nginx expert and I am having trouble evolving the SSL certificate configuration, can you try to help me?
server { listen 80; server_name nextcloud.mydomain.com; return 301 https://nextcloud.mydomain.com$request_uri; } server { listen 443 ssl; # managed by Certbot ssl_certificate /root/certificado/2019-2020/ssl_bundle.crt; ssl_certificate_key /root/certificado/2019-2020/server.key; # include /etc/letsencrypt/options-ssl-nginx.conf; # managed by Certbot #ssl_dhparam /etc/letsencrypt/ssl-dhparams.pem; # managed by Certbot } # Add headers to serve security related headers add_header X-Content-Type-Options nosniff; add_header X-XSS-Protection "1; mode=block"; add_header X-Robots-Tag none; add_header X-Download-Options noopen; add_header X-Permitted-Cross-Domain-Policies none; #This header is already set in PHP, so it is commented out here. #add_header X-Frame-Options "SAMEORIGIN"; # Path to the root of your installation root /usr/share/nginx/nextcloud/; location = /robots.txt { allow all; log_not_found off; access_log off; }You close the second
serverblock too early. The closing bracket}on line 12 should be moved to the end of the file.Hi Xiao, thank you so much for the return.
After applying the changes, you can access it via https, but when running a wget nextcloud.mydomain.com test, an error occurs in the output.
https setting
server { listen 80; server_name nextcloud.mydomain.com; return 301 https://nextcloud.mydomain.com$request_uri; } server { listen 443 ssl; # managed by Certbot ssl_certificate /root/certificado/2019-2020/ssl_bundle.crt; ssl_certificate_key /root/certificado/2019-2020/server.key; #include /etc/letsencrypt/options-ssl-nginx.conf; # managed by Certbot #ssl_dhparam /etc/letsencrypt/ssl-dhparams.pem; # managed by Certbot # Add headers to serve security related headers add_header X-Content-Type-Options nosniff; add_header X-XSS-Protection "1; mode=block"; add_header X-Robots-Tag none; add_header X-Download-Options noopen; add_header X-Permitted-Cross-Domain-Policies none; #This header is already set in PHP, so it is commented out here. #add_header X-Frame-Options "SAMEORIGIN"; # Path to the root of your installation root /usr/share/nginx/nextcloud/; location = /robots.txt { allow all; log_not_found off; access_log off; }I never use wget to check TLS certificate. Wget doesn’t load the correct root certificates from OS.
Hi Xiao, what method can I use to verify my root certificates?
You can just use Let’s Encrypt SSL certificate instead of COMODO SSL certificate. It’s free with automatic renewal.
Hi Xiao, I did not understand your answer.
can I use the COMODO certificate instead of “Let’s Encrypt SSL”?
I opted for the COMODO because we already paid for it.
I think there’s some problem in the COMODO SSL certificate itself. A paid SSL certificate isn’t necessarily better than a free SSL certificate. The end user doesn’t care whose SSL certificate you use.
Internally, the Comodo certificate seems to work fine, but I can’t access the nextcloud server externally from the moment I use Comodo’s SSL settings; It is currently accessible externally but without certificate.
My NextCloud with Let’s Encrypt SSL certificate works fine in the web browser and with wget command line. I can’t help you fix the COMODO SSL certificate problem.
Is it possible to configure automatic renewal for “Let’s Encrypt”?
I see that you use COMODO certificate at https://www.linuxbabe.com
When you install the
certbotpackage from Ubuntu repository, a cron job is installed on your server to automatically renew Let’s Encrypt SSL certificate.This blog is using Cloudflare CDN. I use Let’s Encrypt SSL certificate on my origin server. Visitors can only see the COMODO SSL certificate on Cloudflare’s edge server.
My NextCloud instance is on another server, without Cloudflare CDN.
Hi Xiao,
do you have any openldap based integration methods?
After setting up my ldap base, does my application return with gateway 504 timeout error?
Hi Xiao, how are you?
I was able to successfully configure nextcloud using SSL certificates issued by “COMODO”, but was unsure of the functionality about the commented part of the code.
The first line will include content of the /etc/letsencrypt/options-ssl-nginx.conf file into the current Nginx configuration file. This file contains some common SSL configurations for Nginx.
The second tells Nginx to use the DH parameters in /etc/letsencrypt/ssl-dhparams.pem file, in order to use DHE ciphers.
I am not using letsencrypt, can I remove these lines?
You don’t need to remove these two lines. They are not specific to Let’s Encrypt certificate.
Hi man, could you show how to enable TLS 1.3 on Nginx with nextcloud?
You can follow this tutorial: How to Easily Enable TLS 1.3 in Nginx on Ubuntu 19.04, 18.04, 16.04
This tutorial is accurate. If you follow it to the letter, you should have no problem enabling TLS 1.3.
Hey there,
thank you this and the previous tutorial about installing MariaDB and PHP worked very well, but I get lots of warnings in the devtools:
DevTools failed to parse SourceMap…
I get this error for pretty much every SourceMap, no errors in my network tab. Is this a security concern?
I use the latest nextcloud version 16.0.5 and Nginx 1.16.1
Kind regards,
Dennis
Hey it’s Dennis again,
I have found Nextcloud’s security check service:
https://scan.nextcloud.com/
I got an A rating so I think I am good. Though in the settings of my cloud I got some warnings regarding PHP:
– The PHP memory limit is below the recommended value of 512MB.
– MySQL is used as database but does not support 4-byte characters. To be able to handle 4-byte characters (like emojis) without issues in filenames or comments for example it is recommended to enable the 4-byte support in MySQL. For further details read the documentation page about this.
– The “X-Content-Type-Options” HTTP header is not set to “nosniff”. This is a potential security or privacy risk, as it is recommended to adjust this setting accordingly.
– No memory cache has been configured. To enhance performance, please configure a memcache, if available. Further information can be found in the documentation.
– The “Referrer-Policy” HTTP header is not set to “no-referrer”, “no-referrer-when-downgrade”, “strict-origin”, “strict-origin-when-cross-origin” or “same-origin”. This can leak referer information. See the W3C Recommendation ↗.
All these make sense, except the one about the X-Content-Type-Options header, since I have obviously set it during this tutorial in my nginx configuration.
Cheers,
Dennis
Edit the Nginx Nextcloud configuration file and uncomment the following line.
Save and close the file. Then reload Nginx.
By the way, I have updated the article to include instructions on increasing PHP memory limit, increasing file upload maximum size and configuring Redis memory cache.
The “DevTools failed to parse SourceMap” is specific to Google Chrome. Firefox doesn’t show this warning. It’s not related to security.
502 Bad Gateway
nginx/1.14.0 (Ubuntu)
Any ideas?
Make sure php7.2-fpm is installed and running.
You may also want to check the Nginx error log.
When I clik Finish Button on new installation of Nextcloud, I have this message:
Error while trying to create admin user: Failed to connect to the database: An exception occurred in driver: SQLSTATE[HY000] [2002] No such file or directory
I am using database postgres.
Why?
This is my nextcloud address:
https://cloud.rsudpalembangbari.online
Discourse need postgres, *but* nextcloud *NEED* MySQL/MariaDB. How can I make it on one server?
PostgreSQL and MySQL/MariaDB can run on the same server. To install MariaDB server, run the following command.
Ok, I will try. Sorry for asking a lot, because I really want to learn. Thank you
Setting > Overview:
MySQL is used as database but does not support 4-byte characters. To be able to handle 4-byte characters (like emojis) without issues in filenames or comments for example it is recommended to enable the 4-byte support in MySQL. For further details read the documentation page about this.
How to fix it? Thank you
I just added instructions to enable 4-byte characters in MariaDB at the end of this article.
After add this on:
sudo nano /usr/share/nginx/nextcloud/config/config.php
'memcache.distributed' => '\OC\Memcache\Redis',
'memcache.local' => '\OC\Memcache\Redis',
'memcache.locking' => '\OC\Memcache\Redis',
'redis' => array(
     'host' => 'localhost',
     'port' => 6379,
     ),
Get notification error message like this:
Please help..
Ok, now work for me. Just need to:
sudo service php7.2-fpm restart
Thank you friend.
did not work for me, problem still there
You might need to install the php7.2-redis package.
Hi Xiao Guoan,
This article of yours is very informative, and works well for my current project.
Can I follow all the steps same for Owncloud, instead of Nextcloud?
Please advise. Thanks!
Perfect installation, all done at firts time. You are a master!!!!
Wow, what an excellent tutorial. Too often tutorials are made by those who familiar with what’s going on without explaining what’s actually being done. Not the case here, things are explained well and succinctly.
Maybe a couple of things that could be added for clarification:
At your hosting provider, create an A record for nextcloud.your-domain.com pointing to your server’s IP address.
In other words,
.
Or whichever user nginx runs as, i.e.
. The user nginx runs as can normally be found in the first line of
.
Be sure that PHP is also running as this user, which can be configured in your PHP www.conf (for php-fpm found at
), at the lines,
Hi Xiao!
I’m trying to install nexcloud in a server with Ubuntu 18.04 LTS which I have installed previously iRedMail server(With your awesome guide).
I can’t set up nexcloud, my subdomain nexcloud.example.com is continuosly in loop and white screen.
I think that Nginx configurationin iRedMail(locations,files,..) is a little bit different and I’m not a expert in IT servers admin.
Hi, and thanks for the guide!
The only thing that it is not working for me is to access nextcloud from LAN.
Accessing from my domain nextcloud.mydomain.com works like a charm but I would like to access by the IP of my local host “ip.localhost”/nextcloud
How can I do that, when i type the IP of my localhost I get the default NGINX welcome page.
Thanks in advance!
hello ,
everything works well except i get this warning :
The “X-Frame-Options” HTTP header is not set to “SAMEORIGIN”. This is a potential security or privacy risk, as it is recommended to adjust this setting accordingly.
i edit the file : /etc/nginx/conf.d/nextcloud.conf
and put add_header X-Frame-Options ¨SAMEORIGEN¨
but still i get the warning , any idee ?
Hi!
I’ve unzipped nextcloud (latest 18.0.3) to /usr/share/nginx/ done creating the conf files but I can only get the nginx default welcome page. I haven’t moved on to the SSL part.
I’ve followed and re-installed several times…
I don’t know what I’m doing wrong… nobody else in comments seems to have this issue.
I’m so lost! any guidance will be appreciated!
ok, I managed to solve this part by changing the server_name to the local IP.
now I can access via internet at using the domain address (cloud.domain.com).
I guess that my ubuntu-nextcloud is behind IIS reverse proxy, which rewrites external url to the internal ip address.
I think the reverse proxy is configured correctly because I can access the nextcloud login page from externally.
now i’m stuck getting the certs with the client lacks sufficient authorization – 404 error from lets encrypt.
but I guess its not necessary because its behind the reverse proxy….
so I guess problem solved!
When I get to the step of finishing the installation in the web server, I get a choice of opening index.php with the test editor or saving the file. It just won’t open. Any ideas? Any further information available on request!
If you encouter errors, you can check one of the following log files to find out what’s wrong.
Nginx error log:
/var/log/nginx/error.logNginx error log for the Nextcloud virtual host:
/var/log/nginx/nextcloud.errorNextcloud application log:
/usr/share/nginx/nextcloud/data/nextcloud.logHow is it possible to upgrade to PHP 7.3?
Does it require a new install? I received a message in the admin area that says that version 19 is the last one to support PHP 7.2.
thanks
You can install PHP7.3 or PHP7.4 on Ubuntu by following this guide: How to Install Multiple Versions of PHP on Ubuntu
Remember to install the PHP extensions required by Nextcloud.
Hi, first wanted to thank you for the guide, have been running successfully for a few months now. I’ve had one issue from the start that I have not been able to resolve/figure out, wanted to see if you may have seen this.
When switching from AJAX to Cron, I can’t seem to get cron to ever run. I’ve followed the nextcloud guide and searched the internet without success. I’ve tried this several different ways along with changing permissions but can’t seem to get it right, including different cron users. Here is a log from my last attempt, no matter what it seems to end like this, it’s been a while now since I’ve tried:
Current user : root
Owner of config.php: www-data
Console has to executed with the used that owns the file config/config.php
Current user: root
I also have a second problem that I feel is related but can’t seem to find any direction to start figuring it out. Starting with the update 18.05 and the current available update 18.06, the update gets stuck at Step 3 for a while and sometimes will make it until I get a zip file error. Found some articles about similar issues but they were all related to much eariler versions and nothing really matched up with what I’m seeing.
Thanks
Simply edit the
www-datauser’s crontab file.Add the following line in this file.
Save and close the file. And you’re done.
To manually run the cron job, use this command:
Thanks, this fixed the cron issue, I’m not sure where I went wrong on this. If I figure it out I’ll be sure to update, I was using the nextcloud documentation.
This did not fix the update issue though, still stuck on step 3. Not sure where to look for this error.
Update: issue was solved by using repair several times
Update, fails latest update 18.07 to 18.08 using the GUI, tried the same method as before using oc repair but no luck so far.
Hello. remarkable job. I did not expect this. This is a splendid story. Thanks!
Hi,
Thanks for the tutorial 🙂
I have an issue…when I get to step 5 (Step 5: Enable HTTPS) I cannot access the Nextcloud homepage, only the nginx page shows 🙁
Any ideas?
Thanks again!
thanks …
I made some changes to config.php to change how long the files in trash bin are kept. Do I need to restart php or nginx to apply the change?