Part 2: Install Dovecot IMAP Server on CentOS 8/RHEL 8 & Enable TLS Encryption
This is part 2 of building your own email server from scratch on CentOS 8/RHEL 8 tutorial series. In part 1, we showed you how to set up a basic Postfix SMTP server. In this tutorial, we are going to configure our email server so that we can receive and send emails using a desktop email client like Mozilla Thunderbird or Microsoft Outlook.
To be able to send emails using a desktop email client, we need to enable the submission service in Postfix. To receive emails using a desktop email client, we can install an open-source IMAP server named Dovecot on CentOS 8/RHEL 8 server. And to encrypt our communications, we need a TLS certificate.
Open Ports in Firewall
Run the following command to open email related ports in firewall.
sudo firewall-cmd --permanent --add-service={http,https,smtp-submission,smtps,imap,imaps}
If you use POP3 to fetch emails (I personally don’t), then also add the pop3 and pop3s service.
sudo firewall-cmd --permanent --add-service={pop3,pop3s}
Reload firewalld for the change to take effect.
sudo systemctl reload firewalld
Securing Email Server Traffic with TLS Certificate
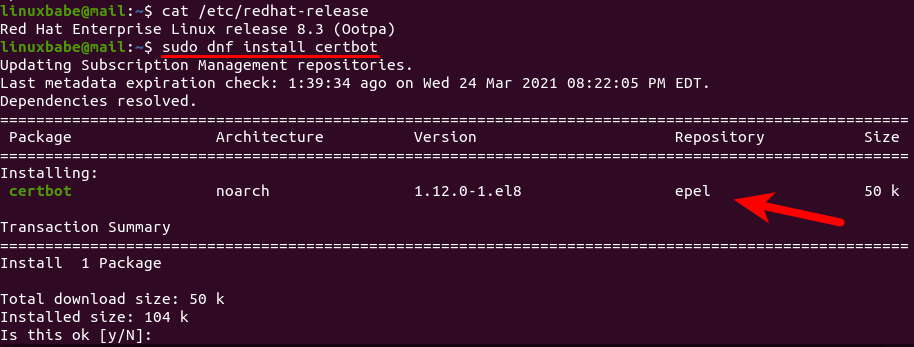
When we configure a desktop email client, enabling encryption is always a good idea. We can easily obtain a free TLS certificate from Let’s Encrypt. Issue the following commands to install Let’s Encrypt client (certbot) from the EPEL repository.
CentOS 8
sudo dnf install epel-release -y

sudo dnf install certbot
RHEL 8
sudo dnf install https://dl.fedoraproject.org/pub/epel/epel-release-latest-8.noarch.rpm

sudo dnf install certbot
If you don’t have a web server running yet, I recommend you install one (Apache or Nginx), because it’s easier to obtain and install TLS certificate with a web server than using other methods. And in a later tutorial, I will show you how to set up webmail, which requires running a web server.
Note that your CentOS 8/RHEL 8 server might ship with Apache web server by default.
Apache
If you prefer Apache, run the following command to install it.
sudo dnf install httpd
Start Apache and enable auto-start at boot time.
sudo systemctl start httpd

sudo systemctl enable httpd
Install the Certbot Apache plugin.
sudo dnf install python3-certbot-apache
Nginx
If you prefer Nginx, run the following command to install it.
sudo dnf install nginx
Start Nginx and enable auto-start at boot time.
sudo systemctl start nginx

sudo systemctl enable nginx
Install the Certbot Nginx plugin.
sudo dnf install python3-certbot-nginx
Obtaining TLS Certificate with Apache Web Server
You need to have an Apache virtual host for mail.your-domain.com before obtaining Let’s Encrypt TLS certificate. Create the virtual host file:
sudo nano /etc/httpd/conf.d/mail.your-domain.com.conf
Then paste the following text into the file.
<VirtualHost *:80>
        ServerName mail.your-domain.com

        DocumentRoot /var/www/html/
</VirtualHost>
Save and close the file. Reload Apache for the changes to take effect.
sudo systemctl reload httpd
Once virtual host is created and enabled, run the following command to obtain Let’s Encrypt TLS certificate.
sudo certbot certonly -a apache --agree-tos --staple-ocsp --email [email protected] -d mail.your-domain.com
After a while, you should see the following lines which means the certificate is successfully obtained. You can also see the directory under which your cert is stored.

Obtaining TLS Certificate with Nginx Web Server
You need to have an Nginx virtual host for mail.your-domain.com before obtaining Let’s Encrypt TLS certificate. Create the virtual host file:
sudo nano /etc/nginx/conf.d/mail.your-domain.com.conf
Next, paste the following text into the file.
server {
      listen 80;
      listen [::]:80;
      server_name mail.your-domain.com;

      root /usr/share/nginx/html/;

      location ~ /.well-known/acme-challenge {
         allow all;
      }
}
Save and close the file. Reload Nginx for the changes to take effect.
sudo systemctl reload nginx
Once virtual host is created and enabled, run the following command to obtain Let’s Encrypt certificate with Nginx plugin.
sudo certbot certonly -a nginx --agree-tos --staple-ocsp --email [email protected] -d mail.your-domain.com
After a while, you should see the following which means the certificate is successfully obtained. You can also see the directory under which your cert is stored.
Enabling Submission Service in Postfix
To send emails from a desktop email client, we need to enable the submission service of Postfix so that the email client can submit emails to Postfix SMTP server. Edit the master.cf file.
sudo nano /etc/postfix/master.cf
In submission section, uncomment or add the following lines. Please allow at least one whitespace (tab or spacebar) before each -o. In postfix configurations, a preceding whitespace character means that this line is continuation of the previous line. (By default the submission section is commented out. You can copy the following lines and paste them into the file, so you don’t have to manually uncomment or add new text.)
submission     inet     n    -    y    -    -    smtpd
  -o syslog_name=postfix/submission
  -o smtpd_tls_security_level=encrypt
  -o smtpd_tls_wrappermode=no
  -o smtpd_sasl_auth_enable=yes
  -o smtpd_relay_restrictions=permit_sasl_authenticated,reject
  -o smtpd_recipient_restrictions=permit_mynetworks,permit_sasl_authenticated,reject
  -o smtpd_sasl_type=dovecot
  -o smtpd_sasl_path=private/auth
The above configuration enables the submission daemon of Postfix and requires TLS encryption. So later on our desktop email client can connect to the submission daemon in TLS encryption. The submission daemon listens on TCP port 587. STARTTLS is used to encrypt communications between email client and the submission daemon.
Microsoft Outlook only supports submission over port 465. If you are going to use Microsoft outlook mail client, then you also need to enable submission service on port 465 by adding the following lines in the file.
smtps     inet  n       -       y       -       -       smtpd
  -o syslog_name=postfix/smtps
  -o smtpd_tls_wrappermode=yes
  -o smtpd_sasl_auth_enable=yes
  -o smtpd_relay_restrictions=permit_sasl_authenticated,reject
  -o smtpd_recipient_restrictions=permit_mynetworks,permit_sasl_authenticated,reject
  -o smtpd_sasl_type=dovecot
  -o smtpd_sasl_path=private/auth

Save and close the file.
Hint: The SMTP protocol is used when an email client submits emails to an SMTP server.
Next, we need to run the following two commands to specify the location of TLS certificate and private key in Postfix configuration file. Your Let’s Encrypt certificate and private key are stored under /etc/letsencrypt/live/mail.your-domain.com/ directory.
sudo postconf "smtpd_tls_cert_file = /etc/letsencrypt/live/mail.your-domain.com/fullchain.pem"

sudo postconf "smtpd_tls_key_file = /etc/letsencrypt/live/mail.your-domain.com/privkey.pem"
If you want to log TLS connections in the mail log (/var/log/maillog), then run the following two commands.
sudo postconf "smtpd_tls_loglevel = 1"

sudo postconf "smtp_tls_loglevel = 1"
To disable insecure SSL/TLS versions, open the Postfix main configuration file.
sudo nano /etc/postfix/main.cf
Add the following lines at the bottom of the file. (In Nano text editor, you can quickly go to the bottom of a file by pressing Ctrl+W, then Ctrl+V.)
#Force TLSv1.3 or TLSv1.2
smtpd_tls_mandatory_protocols = !SSLv2, !SSLv3, !TLSv1, !TLSv1.1
smtpd_tls_protocols = !SSLv2, !SSLv3, !TLSv1, !TLSv1.1
smtp_tls_mandatory_protocols = !SSLv2, !SSLv3, !TLSv1, !TLSv1.1
smtp_tls_protocols = !SSLv2, !SSLv3, !TLSv1, !TLSv1.1
Save and close the file. Then reload Postfix for the changes to take effect.
sudo systemctl restart postfix
If you run the following command, you will see Postfix is now listening on port 587 and 465.
sudo ss -lnpt | grep master

Installing Dovecot IMAP Server
Enter the following command to install Dovecot on CentOS 8/RHEL 8 server.
sudo dnf install dovecot -y
Check Dovecot version:
dovecot --version
Sample output:
2.3.8 (9df20d2db)
Start Dovecot and enable auto-start at boot time.
sudo systemctl start dovecot

sudo systemctl enable dovecot
Configuring Dovecot
First, edit main config file.
sudo nano /etc/dovecot/dovecot.conf
Find the following line.
#protocols = imap pop3 lmtp submission
Change this line to the following to enable IMAP protocol and LMTP protocol.
protocols = imap lmtp
If you want to use POP3 to fetch emails, then also add the POP3 protocol.
protocols = imap pop3 lmtp
Note that you should not enable the submission protocol in Dovecot, because we have already enabled submission service in Postfix.
Save and close the file.
Configuring Mailbox Location
mbox is the traditional and default format for storing emails. Each user’s emails are stored in a single file /var/mail/username. You can run the following command to find the mail spool directory.
postconf mail_spool_directory
Sample output:
mail_spool_directory = /var/mail
However, nowadays it’s almost always you want to use the Maildir format to store email messages. The config file for mailbox location is /etc/dovecot/conf.d/10-mail.conf.
sudo nano /etc/dovecot/conf.d/10-mail.conf
Add the following line to use the Maildir format. Email messages will be stored under the Maildir directory under each user’s home directory.
mail_location = maildir:~/Maildir
We also need to add the following line in the file.
mail_privileged_group = mail
Save and close the file. Then add dovecot to the mail group so that Dovecot can read the INBOX.
sudo gpasswd -a dovecot mail
Using Dovecot to Deliver Email to Message Store
Although we configured Dovecot to store emails in Maildir format, by default, Postfix uses its built-in local delivery agent (LDA) to move inbound emails to the message store (inbox, sent, trash, Junk, etc), and it will be saved in mbox format.
We need to configure Postfix to pass incoming emails to Dovecot, via the LMTP protocol, which is a simplified version of SMTP, so incoming emails will saved in Maildir format by Dovecot. LMTP allows for a highly scalable and reliable mail system. It also allows us to use the sieve plugin to filter inbound messages to different folders.
Edit the Dovecot main configuration file.
sudo nano /etc/dovecot/dovecot.conf
Add lmtp to the supported protocols.
protocols = imap lmtp
Save and close the file. Then edit the Dovecot 10-master.conf file.
sudo nano /etc/dovecot/conf.d/10-master.conf
Change the lmtp service definition to the following.
service lmtp {
 unix_listener /var/spool/postfix/private/dovecot-lmtp {
   mode = 0600
   user = postfix
   group = postfix
  }
}

Save and close the file. Next, edit the Postfix main configuration file.
sudo nano /etc/postfix/main.cf
Add the following lines at the end of the file. The first line tells Postfix to deliver emails to local message store via the dovecot LMTP server. The second line disables SMTPUTF8 in Postfix, because Dovecot-LMTP doesn’t support this email extension.
mailbox_transport = lmtp:unix:private/dovecot-lmtp
smtputf8_enable = no
Save and close the file.
Configuring Authentication Mechanism
Edit the authentication config file.
sudo nano /etc/dovecot/conf.d/10-auth.conf
Find the following line and uncomment it by removing the # character at the beginning.
#disable_plaintext_auth = yes
This will disable plaintext authentication when there’s no SSL/TLS encryption. Then find the following line,
#auth_username_format = %Lu
Uncomment it and change its value to %n.
auth_username_format = %n
By default, when Dovecot tries to find or deliver emails for a user, it uses the full email address. Since in this part, we only set up canonical mailbox users (using OS users as mailbox users), Dovecot can’t find the mailbox user in full domain format ([email protected]), so we need to set auth_username_format = %n to drop the domain part, then Dovecot should be able to find the mailbox user. This also allows us to use the full email address ([email protected]) to log in.
Next, find the following line.
auth_mechanisms = plain
This line only enables the PLAIN authentication mechanism. LOGIN is another authentication mechanism you probably want to add to support older email clients.
auth_mechanisms = plain login
Save and close the file.
Configuring SSL/TLS Encryption
Next, edit SSL/TLS config file.
sudo nano /etc/dovecot/conf.d/10-ssl.conf
You can find the following line, which requires email clients to communicate with Dovecot with TLS encryption.
ssl = required
Then find the following two lines.
ssl_cert = </etc/pki/dovecot/certs/dovecot.pem
ssl_key = </etc/pki/dovecot/private/dovecot.pem
We need to replace values with the location of your SSL/TLS cert and private key. Don’t leave out the < character. It’s necessary.
ssl_cert = </etc/letsencrypt/live/mail.your-domain.com/fullchain.pem
ssl_key = </etc/letsencrypt/live/mail.your-domain.com/privkey.pem
Next, find the following line and uncomment it. (Remove the beginning # character.)
#ssl_dh = </etc/dovecot/dh.pem
Find the following line.
#ssl_min_protocol = TLSv1
This specifies the minimum TLS versions used by Dovecot. TLSv1.0 and TLSv1.1 are insecure. so uncomment this line and change the value to TLSv1.2, which will force Dovecot to use TLSv1.2 or TLSv1.3.
ssl_min_protocol = TLSv1.2
Then find the following line.
#ssl_prefer_server_ciphers = no
It’s a good practice to prefer the server’s order of ciphers over client’s, so uncomment this line and change the value to yes.
ssl_prefer_server_ciphers = yes
Save and close the file. Now we need to generate the Diffie-Hellman parameter with:
sudo openssl dhparam -out /etc/dovecot/dh.pem 4096
If your mail server has a single CPU core, then this is going to take a long time (about 10 minutes). If you can’t wait, you can generate the DH parameters on your local Linux computer, then upload the file to the /etc/dovecot/ directory on the mail server.
SASL Authentication Between Postfix and Dovecot
Edit the following file.
sudo nano /etc/dovecot/conf.d/10-master.conf
Change service auth section to the following so that Postfix can find the Dovecot authentication server. Please be careful about the syntax. Every opening bracket should be terminated by a closing bracket.
service auth {
    unix_listener /var/spool/postfix/private/auth {
      mode = 0600
      user = postfix
      group = postfix
    }
}

Save and close the file.
Auto-create Sent and Trash Folder
Edit the below config file.
sudo nano /etc/dovecot/conf.d/15-mailboxes.conf
To auto-create a folder, simply add the following line in the mailbox section.
auto = create
Example:
 mailbox Trash {
    auto = create
    special_use = \Trash
 }
Some common folders you will want to create includes: Drafts, Junk, Trash and Sent. The Sent folder will be created under the user’s home directory when the user send the first email. The Trash folder will be created when the user deletes an email for the first time, etc. After you save and close all above config files, restart Postfix and Dovecot.
sudo systemctl restart postfix dovecot
Dovecot will be listening on port 143 (IMAP) and 993 (IMAPS), as can be seen with:
sudo ss -lnpt | grep dovecot

If there’s a configuration error, dovecot will fail to restart, so it’s a good idea to check the status of Dovecot.
systemctl status dovecot
Configure Desktop Email Client
Fire up your desktop email client such as Mozilla Thunderbird. Go to Edit -> Account Settings -> Account Actions -> Add Mail Account to add a mail account. If Thunderbird found your mail server configuration like below, simply click Done button and you will be able to read and send emails.

If Thunderbird didn’t found your mail server configuration, then click Manual config button to enter your mail server details.
- In the incoming server section, select IMAP protocol, enter
mail.your-domain.comas the server name, choose port 143 and STARTTLS. Choosenormal passwordas the authentication method. - In the outgoing section, select SMTP protocol, enter
mail.your-domain.comas the server name, choose port 587 and STARTTLS. Choosenormal passwordas the authentication method.

Hint: You can also use port 993 with SSL/TLS encryption for IMAP, and use port 465 with SSL/TLS encryption for SMTP. You should not use port 25 as the SMTP port to submit outgoing emails.
You should now be able to connect to your own email server and also send and receive emails with your desktop email client!
We use local Unix accounts as email addresses, as we did in part 1. For example, if you have a user called user1 on your CentOS/RHEL server, then you have an email address: [email protected], and the password for the email address is the same password for the user1 user. To create a local Unix account, run
sudo adduser user1
Then set a password for this user.
sudo passwd user1
Note: Dovecot doesn’t allow you to login with the root account. You need to create separate user accounts.
You can list all available mailbox users with:
sudo doveadm user '*'
It’s recommended to restart Dovecot after adding users, so Dovecot can recognize new mailbox users.
sudo systemctl restart dovecot
Troubleshooting Tips
As a rule of thumb, you should always check the mail log (/var/log/maillog) on your mail server when an error happens. The following is a list of specific errors.
Can’t login from Mail Clients
If you can’t log into your mail server from a desktop mail client, scan your mail server to find if the ports (TCP 587, 465, 143, and 993) are open. Note that you should run the following command from another Linux computer or server. If you run it on your mail server, then the ports will always appear to be open.
sudo nmap mail.your-domain.com
And check if Dovecot is running.
systemctl status dovecot
You can also check the mail log (/var/log/maillog), which may give you some clues. If Dovecot fails to start, the error might not be logged to the /var/log/maillog file, you can run the following command to see what’s wrong.
sudo journalctl -eu dovecot
For example, some folks may have the following error in the journal.
doveconf: Fatal: Error in configuration file /etc/dovecot/conf.d/10-master.conf line 78: Unknown setting
Most of the time, it’s a simple syntax error, like a missing curly bracket. Open the configuration file, go to the specified line and fix the error.
Cloudflare DNS
As I said in part 1, if you use Cloudflare DNS service, you should not enable the CDN (proxy) feature when creating DNS A record and AAAA record for the hostname of your mail server. Cloudflare doesn’t support SMTP or IMAP proxy.
Relay Access Denied
If you see the “relay access denied” error when trying to send emails from a mail client, it’s most likely that you use port 25 as the SMTP port in your mail client. As I said a while ago, you should use port 587 or 465 as the SMTP port in mail clients (Mozilla Thunberbird, Microsoft Outlook, etc) to submit outgoing emails. Port 25 should be used for SMTP server to SMTP server communications.

If you see the following “relay access denied” error in the /var/log/maillog file when trying to send emails from other mail services like Gmail to your own mail server, it’s likely that yourdomain.com is not in the list of $mydestination parameter.
NOQUEUE: reject: RCPT from mail-il1-f180.google.com[209.85.166.180]: 454 4.7.1 <[email protected]>: Relay access denied; from=<[email protected]> to=<[email protected]> proto=ESMTP helo=<mail-il1-f180.google.com>
You can display the current value of $mydestination with:
postconf mydestination
Some folks might not have the main domain name in the list like so:
mydestination = $myhostname, localhost.$mydomain, localhost
Then run the following command to add the main domain name to the list.
sudo postconf -e "mydestination = yourdomain.com, \$myhostname, localhost.\$mydomain, localhost"
Reload Postfix for the changes to take effect.
sudo systemctl reload postfix
User Doesn’t Exist
If you see the following error message in the mail log (/var/log/maillog), it’s likely that you forgot to set auth_username_format = %n In /etc/dovecot/conf.d/10-auth.conf file.
mail postfix/lmtp[2256]: 68E00FC1A5: to=, relay=mail.example.com[private/dovecot-lmtp], delay=509, delays=509/0.03/0.03/0.02, dsn=5.1.1, status=bounced (host mail.example.com[private/dovecot-lmtp] said: 550 5.1.1 User doesn't exist: [email protected] (in reply to RCPT TO command))
iOS Mail App
If you use the iOS Mail app to log into your mail server and encounter the following error.

You can try to fix it by enforcing SSL encryption, for both SMTP and IMAP.

Fun fact: It seems the iOS Mail app has difficulty in supporting STARTTLS on IMAP port 143, but it supports STARTTLS on the submission port 587.
If you encounter the “No password provided” error in the iOS Mail app, it’s likely that you have a typo when entering the username in the Mail account settings, or you didn’t enable SSL in the Mail account settings. 
Unable to Receive Email From Gmail, Hotmail, Yahoo Mail, etc
If you can’t receive emails from Gmail, Hotmail, Yahoo Mail, etc, here are the possible causes:
- Your MX record is wrong, or not propagated to the Internet yet.
- Your mail server hostname doesn’t have DNS A record, or not propagated to the Internet yet.
- Your firewall doesn’t allow incoming connection to port 25. Maybe your mail server is behind a NAT?
- Postfix isn’t listening on the public IP address.
- Check the mail log (
/var/log/mail.log) to find out if there are other errors in your Postfix and Dovecot configuration.
You can use the Network Tools Email Checker to test if your SMTP server is reachable from the Internet. Just enter your domain email address and click the Go button. As you can see from the screenshot below, it successfully found my domain’s MX record and my SMTP server is reachable from the Internet.

If your SMTP servers isn’t reachable from the Internet, then you have a problem in the first 4 items. If your SMTP server is reachable from the Internet, but you still can’t receive emails, check the mail log (/var/log/mail.log) to find out if there is any errors in your Postfix and Dovecot configuration.
Auto-Renew TLS Certificate
You can create Cron job to automatically renew TLS certificate. Simply open root user’s crontab file.
sudo crontab -e
If you use Apache web server, add the following line at the bottom of the file.
@daily certbot renew --quiet && systemctl reload postfix dovecot httpd
If you are using Nginx web server, then add the following line.
@daily certbot renew --quiet && systemctl reload postfix dovecot nginx
Reloading Postfix, Dovecot and the web server is necessary to make these programs pick up the new certificate and private key.
Dovecot Automatic Restart
If for any reason your Dovecot process is killed, you need to run the following command to restart it.
sudo systemctl restart dovecot
Instead of manually typing this command, we can make Dovecot automatically restart by editing the dovecot.service systemd service unit. To override the default systemd service configuration, we create a separate directory.
sudo mkdir -p /etc/systemd/system/dovecot.service.d/
Then create a file under this directory.
sudo nano /etc/systemd/system/dovecot.service.d/restart.conf
Add the following lines in the file, which will make Dovecot automatically restart 5 seconds after a failure is detected.
[Service]
Restart=always
RestartSec=5s
Save and close the file. Then reload systemd.
sudo systemctl daemon-reload
To check if this would work, kill Dovecot with:
sudo pkill dovecot
Then check Dovecot status. You will find Dovecot automatically restarted.
systemctl status dovecot
Next Step
I hope this article helped you set up Postfix and Dovecot on CentOS 8/RHEL 8 server. In part 3, I will show you how to create virtual mailboxes on CentOS 8/RHEL 8 with PostfixAdmin.


Great instruction, thank you!
However, there is one error causing my thunderbird unable to read email (sending is fine). The mail log (/var/log/maillog) says user doesn’t exists, although it does.
It’s likely that you forgot to set
auth_username_format = %nIn/etc/dovecot/conf.d/10-auth.conffile.Hey,
thanks for ur guide, however i followed ur instructions and even set
in
file and also restarted dovecot, when i try to login via an existing account i do get an error on Thunderbird that the user or password doesn’t match exist. So i checked
to list all available mailbox users, but i do get
.
gives me following errors
Any idea?
Ok, just found the answer here:
https://serverfault.com/questions/291667/dovecot-getting-error-mail-access-for-users-with-uid-222-not-permitted
By changing the the value of
from 1000 to 990 (which is my user id, the uid of ur user can be shown with
) in
.
However it is not recommended to keep it permanent solution since the use of virtual mailboxes is better, so we don’t need to use local Unix accounts. Which is explained in part 3 of this guide.
@Xiao Thanks :), for ur awesome guide, maybe u could add a note into part2 if someone is running into the same problem then me?
The newest version of Dovecot on CentOS 8 is now:
This caused a problem with the SSL connection from mail clients as SSL is no longer used.
Looking at /var/log/maillog I find this:
There are instructions as to resolving this issue as stated:
“dd if=/var/lib/dovecot/ssl-parameters.dat bs=1 skip=88 | openssl dhparam -inform der > /etc/dovecot/dh.pem”
But this fails. The problem being that dh.pem is too small. It should be noted that ssl-parameters.dat is no longer required.
Final resolution is to use a physical computer and issue this command:
In my case I used
and then moved that file to /etc/dovecot/dh.pem.
Next
Finally, restart dovecot with systemctl restart dovecot.service
This was helpful. However, in my case I am using Let’s Encrypt. After the update from Dovecot 2.2 to 2.3.8, I just did the following:
Since it seemed that dovecot was still referencing the ss-parameters.dat file. After removing it from the equation, mail resumed working again.
Great guide, thanks!
I have an issue of “connect to mail.mydomain[private/dovecot-lmtp]: No such file or directory” in the maillog. So postfix can not deliver the mail to dovecot.
Thanks
Sam, in your /etc/dovecot/conf.d/10-master.conf file, check the ‘service lmtp’ section to make sure it is correct. A misconfiguration there will cause that error.
If you don’t know where’s wrong, you can add the following line in the
/etc/dovecot/dovecot.conffile,then restart dovecot, so dovecot will produce debugging message in the
/var/log/maillogfile.Thanks, all good now. It is the service lmtp.
Big thanks for such a great manual, all works great except one thing.
I have such error:
Trying different things like deleting privacy.pem and creating new one. When I testing privacy.pem all looks good.
Hello Xiao ports 465 and 578 not listen after doing this:
Add the following lines at the bottom of the file. (In Nano text editor, you can quickly go to the bottom of a file by pressing Ctrl+W, then Ctrl+V.)
#Force TLSv1.3 or TLSv1.2
smtpd_tls_mandatory_protocols = !SSLv2, !SSLv3, !TLSv1, !TLSv1.1
smtpd_tls_protocols = !SSLv2, !SSLv3, !TLSv1, !TLSv1.1
smtp_tls_mandatory_protocols = !SSLv2, !SSLv3, !TLSv1, !TLSv1.1
smtp_tls_protocols = !SSLv2, !SSLv3, !TLSv1, !TLSv1.1
Save and close the file. Then reload Postfix for the changes to take effect.
sudo systemctl restart postfix
If you run the following command, you will see Postfix is now listening on port 587 and 465.
sudo netstat -lnpt | grep master
Check your mail log file (/var/log/maillog) to find out what’s wrong.
Xiao question very important : Can anyone hack my mail server? postfix? vps? how I can found out I been hacked ? thanks
You can read the following article on how to protect your mail server from hacking.
How to Secure Email Server Against Hacking with Self-hosted VPN Server (CentOS/RHEL)
Thank You Xiao
Hi Xiao,
what a great toturial ever i found. could we follow your tutorial series but postfix and dovecot installed on different servers? lets say postfix on server a and dovecot for server b?
thanks.
I’m commenting issues I had because I ended up having to rebuild my server after being DDoS’d (configuration maybe) and likely misconfigured. Couldn’t reboot my CentOS without entering rescue kernel. I was almost 100% completed with this tutorial but I couldn’t get my primary email account setup. Sucks. I wish you added more information about setting up the initial email account as opposed to it being inherited from the centOS user account. When I tried in thunderbird it found the settings but just wouldn’t login. I went over the permissions a million times. I’m hoping to maybe start from scratch in-case I missed something. Email servers ARE A PAIN. Let me tell you, anyone who wants to do this. I’ve been building sites for 15 years and feel like I have a good grasp of CentOS, and the ever-changing landscape is inevitable it feels like. Bandwidth, CPU, script-kiddies, etc. It’s a lot to juggle.
If you don’t want to build an email server from scratch, you can use iRedMail to set up a full-featured mail server quickly and easily.
Not this configuration specifically, but something went wrong on my side while I followed the tutorial. I have root login and password authentication shut off with sshd reloaded, but I can see cross-site attacks from Chinese IP addresses in the logs for days following the mail installation. Most of them are referencing the cgi-bin, and I haven’t figured out what happened yet.
Great & complete tutorial, nice of you to put everything here together. Thanks!
Correct me if I missed it but it could be interesting to know that the settings in main.cf are overridden for specific “services” in master.cf. I.e.: the require for TLS security level in the “submission” handler of master.cf only enforces the use of TLS when a client speaks to the submission service.
Yes. Each parameter in the
-oline will override the corresponding setting in /etc/postfix/main.cf.dovecot does not support ocsp stapling, so i would NOT use ocsp staple on the certificate until they have added this feature to dovecot, see https://dovecot.org/pipermail/dovecot/2018-October/113368.html
Yes, Postfix and Dovecot don’t support OCSP stapling. However, the
--staple-ocspflag doesn’t force the use the OCSP, so this won’t affect mail clients like Thunderbird.If you add
--must-stapleto your TLS certificate, then mail clients (Thunderbird) would refuse to connect.hi!
many thanks for your beautiful article. I have already installed let’s encrypt for my domain.com and www.domain.com. how can I install it for mail.domain.com as well?
You can’t use TLS certificate for domain.com or www.domain.com on mail.domain.com. Obtain a new TLS certificate for mail.domain.com.
Do I need the email submission service if I don’t plan on using a desktop client?
If you use webmail or use SMTP authentication, you still need to enable the submission service.
The only situation you don’t need a submission service is when you send and receive emails from the command line.
Can I have an email address that doesn’t match the unix username without creating a virtual mailbox? For example I want Tanner@mydomain instead of [email protected]
Also is it possible to create a group that makes it so only users in that group have an email account?
1. ) By default, Postfix allows you to use any email address (it could be non-existent) as the From: address to send emails. However, you can’t receive emails with a non-existent email address.
2.) I have never tried that.
I am having all kinds of problems resolving this issue. It appease to be an mx record problem. But I just cannot figure it out. Any ideas where to look. Thank you.
postfix/smtp[3913]: CD9FA4637C: host a34-mta04.direcpc.com[66.82.4.105] refused to talk to me: 421 Downstream server error
This error code indicates this is the receiving SMTP server’s problem, not your problem. You don’t need to do anything on your mail server. Maybe you can contact the administrator of the receiving mail server asking them to fix the error on their mail server.
sudo certbot certonly -a -apache –agree-tos –staple-ocsp –email [email protected] -d mail.your-domain.com
In the email zone what I have to do ?
Just replace [email protected] with your real email address.
Hi everyone,
I get the following error:
Can someone please help me out here?
Thanks in advance!!
Tom.
The correct command should be
There should be no hyphen before
apache.Hello Xiao,
First, I’d like to thank you for this amazing tutorial. I appreciate your work.
Second, do you know what could be the reason for not being able to receive email on my mail server? I sent email from the server and all is good, but email does not arrive back. I constantly checked /var/log/maillog and I can’t see any “incoming” email.
I initially thought it has to do with dovecot / protocols (I had protocols = imap lmtp). I tried with protocols = imaps lmtp but this didn’t change anything – email is still not incoming.
Any suggestions are much appreciated.
Thanks,
Axel
Possible causes of no incoming emails.
1. Your MX record is wrong.
2. Your mail server hostname doesn’t have DNS A record.
3. Your firewall doesn’t allow incoming connection to port 25.
4. Postfix isn’t listening on the public IP address.
5. Check the mail log (/var/log/maillog) to find out if there are other errors in your configuration
Thanks for this great series of tutorials! Sending and receiving mails sent from thunderbird within the mail server (local user accounts) is working fine. As soon as I try to send a mail to a gmail mailbox, I get the following error:
Relay access denied;
/var/log/maillog shows:
It seems you use port 25 in Thunderbird to submit outgoing emails. You should use port 587 or 465 as the outgoing port in mail user agent (MUA).
Yes, this did the trick. Thanks! I always thought STARTTLS used Port 25 to initialize the connection and then switches over to the secure port.
STARTTLS can be used on port 25 (SMTP), 587 (SMTP submission), and 143 (IMAP).
Port 25 should be used for
1.) MTA-to-MTA communication
2.) local applications on the mail server to submit outgoing emails (127.0.0.1:25).
I received a mail that content is below
————————————————
Your certificate (or certificates) for the names listed below will expire in 20 days (on 19 Jan 21 13:04 +0000). Please make sure to renew your certificate before then, or visitors to your website will encounter errors.
…
————————————————
how to renew my certification? thank you always!
If you use Apache web server,
If you are using Nginx web server
Reloading Postfix, Dovecot and the web server is necessary to make these programs pick up the new certificate and private key.
If the renewal fails, it’s probably because you changed the virtual host file.
Thank you so much!
Happy New Year Xiao Guoan!! 🙂
Hi Xiao Guoan, I got the error as below, please give me advice, thanks.
It looks like bit915.com is not a publicly registered domain. NameCheap shows that this domain is available for purchase.
Internal domain names can’t obtain Let’s Encrypt TLS certificate, and you won’t be able to receive emails from other mail servers, because the domain doesn’t exist on the public Internet.
Great Guide. I have implemented your guide in our server, however i have a small problem witch certificates. Our server is both web and mail server. So in server hostname i have set the main domain emk.gr and in postfix hostname mail.emk.gr. I have generated the certificates using certbot command
and setup postfix and dovecot with the related paths.
However certificate verification fails with error message:
Peer certificate CN=`emk.gr’ did not match expected CN=`mail.emk.gr’
Any suggestions?
Using command:
is it going to resolve the problem??
Thanks in advance
You need to use the certificate for mail.emk.gr in the Postfix and Dovecot configurations files. You don’t need to combine the certificate for emk.gr and www.emk.gr with the certificate for mail.gmk.gr. They can have their own certificate files.
Follow the instructions in this tutorial to obtain a certificate for mail.emk.gr.
sudo dnf install epel-release -y
no longer works
get:
Using RHEL 8.3 Server
If you use RHEL 8.3, run the following commands.
sudo dnf install Certbot doesnt work
Certbot is in the EPEL repository.
Have you enabled the EPEL repository?
PS: Please do NOT double post the same question.
I’m confused, my /etc/postfix/master.cf looks a whole lot different than the one shown here and it’s missing some of the things mentioned here; what should I do?
You don’t need to use all the default parameters in the /etc/postfix/master.cf file. If you don’t know what a parameter means, it’s better not to use the parameter.
Thanks a lot for the tutorial. Almost everything is working fine apart from the following.
I am able to send and receive emails from an account [email protected], where user mailA belongs to the wheel group.
I created an additional user mailB, and although I am able to send emails to mailA and external email accounts, I cannot receive any email in this mailB account.
The log says the following when trying to send an email from mailA to mailB.
For some unknown reason to me the root user is popping up in the log.
From the logs, do you have any idea why mailB cannot receive any email?
Thanks in advance.
Dovecot doesn’t allow you to use the root user account as an email address. Don’t use the [email protected] email address.
If you want to use the [email protected] email address, you need to go to part 3 to set up virtual mailbox.
Thanks for the quick reply. I just followed the tutorial, and at no moment I configured a [email protected] email, that is why I find it weird it showing up in the logs.
Maybe it’s a system mail automatically sent to the [email protected] address.
How might this be accomplished without using “Let’s Encrypt” ?
The environment we are in has its own CA.
For Postfix, the commands to set TLS certificate are:
For Dovecot, the TLS directives are:
in the
/etc/dovecot/conf.d/10-ssl.conffile.If you have your own certificate, Simply replace the Let’s Encrypt certificate with your own certificate.
Thanks for responding, but what is in the “fullchain.pem” file ?
Some sites say it is the server’s cert plus the CA cert chain.
Others include the server’s private key.
There is no definitive information about ordering of the 2-or-3 pieces.
“Let’s Encrypt” may be the greatest thing since sliced bread, but I am not sure I am permitted to use it in my environment (Security restrictions/requirements)
Yes, it is the server’s cert plus the CA cert chain.
The server private key is in a separate file: privkey.pem.
Hi,
I have multiple domains. How do i insert all the certs to dovecot?
You will learn that in part 7: Host Multiple Mail Domains in PostfixAdmin on CentOS/RHEL
Thank you!
Awesome job Xiao! You made an old man proud by teaching him how to run his own mail server.
How to address the path of a smb share folder to a virtual mailbox in dovecot conf
Under Dovecot Automatic Restart, a more straight forward way is:
Paste/type:
Save and exit nano.
Done, that creates the directory, drops the content into a file called override.conf and automatically loads it into systemd on update.
Hi when i try to send an mail as [email protected] to someone random it says message failed. Any ideas where i should look to troubleshoot this problem?
As a rule of thumb, you should always check the mail log (/var/log/maillog) on your mail server when an error happens.
Hello Xiao and thank you for the tutorial.
I initially created info as the user thru webmin and assigned it to postfix. However, due to some issues, I completely deleted that user and used your approach by: sudo adduser info
The issue is that I can login to mozila thunderbird to that [email protected], I can send out emails to [email protected], [email protected], BUT i cannot receive any emails into my [email protected] from no one! Here is maillog that I hope you can help me with it…
Thank you very much! – Ali
The above problem was due to an alias info => root.
Yes, you should not use root as the email address.
Hi Xiao,
Thank you for an incredible tutorial!
I noticed that you have two mail exchange: (mail2.linuxbabe.com, mail.linuxbabe.com).
How can I do that? How to build two mail servers (mx1., mx2.) but some SMTP address (smtp.domain.com)?