How to Upgrade Ubuntu 16.10/17.04 to Ubuntu 18.04 From Command Line
This tutorial will be showing you how to upgrade Ubuntu 16.10/17.04 to Ubuntu 18.04. Ubuntu 16.10/17.04 reached end of life but some users are still using it and have problems in upgrading to Ubuntu 18.04.
For those who don’t know, normal Ubuntu releases are supported for 9 months, whereas LTS releases are supported for 5 years. (LTS stands for Long Term Support) There are 3 LTS now: Ubuntu 14.04, Ubuntu 16.04 and Ubuntu 18.04. If you prefer stability over new software, then you should choose LTS and only upgrade it when the next LTS comes out. If you prefer newer software, then remember to upgrade your system every 9 months.
When an Ubuntu release reaches its “end of life” it receives no further maintenance updates, including critical security upgrades. Ubuntu 16.10 and Ubuntu 17.04 both reached end of life so users of these two releases can’t install software from standard repository any more. Running an update command will result in 404 error.

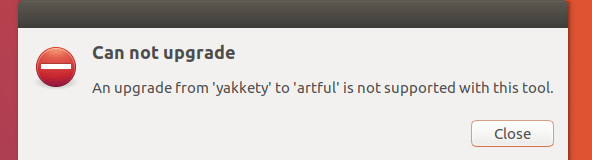
If you open software updater, it tells you to upgrade to Ubuntu 17.10.

But later you will find this is not supported.

How to Upgrade Ubuntu 16.10/17.04 to Ubuntu 18.04 From Command Line
The method I will tell you is the same method for upgrading a Debian system and is how Ubuntu update manager works under the hood. The difference is that Ubuntu update manager refuses to change code name on an obsolete release like Ubuntu 16.10, but we’re going to manually change the code name. Personally I don’t think there’s more risk in doing this than upgrading Ubuntu 16.04 to Ubuntu 18.04. That being said, be sure to back up your important data before following the instructions below.
First, we need to run the following command to change all instances of yakkety to bionic in the source list file (/etc/apt/sources.list). The former is the code name for Ubuntu 16.10, whereas bionic is the code name for Ubuntu 18.04.
sudo sed -i 's/yakkety/bionic/g' /etc/apt/sources.list
If you are using Ubuntu 17.04, then run this command instead.
sudo sed -i 's/zesty/bionic/g' /etc/apt/sources.list
Then we need to disable third-party repositories (PPAs) with the command below.
sudo sed -i 's/^/#/' /etc/apt/sources.list.d/*.list
After that, update software sources and upgrade software to the latest version available in the Ubuntu 18.04 repository. This step is called minimal upgrade.
sudo apt update

sudo apt upgrade
Once minimal upgrade is finished, run the following command to begin full upgrade.
sudo apt dist-upgrade
If you see this error:
Unable to fetch some archives, maybe run apt-get update or try with --fix-missing?
Then run the following command to fix the error.
sudo apt update
And re-run
sudo apt dist-upgrade
After that, you can remove obsolete/unneeded software packages from your Ubuntu system.
sudo apt autoremove

sudo apt clean
Finally, reboot the system.
sudo shutdown -r now
You should now see the Ubuntu 18.04 GNOME login screen. GNOME is the default desktop environment, but you can choose Unity desktop on the login screen.

Once logged in, the Ubuntu 18.04 welcome screen pops up.

You can open up terminal window and check your Ubuntu version.
lsb_release -a
You should see the following text.
No LSB modules are available.
Distributor ID: Ubuntu
Description:    Ubuntu 18.04 LTS
Release:        18.04
Codename:       bionic
Hint
1. You can also use the method described in this article when the update manager is stuck and doesn’t do anything. For example, I once run
do-release-upgade
Then it was stuck at
checking for a new ubuntu release
2. Sometime the upgrade manager can’t calculate the upgrade.
Could not calculate the upgrade
An unresolvable problem occurred while calculating the upgrade.
And the log file (/var/log/dist-upgrade/main.log) shows the following line.
Dist-upgrade failed: 'The package 'postgresql-14-postgis-3' is marked for removal but it is in the removal blacklist.'
In this case, you can also use the method described in this article to perform the system upgrade.
Wrapping Up
Congrats! You have successfully upgraded Ubuntu 16.10/17.04 to Ubuntu 18.04. As always, if you found this post useful, then subscribe to our free newsletter to get more tips and tricks. Take care.


How do I upgrade my Web Server from 16.04 LTS to 18.04 LTS.
Please see this tutorial: https://www.linuxbabe.com/ubuntu/upgrade-from-ubuntu-16-04-17-10-to-ubuntu-18-04
It’s better to test the upgrade on a clone server before doing the real upgrade.
Thank you so much for this. Saved me a ton of time and it was painless. Worked perfect.
Your are a star Man,
Thanks for this, you saved my life.
God bless.
Plz keep on posting post like this.
I still get an error of Hash Sum mismatch even after I ‘sudo apt get update’ and ‘sudo apt dist-upgrade’ over again and again.. Please help!
Thank you! I upgraded from 17.04 to 18.04.
Hi Can you share your sources.list file
This is the sources.list file for Ubuntu 18.04 on my computer.
It didnt work for me. I got this error: sudo apt update
Ign:1 http://old-releases.ubuntu.com/ubuntu bionic InRelease
Ign:2 http://old-releases.ubuntu.com/ubuntu bionic-updates InRelease
Ign:3 http://old-releases.ubuntu.com/ubuntu bionic-backports InRelease
Hit:4 http://archive.canonical.com/ubuntu bionic InRelease
Ign:5 http://old-releases.ubuntu.com/ubuntu bionic-security InRelease
Err:6 http://old-releases.ubuntu.com/ubuntu bionic Release
404 Not Found
Err:7 http://old-releases.ubuntu.com/ubuntu bionic-updates Release
404 Not Found
Err:8 http://old-releases.ubuntu.com/ubuntu bionic-backports Release
404 Not Found
Err:9 http://old-releases.ubuntu.com/ubuntu bionic-security Release
404 Not Found
Reading package lists… Done
E: The repository ‘http://old-releases.ubuntu.com/ubuntu bionic Release’ does not have a Release file.
N: Updating from such a repository can’t be done securely, and is therefore disabled by default.
N: See apt-secure(8) manpage for repository creation and user configuration details.
E: The repository ‘http://old-releases.ubuntu.com/ubuntu bionic-updates Release’ does not have a Release file.
N: Updating from such a repository can’t be done securely, and is therefore disabled by default.
N: See apt-secure(8) manpage for repository creation and user configuration details.
E: The repository ‘http://old-releases.ubuntu.com/ubuntu bionic-backports Release’ does not have a Release file.
N: Updating from such a repository can’t be done securely, and is therefore disabled by default.
N: See apt-secure(8) manpage for repository creation and user configuration details.
E: The repository ‘http://old-releases.ubuntu.com/ubuntu bionic-security Release’ does not have a Release file.
N: Updating from such a repository can’t be done securely, and is therefore disabled by default.
N: See apt-secure(8) manpage for repository creation and user configuration details.
W: Target Sources (main/source/Sources) is configured multiple times in /etc/apt/sources.list:12 and /etc/apt/sources.list:13
W: Target Sources (restricted/source/Sources) is configured multiple times in /etc/apt/sources.list:12 and /etc/apt/sources.list:13
W: Target Sources (universe/source/Sources) is configured multiple times in /etc/apt/sources.list:12 and /etc/apt/sources.list:21
W: Target Sources (multiverse/source/Sources) is configured multiple times in /etc/apt/sources.list:12 and /etc/apt/sources.list:31
W: Target Sources (main/source/Sources) is configured multiple times in /etc/apt/sources.list:39 and /etc/apt/sources.list:40
W: Target Sources (restricted/source/Sources) is configured multiple times in /etc/apt/sources.list:39 and /etc/apt/sources.list:40
W: Target Sources (universe/source/Sources) is configured multiple times in /etc/apt/sources.list:39 and /etc/apt/sources.list:40
W: Target Sources (multiverse/source/Sources) is configured multiple times in /etc/apt/sources.list:39 and /etc/apt/sources.list:40
W: Target Sources (main/source/Sources) is configured multiple times in /etc/apt/sources.list:50 and /etc/apt/sources.list:51
W: Target Sources (restricted/source/Sources) is configured multiple times in /etc/apt/sources.list:50 and /etc/apt/sources.list:51
W: Target Sources (universe/source/Sources) is configured multiple times in /etc/apt/sources.list:50 and /etc/apt/sources.list:53
W: Target Sources (multiverse/source/Sources) is configured multiple times in /etc/apt/sources.list:50 and /etc/apt/sources.list:55
Looks like you have edited the
/etc/apt/sources.listfile before following this tutorial. Maybe you should replace the content in that file with the following lines:Hello, does this work for Lubuntu distro? I am using Lubuntu 16.10 and it is similar to Ubuntu but it is lore lightweight because of LXDE.
The upgrade procedure is the same for all Ubuntu flavors, including Lubuntu. The desktop environment doesn’t matter.
Hello, so I was trying your method. Everything was going fine but halfway through the minimal upgrade I suddenly got a black screen and it still persists until now.
I have no idea what went wrong… Can you provide a solution?
Black screen often has something to do with your hardware, especially when you use Nvidia graphics card.
Hello, after reboot I have got only black screen. Sorry 🙁 I do not know, what solution better: a new computer or mind of smart man 😯
Thanks, Xiao Guo-An.
At first I got the same error as Flattop above mentioned. I did the replacement you suggested and all worked. As a sidenote, the file /etc/apt/sources.list had been tampered with many times and that’s why the upgrade recipe didn’t work at first.
I would add my case too:
When running command `apt upgrade` the upgrade process has stop because of some dependency error.
Fixed with:
sudo dpkg –configure -a
sudo dpkg –configure -a –force-depends
sudo apt-get -f install
To fix drivers problem run
sudo ubuntu-drivers autoinstall
Is this legal ?
Yes it’s legal. Canonical doesn’t want to spend time supporting Ubuntu 16.10 and Ubuntu 17.04 users. We can use this method to upgrade. If you have important data on your system, be sure to back it up before following the upgrade instructions .
thank you ..but at the end of sudo apt upgrade ihave this :
what to do and thank you
I think you need to run the following command to fix the error.
If there are other errors, feel free to post here.
Worked for me moving from 17.04 with Mate desktop.
I also got ‘plymouth-theme-ubuntu-text’ error but after following your suggestion + the one displayed in command line it all worked fine.
Thanks!
You might not really understand, but you have literally saved a LIFE of a human being even better than a doctor could have. GOD BLESS YOU. I am most grateful!
Glad to hear that 🙂
E: Could not get lock /var/lib/apt/lists/lock – open (11: Resource temporarily unavailable)
E: Unable to lock directory /var/lib/apt/lists/
getting this error on running sudo apt update command
You need to wait for the background “apt update” to finish. This usually happens when you haven’t used Ubuntu for some time.
ingrese el primero comnado
sudo sed -i ‘s / yakkety / bionic / g’ /etc/apt/sources.list
y me resulto en este error por favor ayuda
sed: -e expresión #1, carácter 13: opción desconocida para `s’
lo tienes mal escrito eso no lleva espacios…
thank you man…everything worked well…Good job.
In one of the comments you mentioned that we can expect a black screen if we use an Nvidia graphics card. I have and use one on my Ubuntu OS, so should I avoid this procedure?
If you worry about black screen, you can first disable the Nvidia graphics driver before doing the upgrade. After the upgrade, you can enable Nvidia grahics driver again.
when i run sudo apt-get dist-upgrade, i got message below
The following packages have unmet dependencies:
gnupg-utils : Breaks: gnupg-agent (< 2.1.21-4)
gpgconf : Breaks: gnupg-agent (< 2.1.21-4)
E: Error, pkgProblemResolver::Resolve generated breaks, this may be caused by held packages.
how to solve this ?
Since you are using an unsupported Ubuntu version, it’s better to remove these gpg packages to solve the dependency problem.
If you have GPG keys, export them to another computer or USB stick before removing these packages.
thanks for tutorial and reply,
about gnupg issues finally i can solve it, problem not on gnupg directly but on repo,
my ubuntu cannot authorized archive.ubuntu because badsig, so i change to closest mirror.
that make everything work.
Hola estimados, temgp ubuntu 17.04 ya no puedo realizar actualizaciones, de ninguna forma, ni con el asistente ni con la linea de comando, queria pasar mi version a la 18.4 LTS, para evitarme futuros problemas. he prodado editando mil veces el sources usando la del 18, pero no funciona igual. respecto a este tuto
ejecute la sentencia: sudo sed -i ‘s / zesty / bionic / g’ /etc/apt/sources.list y tento la respuesta
sed: -e expresión # 1, carácter 13: opción desconocida para `s ‘
¿que procederia para solventarlo y probar continuar con el resto del tuto?
En espera de sus comentarios, sls.
That’s because the quotation marks have been changed to another character in your language.
Please read this article in English.
Estimado muchas gracias,
Saludos estimados, espero me puedan ilustrar un poco, un día de tantos al inicar mi ubuntu 17.04 ya no me levanto el escritorio completo, no me mostraba la barra lateral de aplicaciones (el lanzador) al lado izquierdo, y el escritorio vacío, por un tiempo pues tuve que usar todo desde consola, pero ya es tiempo de darle solución, luego de invertir muchas horas buscando diferentes soluciones, ninguna me ha funcionado. además de ya no poder realizar actualizaciones fiables porque ya no hay soporte, deseo migrar a la 18.4 LTS, espero pueda ser posible.
1. instale otro entorno de escritorio como kde, unity, esperado poder desplegar todo bien, pero no fue así.
2. por no poder tener actualizaciones, compie el sources.list que viene en 18.4 lts y tal vez poder actualizar y realizar el upgrade y tampo función.
3. cuando me daba problemas de dpkg, creo que igual solucione ello pero no logró levantar todo el escritorio aun, además que todas las ventanas que logró abrir con dificultad no muestra los iconos de cerrar, minimizar, maximizar
4. uso una maquina virtual con virtual box.
alguna idea de como solventar realmente que: A) muestre el lanzador en la barra lateral izquierda como es comun, y B) solventar que las aplicaciones las pueda manipupar (que me muestre los iconos de minimizar, maximizar y cerrar?
5) Tambien me gustaria me aclaren, por algun foro lei que no puedo actualizar una version normal a una version que sea LTS ? es eso cierto? “Ubuntu sólo admite la actualización de una versión a la siguiente, o de una versión LTS a la siguiente versión LTS.” ????
En espera de su ayuda.
Sls.
Normally, it’s a good practice to upgrade from LTS to LTS, or upgrade your Ubuntu system every nine months.
Yes, Canonical doesn’t officially support upgrading Ubuntu 17.04 to Ubuntu 18.04 LTS. That’s because Canonical doesn’t want to spend extra resources to support so many Ubuntu versions at the same time.
However, since you forgot to upgrade Ubuntu 17.04 to the next version, you have no choice but to use an unofficial way to upgrade Ubuntu 17.04 to Ubuntu 18.04 LTS. The method I showed in this article is how the Ubuntu distribution upgrade manager works under the hood. At the end of the day, there’s no real difference between the official upgrade method and the unofficial upgrade method mentioned in this article.
In a nutshell, Canonical doesn’t officially support upgrading Ubuntu 17.04 to Ubuntu 18.04 LTS. That’s simply because they don’t want to spend extra resources to support so many Ubuntu versions at the same time, but that doesn’t mean you can’t do it.
You can create a snapshot in VirtualBox before upgrade. If the upgrade fails, you can revert your VM back to the original state.
To install KDE desktop environment on Ubuntu 18.04, simply run the following command.
muchas gracias por sus comentarios, realmente es una pena que no podre pasar a una lts, pero ya estoy más claro, en adelante usare solo versiones LTS,
Solo no queria dejar abandonado todo lo que ya había trabajado en el entorno de 14.4, mis archivos principales ya los tengo respaldados, pero no quería invertir más tiempo en volver a instalar mis programas que su momento me costaron un poco igual configurar. En cambio quería aprender a solventarlo, pero veo que no podré 🙁
edite manualemente el source de zesty por bionic en las lista de repositorio, pero no logre solucionar todo.
I tried to upgrade but I get the following error:
E: No se puede encontrar la versión de debconf. ¿Está debconf instalado?
debconf: fallo al ejecutar «apt-extracttemplates»: No such file or directory
dpkg-deb: /lib/x86_64-linux-gnu/liblzma.so.5: version `XZ_5.2′ not found (required by dpkg-deb)
dpkg: error al procesar el archivo /var/cache/apt/archives/gcc-8-base_8.3.0-6ubuntu1~18.04.1_amd64.deb (–unpack): el subproceso dpkg-deb –control devolvió el código de salida de error 1
Se encontraron errores al procesar:
/var/cache/apt/archives/gcc-8-base_8.3.0-6ubuntu1~18.04.1_amd64.deb
E: Sub-process /usr/bin/dpkg returned an error code (1)
************************************************
I tried to delete the cache, but it does not work either,
rm /var/cache/apt/archives/gcc-8-base_8.3.0-6ubuntu1~18.04.1_amd64.deb
Install the liblzma5 package.
Then run the upgrade command again.
try, but give the same error
Run the following command to see if liblzma5 is installed.
If it’s not installed, maybe you need to install debconf.
1) dpkg -L liblzma5
“dpkg-query: atención: falta el fichero de lista de ficheros del paquete `liblzma5:amd64′, se supondrá que el paquete no tiene ningún fichero actualmente instalado
El paquete `liblzma5:amd64′ no contiene ningún fichero (¡!) ”
**************
2) al ejecutar: sudo apt install debconf
Extrayendo plantillas para los paquetes: 100%
dpkg-deb: /lib/x86_64-linux-gnu/liblzma.so.5: version `XZ_5.2′ not found (required by dpkg-deb)
dpkg: error al procesar el archivo /var/cache/apt/archives/libc6_2.27-3ubuntu1_amd64.deb (–unpack):
el subproceso dpkg-deb –control devolvió el código de salida de error 1
Se encontraron errores al procesar:
/var/cache/apt/archives/libc6_2.27-3ubuntu1_amd64.deb
E: Sub-process /usr/bin/dpkg returned an error code (1)
creo que busca esta libreria “libc6_2.27-3ubuntu1_amd64.deb”
reviso el status de dpkg con nano /var/lib/dpkg/status y esta bien creo…
Package: liblzma5
Status: install ok installed
Priority: required
Section: libs
Installed-Size: 305
Maintainer: Ubuntu Developers
Architecture: amd64
Multi-Arch: same
Source: xz-utils
Version: 5.1.1alpha+20120614-2ubuntu2
*****
I’m afraid your system has been corrupted before the upgrade.
Just for clarification is this guide geared towards 64-bit OS architecture versions or is it also usable for 32-bit OS architectures?
I was in the middle of updating my system. In the minimal upgrade (the second command) my computer temporarily lost connection and then there was an error saying the installs had no dependency files. I tried repeating but it didn’t work and now I tried restarting but the computer itself is not booting up, it’s either a blank screen or loading continuously. Please help. I don’t know anything about linux.
What to do?
Disable third-party repositories (PPAs) with the command below.
Then run the
sudo apt updatecommand again.hi, after doing this tutorial and upgrading my system from 17.04 to 18.04, the resolution on my computer has plummeted and I can’t seem to fix it, do you have any ideas how I can do this?
Install the latest driver for your graphics card.
help me!
ERROR”sed: can’t read /etc/apt/sources.list.d/*.list: No such file or directory”
It means your system doesn’t have third party repository, so just execute the next command.
I have just tried the steps you have described. (I wanted to upgrade from zesty to bionic).
The command sudo sed -i ‘s/zesty/bionic/g’ /etc/apt/sources.list didn’t work. A lot of urls are not valid anymore.
Then I have replaced my sources.list with yours
deb http://us.archive.ubuntu.com/ubuntu/ bionic main restricted
deb http://us.archive.ubuntu.com/ubuntu/ bionic-updates main restricted
deb http://us.archive.ubuntu.com/ubuntu/ bionic universe
deb http://us.archive.ubuntu.com/ubuntu/ bionic-updates universe
deb http://us.archive.ubuntu.com/ubuntu/ bionic multiverse
deb http://us.archive.ubuntu.com/ubuntu/ bionic-updates multiverse
deb http://us.archive.ubuntu.com/ubuntu/ bionic-backports main restricted universe multiverse
deb http://security.ubuntu.com/ubuntu bionic-security main restricted
deb http://security.ubuntu.com/ubuntu bionic-security universe
deb http://security.ubuntu.com/ubuntu bionic-security multiverse.
When I run sudo apt update I’ve got Metadata files have errors: /var/cache/app-info/xmls/fwupd.xml.
I have fixed it using the steps in here
https://askubuntu.com/questions/1053869/apt-update-error-from-fwupd-xml/1060895 For me it worked corrected the &
Then redo sudo apt update and it worked for me
I did this on my 16.10 Unbuntu VM and all looks good when booting up. Except the GUI does not load properly and I just get a black screen. Using VMWare. Is this the graphics isse you are referring to? I dont think it uses NVidia Drivers. It says universal.
I am intending on migrating a server edition of ubuntu that is running currently 17.10. My goal is to get 18.04. Then once, 20.04 has had some time to receive updates we will migrate this server to 20.04
Does this article still apply as of 5-5-2020 Thank you
I was on the process to modify from 17.04 to 18.04. Modified source.list and done all steps upto sudo apt update successfully.
After that sudo apt upgrade, downloaded packages and started installation. During that process Screen got locked and now not able to login to the system. Not allowed to enter password. When ever you click on the password field it shows Failed to authenticate. I think installation is in progress behind the screen.
How to proceed next. Do I need to wait for more time.
None of my upgrade attempt succeeded. So reinstalled linux 18.04. It’s much faster than upgrade.