An Overview of HTTPS Encryption and Let’s Encryption on Nginx Deployment
An Overview of HTTPS Encryption
The Acronyms
There are a lot of acronyms around encryption. Below is just a tip of the iceberg. These are the fundementals.
- SSL: Secure Socket Layer. It’s the old protocol used as a security layer on top of TCP. Originaly developed by Netscape, the first version SSL1.0 was invented around 1993. SSL has three versions: SSL1, SSL2, SSL3.
- TLS: Transport Layer Security. TLS superseded SSL. TLS also has three versions: TLS1.0, TLS1.1 and TLS1.2. The newer the better.
- X.509: The format used by TLS certificates.
- PKI: Public Key Infrastructure.
- CA: Certificate Authority. This is the entity within the PKI that issue certificates. There’re two types of CA: Root CA and Intermediate CA. Let’s Encrypt is an intermediate CA.
People often say SSL certificate and TLS cerficate interchangeably. But most encryption uses TLS protocol instead of SSL because the latter is no longer a secure protocol.
The Importance of Encryption
Many people think that you only need encryption when doing online banking or to protect your login credentials. But there’s more to it than that. Encryption is really a fundemental technology for people who value their online privacy. It also protect us from various form of attacks. Plain HTTP is never intended to secure the communication between servers and web browsers. It’s totally unsecure.
Why You Need Encryption?
TLS encryption provides CIA which stands for confidentiality, integrity and authenticity. More specifically:
- Confidentiality: prevent sidejacking and location tracking. Others cannot see what you viewed online. People in China may be banned from using Internet if they are found viewing “illegal content”! In November 2015 some people in Xinjiang Province of China used VPN to access Instagram, telegram, WhatsApp and their mobile service was suspended by police!
- Integrity: download software securely, prevent your downloading software from modified by middle-man attack.
- Authenticity: know that the people who is send the data is someone you trust.
and lots of other specifical scenarios…
the Recent Poodle Attack
SSL3 is obsolete after the Poodle attack in October 2014. Poodle stands for Padding Oracle On Downgraded Legacy Encryption. It’s able to downgrade the encryption between client and server to SSL3 and exploit the vulnerability of SSL3.
The Barriers of Getting a Certificate
webmasters think that HTTPS slows down website and puts a lot of demands on the CPU of the server. A lot of people say it’s costly (financial cost & time cost), tedious and difficult to obtain and mantain certificates. Webmasters have to choose which cipher suite to use but it’s very confusing for most people. When the certificate expires and webmasters forget to renew, then users will get a warning.
Let’s Encrypt Project
Let’s Encrypt is a project that is backed by Electronic Frontier Foundation, Mozilla, Akamai, University of Michigan and Cisco. It’s a completely free and automated Certificate Authority that aims to encrypt the entire web. It’s a simple, secure, fast and free way to automate everything about SSL/TLS certificate including obtaining, installing and renewing certificate. Let’s Encrypt is a Intermediate CA cross-signed by IdenTrust which is a Root CA that is trusted by mainstream browsers. As of October 2015, mainstream browsers, Google Chrome, Mozilla Firefox, Microsoft Edge, Safari, Opera will trust Let’s Encrypt immediately.
Let’s Encrypt Concepts
DV: Domain Validation. It’s confirmation by CA that the applicant controls the domain. This validation process can be fully automated. It can be performed by machine, requires no human intervention.
DVSNI: proves control over the web server.
ACME: Automated Certificate Management Environment. It’s the protocol used between the applicant’s web server and Let’s Encrypt CA server.
Safety
Auto configuration provides bakcup copy of your web server configuration. At the time of this writting, Apache is the only web server that can be autoconfigured by lets-encrypt client.
Let’s Encrypt can prevent an applicant from applying two certs for the same domain.
Standalone mode
Standalone mode is used when your web server such as Nginx is not supported by auto configuration. In standalone mode, the cert and key is stored on the file system, and then you need to configure your web server to locate the cert and key.
wildcard and multi-domain certificates
Let’s Encrypt supports multi-domain certficate right now and it works great. You just need to enter all the domain names when applying certs and Let’s Encrypt CA will validate all of the domains. Wildcard is a more difficult case. Right now there is no support from Let’s Encrypt.
The Fun Part: Installing a Let’s Encrypt Certificate on Nginx Server
First Install Git on your Linux server:
Debain/Ubuntu: sudo apt-get install git

CentOS: sudo yum install git

Arch Linux: sudo pacman -S git
Next, clone the Let’s Encrypt github repository.
git clone https://github.com/letsencrypt/letsencrypt

cd letsencrypt
At the time of this writting, Let’s Encrypt is still in beta and doesn’t support auto-configuration for Nginx. –agree-tos means agreeing terms of service. certonly means obtaings SSL certificate but don’t auto-install SSL certificate because we have to manualy install it.
./letsencrypt-auto --agree-tos certonly
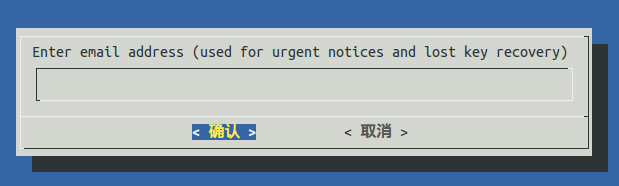
Then it will ask you email address. Then enter your domain. The email address is for urgent notice and lost key recovery.
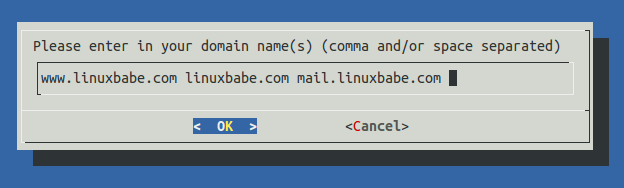
Because Let’s Encrypt supports multi domain certificates, you can enter up to 100 domain names. But be aware that the domain names you entered should all point to the IP of your server. Let’s Encrypt will validate through DNS. The first domain name will be the common name and all the domain names will be the alternative names.
And then you will see the following saying nginx is already listening on port 80.
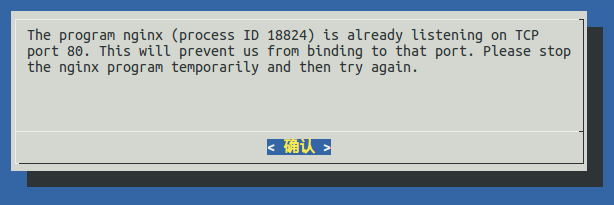
So you need to temporarily stop Nginx and excute the command again.
sudo service nginx stop    or     sudo systemctl stop nginx

./letsencrypt-auto --agree-tos certonly
If you encounter en error such as the following one, just reissue the above command.
Failed authorization procedure. www.linuxdashen.com (tls-sni-01): urn:acme:error:tls :: The server experienced a TLS error during DV :: Failed to connect to host for DVSNI challenge
When the command is completed, you will see the following message.
IMPORTANT NOTES:
 - Congratulations! Your certificate and chain have been saved at
 /etc/letsencrypt/live/yourdomain.com/fullchain.pem. Your cert will
 expire on 2016-03-06. To obtain a new version of the certificate in
 the future, simply run Let's Encrypt again.
 - If like Let's Encrypt, please consider supporting our work by:
Donating to ISRG / Let's Encrypt: https://letsencrypt.org/donate
 Donating to EFF: https://eff.org/donate-le
IMPORTANT NOTES:
 - If you lose your account credentials, you can recover through
 e-mails sent to [email protected].
 - Your account credentials have been saved in your Let's Encrypt
 configuration directory at /etc/letsencrypt. You should make a
 secure backup of this folder now. This configuration directory will
 also contain certificates and private keys obtained by Let's
 Encrypt so making regular backups of this folder is ideal.
Now start Nginx
sudo service nginx start or sudo systemctl start nginx
Change your Nignx configuration to make it like the following:
server {
    listen 80;
    server_name yourdomain.com www.yourdomain.com;
    return 301 https://www.yourdomain.com$request_uri;
 }

server {
   listen 443 ssl spdy;
   server_name www.yourdomain.com;
   ssl_certificate /etc/letsencrypt/live/yourdomain.com/fullchain.pem;
   ssl_certificate_key /etc/letsencrypt/live/yourdomain.com/privkey.pem;

   ssl_session_timeout 1d;
   ssl_session_cache shared:SSL:10m;
   ssl_session_tickets off;
   ssl_protocols TLSv1.1 TLSv1.2;
   ssl_ciphers 'ECDHE-RSA-AES128-GCM-SHA256:ECDHE-ECDSA-AES128-GCM-SHA256:ECDHE-RSA-AES256-GCM-SHA384:ECDHE-ECDSA-AES256-GCM-SHA384:DHE-RSA-AES128-GCM-SHA256:DHE-DSS-AES128-GCM-SHA256:kEDH+AESGCM:ECDHE-RSA-AES128-SHA256:ECDHE-ECDSA-AES128-SHA256:ECDHE-RSA-AES128-SHA:ECDHE-ECDSA-AES128-SHA:ECDHE-RSA-AES256-SHA384:ECDHE-ECDSA-AES256-SHA384:ECDHE-RSA-AES256-SHA:ECDHE-ECDSA-AES256-SHA:DHE-RSA-AES128-SHA256:DHE-RSA-AES128-SHA:DHE-DSS-AES128-SHA256:DHE-RSA-AES256-SHA256:DHE-DSS-AES256-SHA:DHE-RSA-AES256-SHA:!aNULL:!eNULL:!EXPORT:!DES:!RC4:!3DES:!MD5:!PSK';
  ssl_prefer_server_ciphers on;
 root /path/of/the/web/root;
 index index.php index.html index.htm index.nginx-debian.html;

location / {
 try_files $uri $uri/ /index.php?$query_string;
 }
........
Then reload Nginx configuration.
sudo service nginx reload or sudo systemctl reload nginx
Now visit your website and you should see a greenlock.
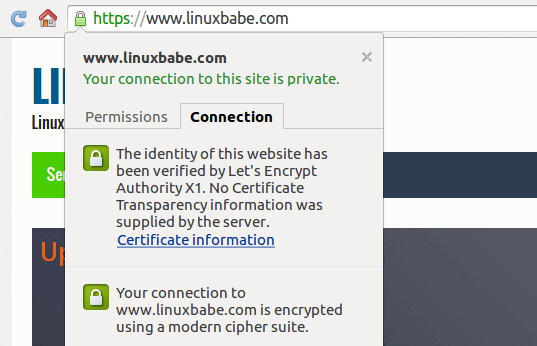
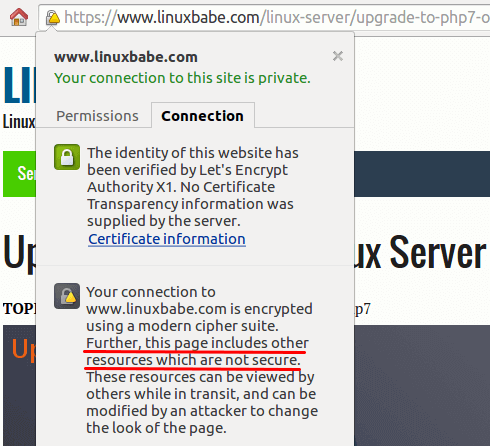
If your webpages have links pointing to other websites which is not https enabled, then you will see a whitelock with a yellow triangle.
If you are using an old Nginx version such as nginx 1.4.x, the above Nginx configuration may not work for you. You can check my post how to install Nginx mainline branch on Ubuntu server to install the latest Nginx version.
Where’s Your Keys and Certs?
All your keys and certs are located at /etc/letsencrypt/live/yourdomain.com. You should backup them in safe place.
If your server crashes and lost all your keys, in that case you need to go to one of the existing certificate authorities, pay them money for a certificate to prove to Let’s Encrypt CA. Existing CAs serves as a fall back mechanism.
We’re getting quite close to the end.
Encryption Strength Test
Visit SSL labs to test your encryption strength.


