Upgrade to PHP7 on Linux Server (Ubuntu & Debian)
PHP7 is finally out on 3rd December. Although many Linux distributions are busy packaging PHP7 to their repository and you will wait for some time, there’re some guy who have already maintained a PHP7 repository. In this tutorial I will show you how to upgrade to PHP7 on Ubuntu and Debian.
Upgrade to PHP7 on Ubuntu
Note: The following PPA is for Ubuntu 15.10/14.04/12.04. Ubuntu 16.04 users can install PHP7 directly from Ubuntu repository.
First add the PPA from Ondřej Surý
sudo apt-get install python-software-properties software-properties-common

sudo add-apt-repository ppa:ondrej/php

sudo apt-get update
Then remove PHP5 from your system.
sudo apt-get purge php5-fpm php5-mysql php5-common

sudo apt-get --purge autoremove
Install PHP7 and PHP7 extensions:
sudo apt-get install php7.0-fpm php7.0-mysql php7.0-common php7.0-gd php7.0-json php7.0-cli php7.0-curl php7.0-mbstring
Upgrade to PHP7 on Debian
Add dotdeb.org repository, put the following text in /etc/apt/sources.list file.
deb http://packages.dotdeb.org jessie all
deb-src http://packages.dotdeb.org jessie all
or
deb http://packages.dotdeb.org wheezy all
deb-src http://packages.dotdeb.org wheezy all
or
deb http://packages.dotdeb.org squeeze all
deb-src http://packages.dotdeb.org squeeze all
Fetch and install the GnuPG key
wget https://www.dotdeb.org/dotdeb.gpg

sudo apt-key add dotdeb.gpg

sudo apt-get update
Remove PHP5 from your system
sudo apt-get purge php5*

sudo apt-get --purge autoremove
Install PHP7
sudo apt-get install php7.0-fpm php7.0-mysql php7.0-common php7.0-gd php7.0-json php7.0-cli php7.0-curl
Nginx Configuration
After PHP7 is installed, your website will return a 404 not found error. What we need to do is change your Nginx configuration.
sudo vi /etc/nginx/sites-available/yourdomain.com
Find your fastcgi_pass directive
fastcgi_pass unix:/var/run/php5-fpm.sock;
Change it to the following:
fastcgi_pass unix:/run/php/php7.0-fpm.sock;
Save and close the file. Then reload your Nginx configuration.
sudo service nginx reload
Now you website should be working correctly.
PHP Pool File Configuration
First check what username your Nginx is using, this can be found at the first line in /etc/nginx/nginx.conf file.
less /etc/nginx/nginx.conf
By default, PHP7 set the user and group to www-data. If your Nginx also use www-data as the user and group, then you don’t need to configure the pool file. But if your Nginx use nginx as the user and group, you need to change it.
You can change your Nginx username in /etc/nginx/nginx.conf to www-data.
sudo vi /etc/nginx/nginx.conf
Change the user to www-data. Then reload Nginx confiugration. Or you can edit the PHP pool file to change the username to nginx.
sudo vi /etc/php/7.0/fpm/pool.d/www.conf
Change the following line
user = www-data
group = www-data

listen.owner = www-data
listen.group = www-data
Replace all the www-data with nginx. Save and close the file. Then reload PHP-FPM.
sudo service php7.0-fpm reload
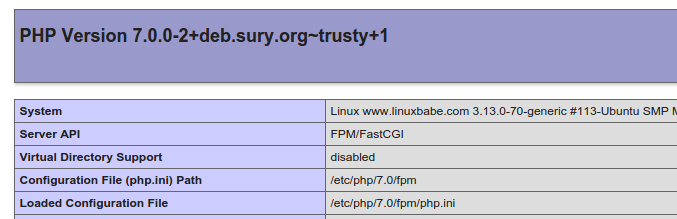
How to Check Your PHP7 info
Create a info.php file under your web root and put the following text into the file.
<?php
 phpinfo();
?>
Save and close the file. Now visit this file in your web browser.
www.yourdomain.com/info.php
You should see the following.
After checking PHP7 information, it would be better to delete this file from your server to prevent others from getting your server information.


