2 Ways to Upgrade Ubuntu 18.04 To Ubuntu 20.04 (Graphical & Terminal)
Ubuntu 20.04 Focal Fossa was released on April 23, 2020. This tutorial is going to show you 2 ways to upgrade from Ubuntu 18.04 to Ubuntu 20.04: using the graphical update manager and using the command line. Normally you use the graphical update manager to upgrade Ubuntu desktop and use the command line to upgrade Ubuntu server, but the command-line method works for desktops too.
Ubuntu 20.04 New Features
- Improved ZFS file system.
- Computer manufacturer logo during boot
- Linux Kernel 5.4
- GNOME 3.36, which is way faster than previous versions.
- PHP7.4, Ruby 2.7, Python 3.8, OpenJDK 11.
- ZFS 0.8: includes native encryption
- and many more.
Note: Before doing the upgrade, you can use the systemback program to create a bootable ISO image from your current OS. If the upgrade fails, you can easily restore your OS with the bootable ISO. Everything on your OS including software and files will be intact. If you are using a laptop, please connect your power source.
Upgrade Ubuntu 18.04 to Ubuntu 20.04 with the Graphical Update Manager
First of all, open software updater (aka update manager) from your application menu. It will update software package information. If there’s updates available, click the Install Now button and enter your password to install updates.

If a new version of Linux kernel is installed, then the update manager will tell you to restart your computer. Click Restart Now.

Then open Software & Updates from your application menu.

Select the Updates tab. At the bottom of the window, set notification to For long-term support versions.You will be asked to enter your password for the change to take effect.

Close the Software & Updates window. Then open up a terminal window and issue the following command.
update-manager -d
After checking for updates, the update manager will tell you that Ubuntu 20.04 is now available. Click the Upgrade button.

Next, enter your password. The release notes window appears. Click Upgrade.

The distribution upgrade window will open up. If you are notified that some third-party sources are disabled, accept it. You can re-enable them after the upgrade is finished.

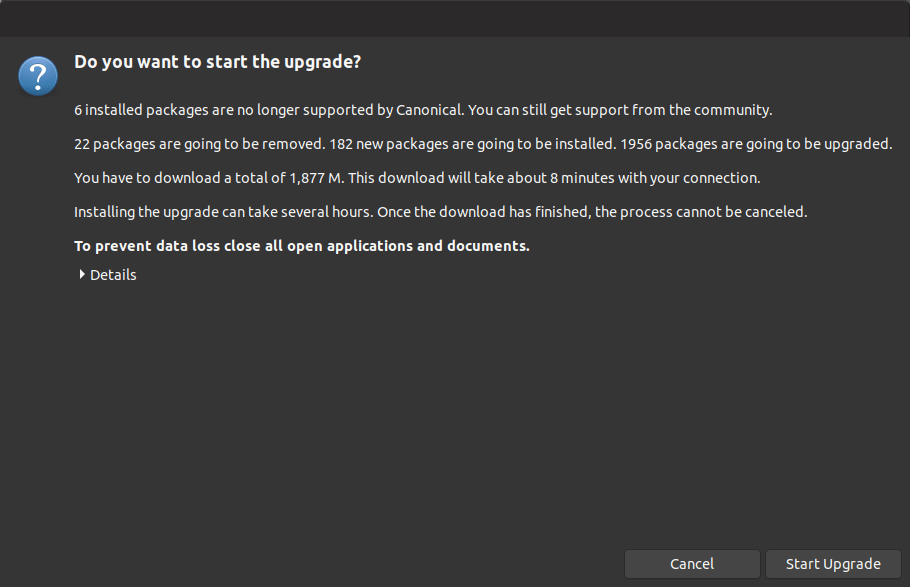
In a few moments, you will be asked if you want to start the upgrade. Click the Start Upgrade button.
Wait for the upgrade process to finish. The update manager may ask you if you want to restart services during packages upgrade without asking. Tick it on and click Next button.

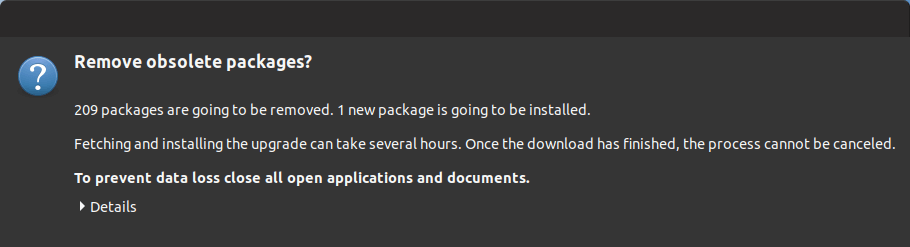
After new versions of packages are installed, the update manager may ask you if you want to remove obsolete packages. I always select Remove.
Obsolete packages are software packages whose name can’t be found in the software repository of the new Ubuntu release. The cause of obsolete packages are the following:
- The upstream developer stops maintaining this package and there is no other person willing to take over. So the Ubuntu package maintainer decides to drop this package from the Ubuntu repository.
- The package becomes an orphan package, which means there’s no other package that depends on it and there are very few users of this package. So the Ubuntu package maintainer decides to drop this package from the Ubuntu repository.
- The package has a new name in the software repository of the new Ubuntu release.
After obsolete packages are removed from your system. Restart your computer and check your Ubuntu version with the following command.
lsb_release -a
Output:
No LSB modules are available.
Distributor ID:	Ubuntu
Description:	Ubuntu Focal Fossa
Release:	20.04
Codename:	focal
Upgrade Ubuntu 18.04 to Ubuntu 20.04 From Command Line
You can use the command line to upgrade Ubuntu desktop or a headless server. Speaking of servers, it is recommended that you upgrade Ubuntu on a test server before doing it on a production server. Some server software such as iRedMail (a mail server software suite) may not support Ubuntu 20.04 yet. In that case, it is advisable to wait some time for the software to support Ubuntu 20.04.
If you use SSH to log into your Ubuntu server, it’s a good idea to keep your OpenSSH session alive by adding the following line in /etc/ssh/sshd_config file on your server.
ClientAliveInterval 60
Save and close the file. Then restart SSH daemon.
sudo systemctl restart ssh
To upgrade to Ubuntu 20.04, first run the following command to upgrade existing software. (Please note that if a new Linux kernel is installed while running the following command, you need to reboot system in order to continue the upgrade process.)
sudo apt update && sudo apt dist-upgrade
Then make sure you have the update-manager-core package installed.
sudo apt install update-manager-core
Open the /etc/update-manager/release-upgrades file with a command-line text editor like Nano.
sudo nano /etc/update-manager/release-upgrades
Make sure the value of prompt is set to lts.

Save and close the file. To save a file in Nano text editor, press Ctrl+O, then press Enter to confirm. To exit, press Ctrl+X.
After that, run the following command to begin the upgrade process.
do-release-upgrade -d
Then follow the on-screen instruction to upgrade to Ubuntu 20.04. Basically, you need to press y to answer the questions.

If you are upgrading a server, you will probably see messages like below. I recommend choosing N to keep your current version. The updated version will be available at the same directory. You can check it out later.

Once the upgrade is finished, reboot your Ubuntu desktop or server. To check your Ubuntu version, run:
lsb_release -a
Output:
No LSB modules are available.
Distributor ID:	Ubuntu
Description:	Ubuntu Focal Fossa
Release:	20.04
Codename:	focal
Please install all available updates for your release before upgrading
If you see the following message when trying to upgrade, then you need to update all packages (sudo apt update;sudo apt upgrade -y) then restart the OS and try to upgrade again.
Please install all available updates for your release before upgrading.
Sometimes your system may have some package kept on hold, which can be shown with:
sudo apt-mark showhold
You need to unhold the package.
sudo apt-mark unhold package-name
Then run
sudo apt upgrade
Sometimes, sudo apt update tells you that a package can be upgraded, but sudo apt upgrade won’t upgrade the package, then you can run the following command to list the package.
apt list --upgradable
Now you can upgrade the package.
sudo apt upgrade pacakge-name
If this is a broken package that can not be upgraded, then remove it.
sudo apt remove package-name
How to Re-Enable Third-Party Repositories
Third-party repositories are defined in the .list files under /etc/apt/sources.list.d/ directory. First, re-enable third-party repositories with the following command, which will remove the # character in lines that begin with deb.
sudo sed -i '/deb/s/^#//g' /etc/apt/sources.list.d/*.list
Then change all instances of bionic to focal.
sudo sed -i 's/bionic/focal/g' /etc/apt/sources.list.d/*.list
Update package repository index.
sudo apt update
Some third-party repositories don’t have an entry for Ubuntu 20.04, so you will likely to see errors like:
E: The repository 'http://linux.dropbox.com/ubuntu focal Release' does not have a Release file.
N: Updating from such a repository can't be done securely, and is therefore disabled by default.
N: See apt-secure(8) manpage for repository creation and user configuration details.
You will need to edit these repository files one by one and disable them. For example, I edit the Dropbox repository file.
sudo nano /etc/apt/sources.list.d/dropbox.list
Disable this repository by adding the # character at the beginning of the line.
# deb [arch=i386,amd64] http://linux.dropbox.com/ubuntu focal main # disabled on upgrade to focal
Save and close the file. You need to wait for those repositories to add support for Ubuntu 20.04. Some software packages in third-party repositories might be included in 20.04. For example, Ubuntu 20.04 repository contains the nextcloud-desktop package, so I don’t need the Nextcloud PPA anymore. I can delete the Nextcloud PPA.
sudo rm /etc/apt/sources.list.d/nextcloud-client.list*
Wrapping Up
That’s it! I hope this tutorial helped you upgrade to Ubuntu 20.04 from Ubuntu 18.04. As always, if you found this post useful, then subscribe to our free newsletter to get new tutorials. You might also want to read:


Hello, i have a question, what happen if i install ubuntu 20.04 beta right now, can i have troubles on april 23? or only see a new uptade, thanks
If you install or upgrade to Ubuntu 20.04 beta now, you just need to run
sudo apt updateandsudo apt upgradeon April 23. Your beta system will become the final release.Hi there,
First off cool tut, thank you.
Next,
I did a server upgrade from 18.04 to 20.04 LTS Production and the install ran it’s course without losing the ssh, so cool for that.
At the end, I had to disable the source list for CERTBOT.
don’t know what to do about that yet. !?
Then did a service –status -all and got the following.
And now I cannot get my apache started !?
And that’s where I’m at.
Any suggestions?
thanx
Aha found the little bugger,
Ubuntu 20.04 removes php7.2 on 18.04 versions and installs php 7.4 and deletes all libs installed.
But during the upgrade process, you get the message that ubuntu has to stop services.
In my case [vsftpd, rsync, cron, mysql, apache].
So after installing, I did a ‘service –status-all’ command and got a list of services that needed to be started.
And discovered that apache2 would start
got the following error
so I took a long look at journalctl -xe
And I got a brain freeze ….pfff
I spent some time on the internet hunting and somehow landed on a blog page showing me how to restart apache.
And one of the commands caught my eye. “apachectl configtest”.
So I ran the apache config test and discovered the problem to the issue.
The error I got:
That the ‘/etc/apache2/mod-enabled/php7.2.load’ file was trying to load the uninstalled php 7.2 libs.
So the solution to my problem is :
with the php7.2.load file comment out the following line
or delete the load file if you know what you’re doing … lol
And that’s it folks
Quite a wild adventure, huh? I’m glad you got it working, and thanks for sharing your solution.
modify line LoadModule php7_module /usr/lib/apache2/modules/libphp7.2.so to
LoadModule php7_module /usr/lib/apache2/modules/libphp7.4.so
In 20.04 now php7.4 is being used but being beta version upgrader is missing to fix this file.
to confirm it run following command ls /usr/lib/apache2/modules/|grep php and see that now libphp.7.4.so is there in place of the older one.
By simply commenting it you are diababling the php use on apache
Hello LinuxBabe Xiao:
Yesterday, I upgraded a VPS from 18.04 to 20.04, and it all was reported as complete, but the newer kernel upon reboot (5.4.0-40) will not load. Only the recovery kernel from 18.04 loads. I have tried to hard code the new kernel into grub to no avail. My failing grub file is copied below. If you can suggest anything to attempt that will load the new kernel, it would be greatly appreciated.
Sincerely,
willie
# If you change this file, run ‘update-grub’ afterwards to update
# /boot/grub/grub.cfg.
# For full documentation of the options in this file, see:
# info -f grub -n ‘Simple configuration’
GRUB_DEFAULT=”gnulinux-advanced-b1f9d0ca-31c7-44c4-a21f-33f66613beb3>gnulinux-5.4.0-40-generic-advanced-b1f9d0ca-31c7-44c4-a21f-33f66613beb3″
#GRUB_HIDDEN_TIMEOUT=0
GRUB_HIDDEN_TIMEOUT_QUIET=true
GRUB_TIMEOUT=2
GRUB_DISTRIBUTOR=`lsb_release -i -s 2> /dev/null || echo Debian`
GRUB_CMDLINE_LINUX_DEFAULT=”quiet splash net.ifnames=0 biosdevname=0″
GRUB_CMDLINE_LINUX=”netcfg/do_not_use_netplan=true”
# Uncomment to enable BadRAM filtering, modify to suit your needs
# This works with Linux (no patch required) and with any kernel that obtains
# the memory map information from GRUB (GNU Mach, kernel of FreeBSD …)
#GRUB_BADRAM=”0x01234567,0xfefefefe,0x89abcdef,0xefefefef”
# Uncomment to disable graphical terminal (grub-pc only)
#GRUB_TERMINAL=console
# The resolution used on graphical terminal
# note that you can use only modes which your graphic card supports via VBE
# you can see them in real GRUB with the command `vbeinfo’
#GRUB_GFXMODE=640×480
# Uncomment if you don’t want GRUB to pass “root=UUID=xxx” parameter to Linux
GRUB_DISABLE_LINUX_UUID=true
# Uncomment to disable generation of recovery mode menu entries
GRUB_DISABLE_RECOVERY=”true”
# Uncomment to get a beep at grub start
#GRUB_INIT_TUNE=”480 440 1″
Thanks for this tutorial – BTW there is no ‘apt dist-upgrade’ – you can confirm it through ‘man apt’ and ‘apt –help’, therefore the correct approach is that it can be either ‘apt-get dist-upgrade’ or ‘apt full-upgrade’ – where the these 2 are equivalents